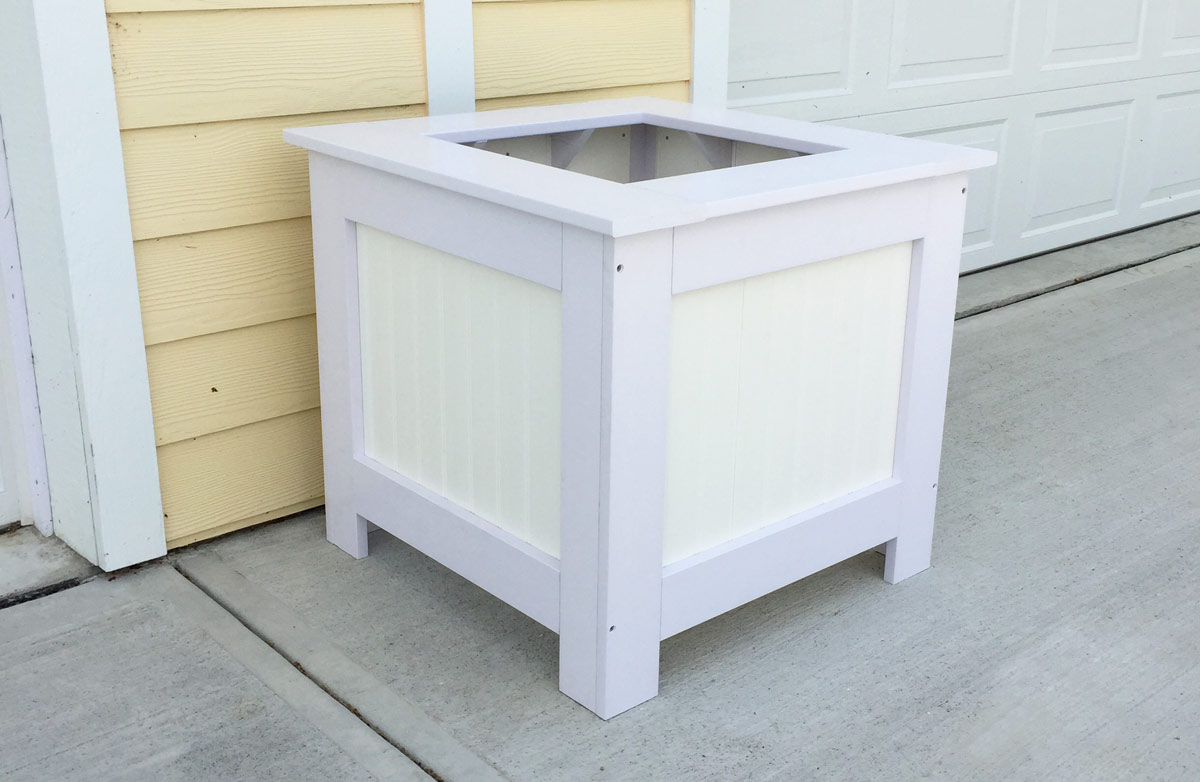
Build a PVC Planter
We were at the local hardware store, buying some flowers and gardening supplies. Mrs. Moist thought a large planter would look great in between our garage doors in our driveway. They have large ceramic planters available, but nothing that quite fit our style. So we’re off on a project – to build a planter just the way we want.
Brainstorming
White would be cool – it would match the trim on the building on our property. Wood would rot. Maybe a composite would work well. Composite decking is an option, but doesn’t come in white. What about PVC? Perfect.
The Design
Nothing too fancy. The feel should mimic the design of the house and garage. A shaker style design would work with bead board panels. I went off to sketch up some ideas and came back with this.
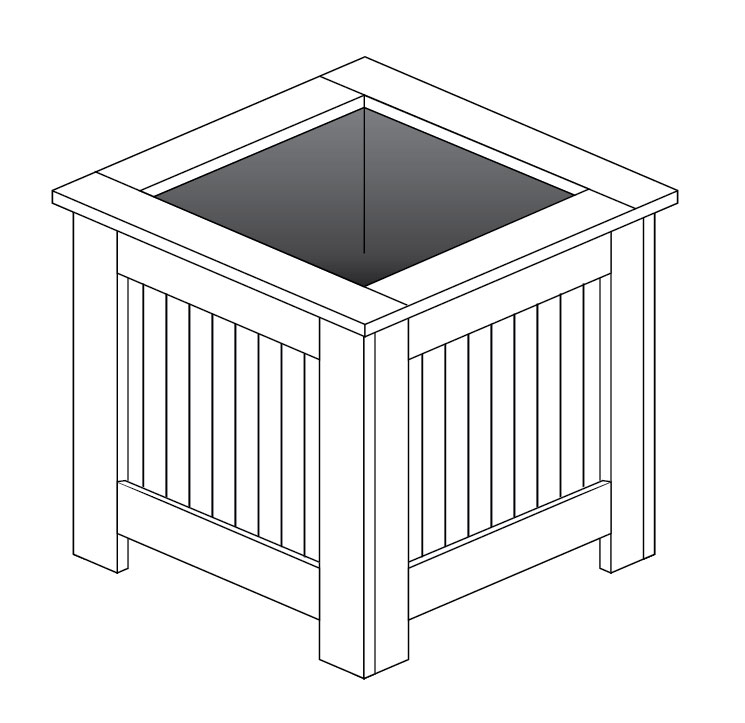
PVC Planter Mockup
The idea is that instead of filling the entire box up with dirt, which would be a waste (and a bear to support) we’ll build the PVC planter so that a smaller planter will fit into the top. The lip of the plastic planter will sit on top of the PVC planter, keeping it from falling through.
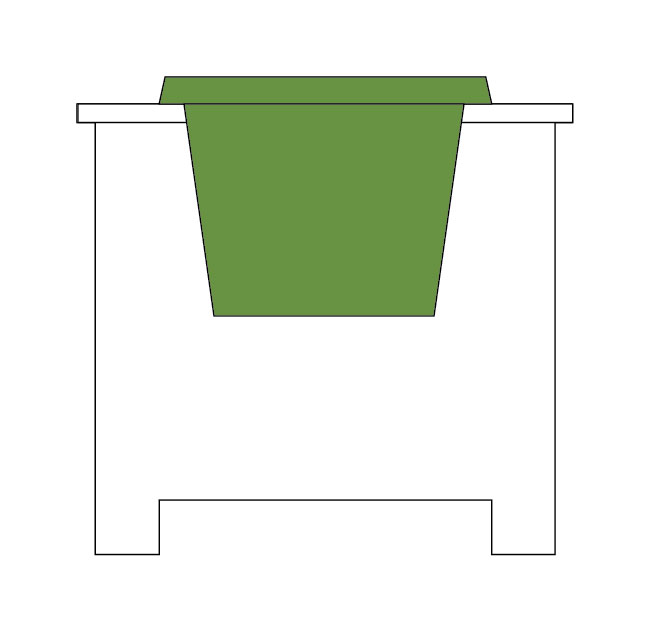
The planter lip will rest on top of the PVC planter
I took some measurements and decided on a footprint of about 27.5″ square for the overall footprint. Here are what the measurements looked like.
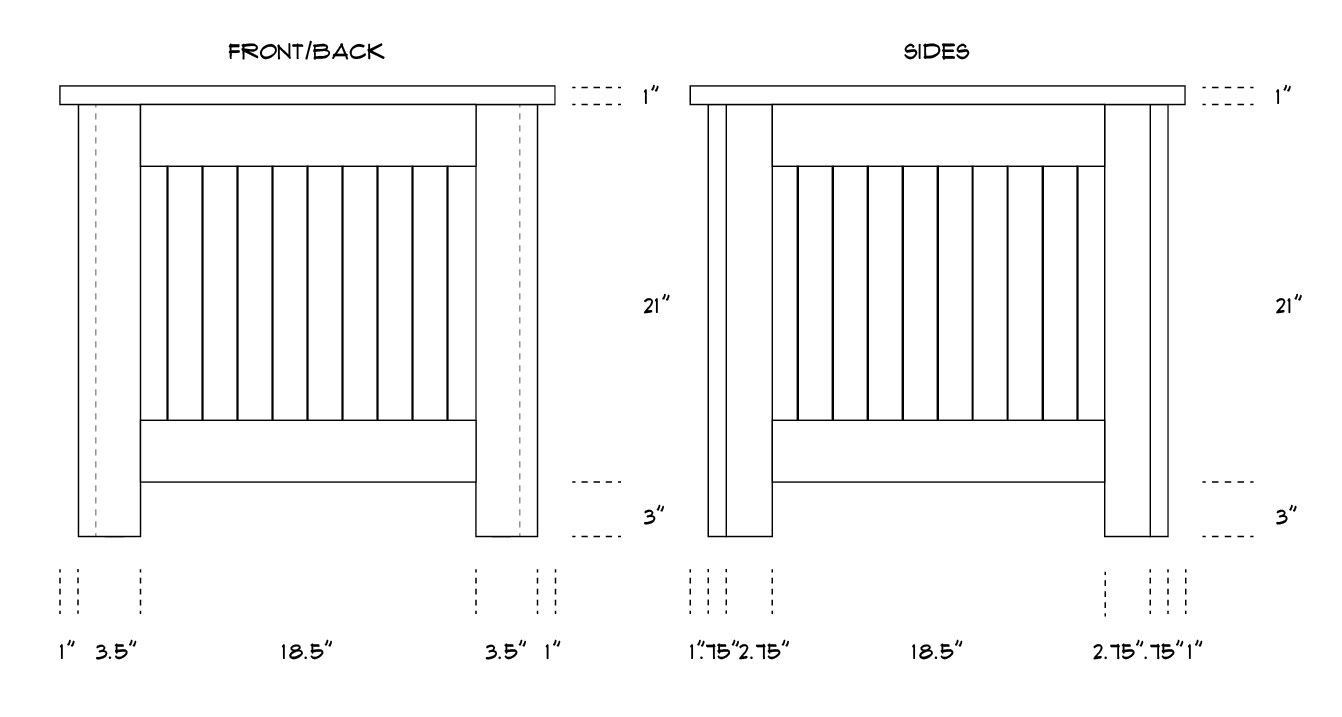
PVC Planter Measurements
Tools Needed
- Tape measure
- A saw (you’ll make mostly straight cuts, with a few miters at the end)
- Drill and bits
- A couple 30″ or longer clamps
Shopping List
You need to buy:
- 1) 4/4 x 6″ x 8′ PVC Trim for Top
- 4) 4/4″ x 4″ x 8′ PVC Trim for Legs and Rails
- 1pk) PVC Bead Board from Home Depot
- 1) plastic planter to insert into top of PVC planter (16″ across under lip, 18″ across lip)
- PVC Glue (clear)
- PVC Primer
- 8) All-weather 1 5/8″ or similar screws
- A box of short (< 3/4″) screws
Cut List
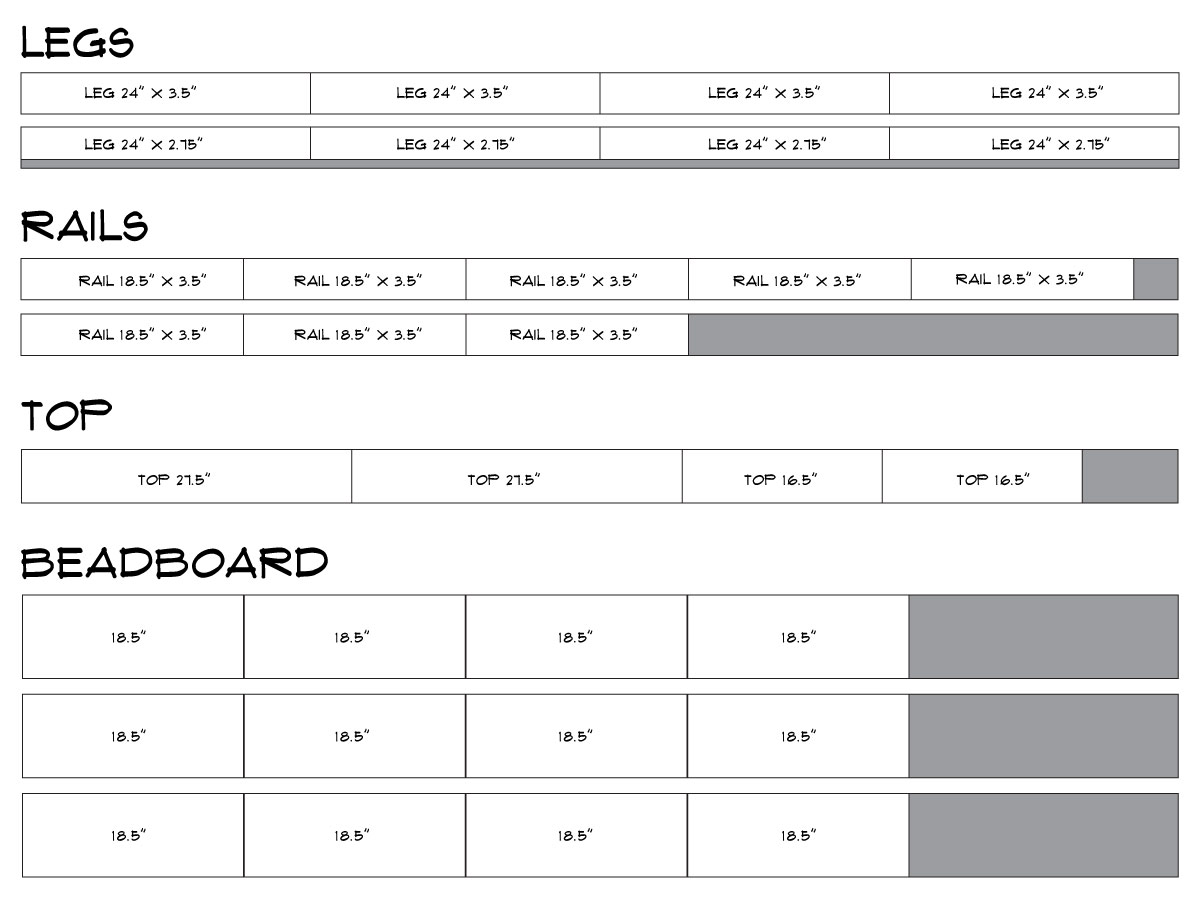
- Cut two 4/4″ x 4″ x 8′ pieces into equal 24″ sections for a total of eight legs.
- Cut the other two 4/4″ x 4″ x 8′ into eight 18 1/2″ sections for a total of eight rails.
- Cut two 27 1/2″ and two 16 1/2″ pieces from the 4/4″ x 6″ x 8′ piece.
- Cut four 18 1/2″ tall pieces from each of the three sheets of bead board.
- Rip four of the legs to 2 3/4″ wide – down from the original 3 1/2″.
Put it Together
Grab two of the legs (make sure they’re the same thickness – you ripped two down) and two of the rails. Position them in the orientation they’re going to be glued together. I made a quick jig to ensure the top and bottom rails stay the same distance apart when gluing up. Once arranged, apply PVC primer and glue to the areas where the boards meet, then clamp together. It won’t take long – maybe a couple of minutes before they’re able to be handled. Read the label on the PVC glue container for recommended drying times.
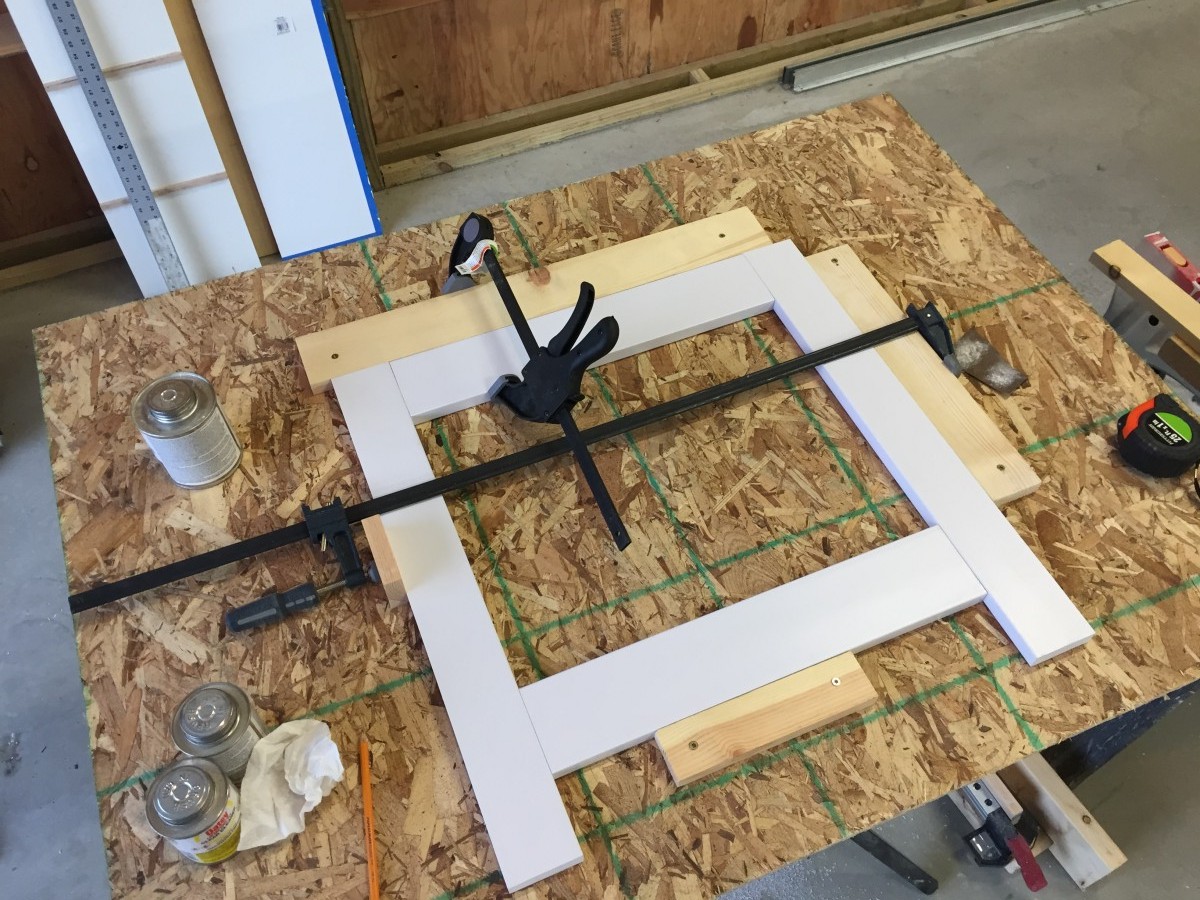
Make a jig to keep everything consistent.
Do this for the other three sides. The PVC glue will hold everything just fine.
Now, grab the bead board. You’ll need three pieces for each of the four sides. Prime and glue them to the rear of each side, making sure that the tongue fits into the grove of the previous piece. Just to hold it in place while it dried, I attached each piece with a few screws.
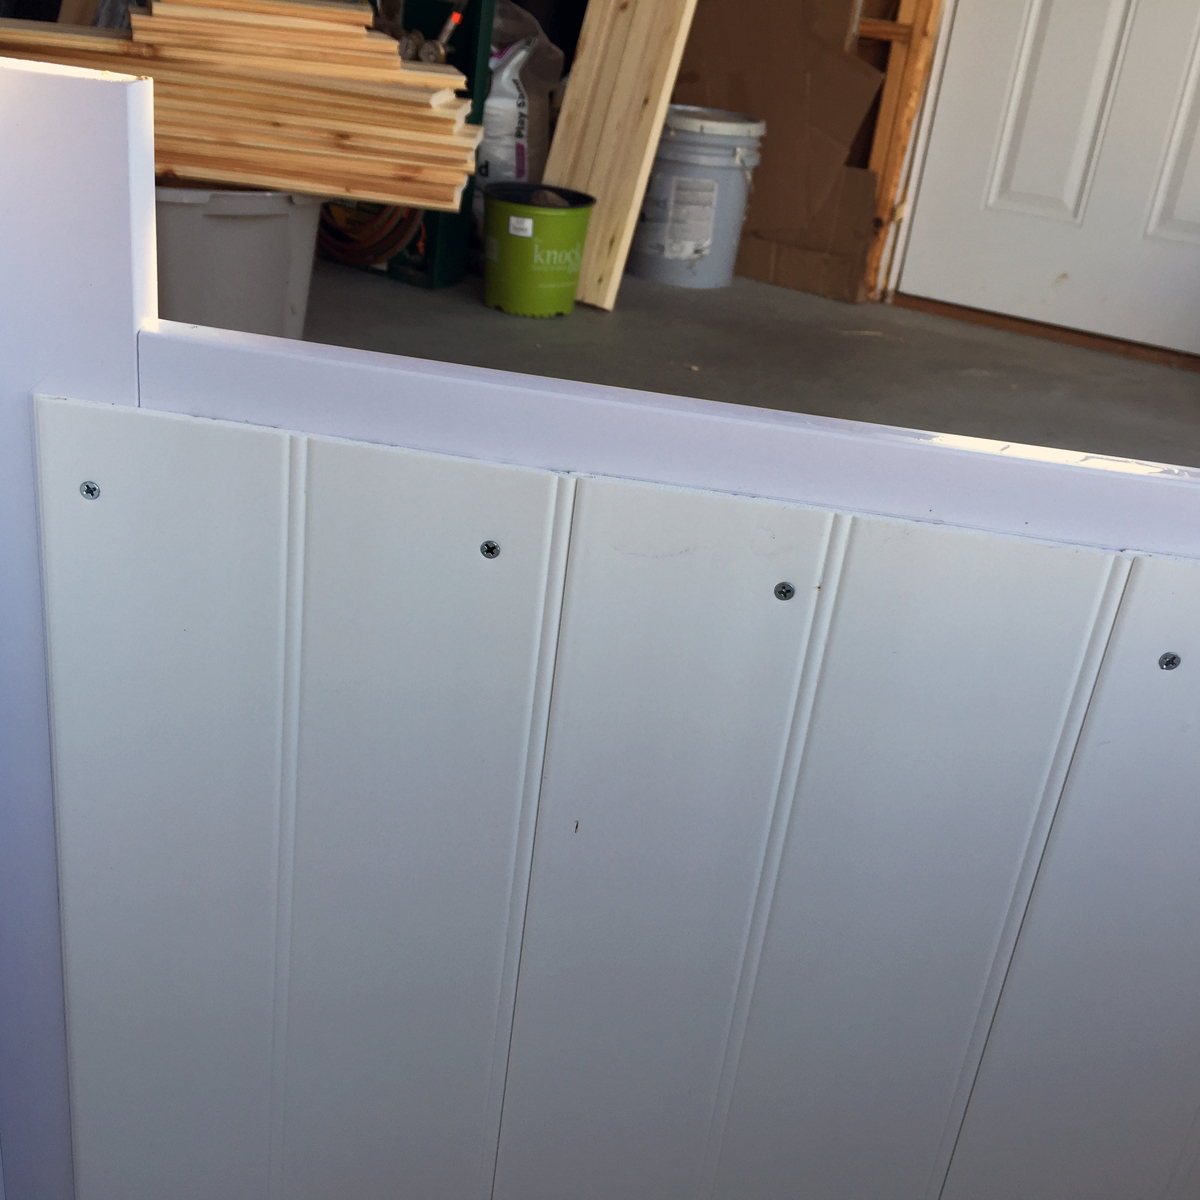
Attached bead board with glue and screws.
Once the sides are complete, they can be assembled to form a box. I used screws to hold the sides together. Be sure to drill pilot holes for the screws and counter sink them. To keep everything together while screwing, use clamps.

Sides assembled.
Next, assemble the top by gluing them together in the same way the sides were glued.
At this point, you’ll have a square top which needs to be attached to the sides. Place the top upside down on the ground, then set the assembled sides upside down on top of it. Use a tape measure to ensure it’s centered on the top and mark it’s location. Apply glue to the top of the sides and position the top according to the marks.
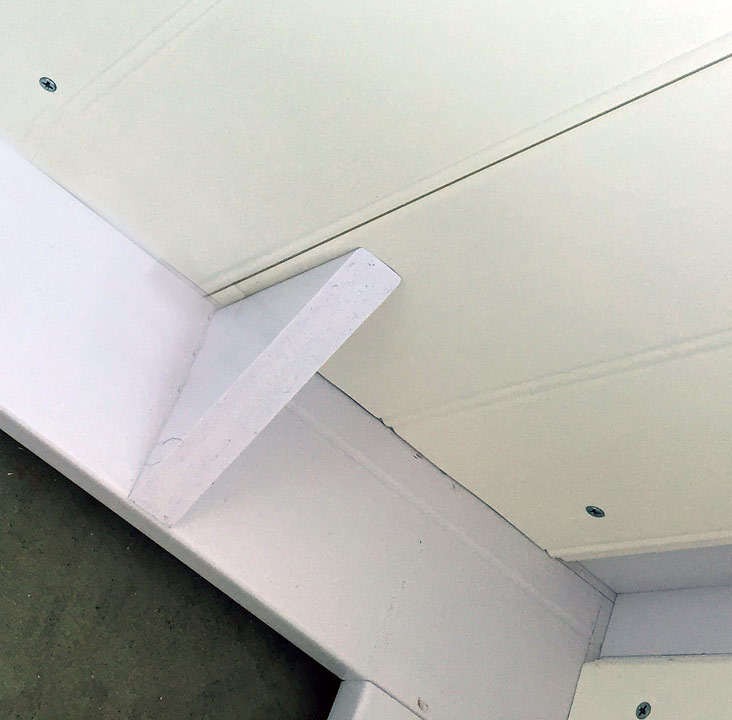
From the leftover scrap PVC, cut eight triangles and glue these in place, two per side, to add further reinforcement.
Now place your smaller, plastic planter in the hole in the top. That’s it! Add some potting mix and plants and you have a unique planter at a fraction of the cost!