
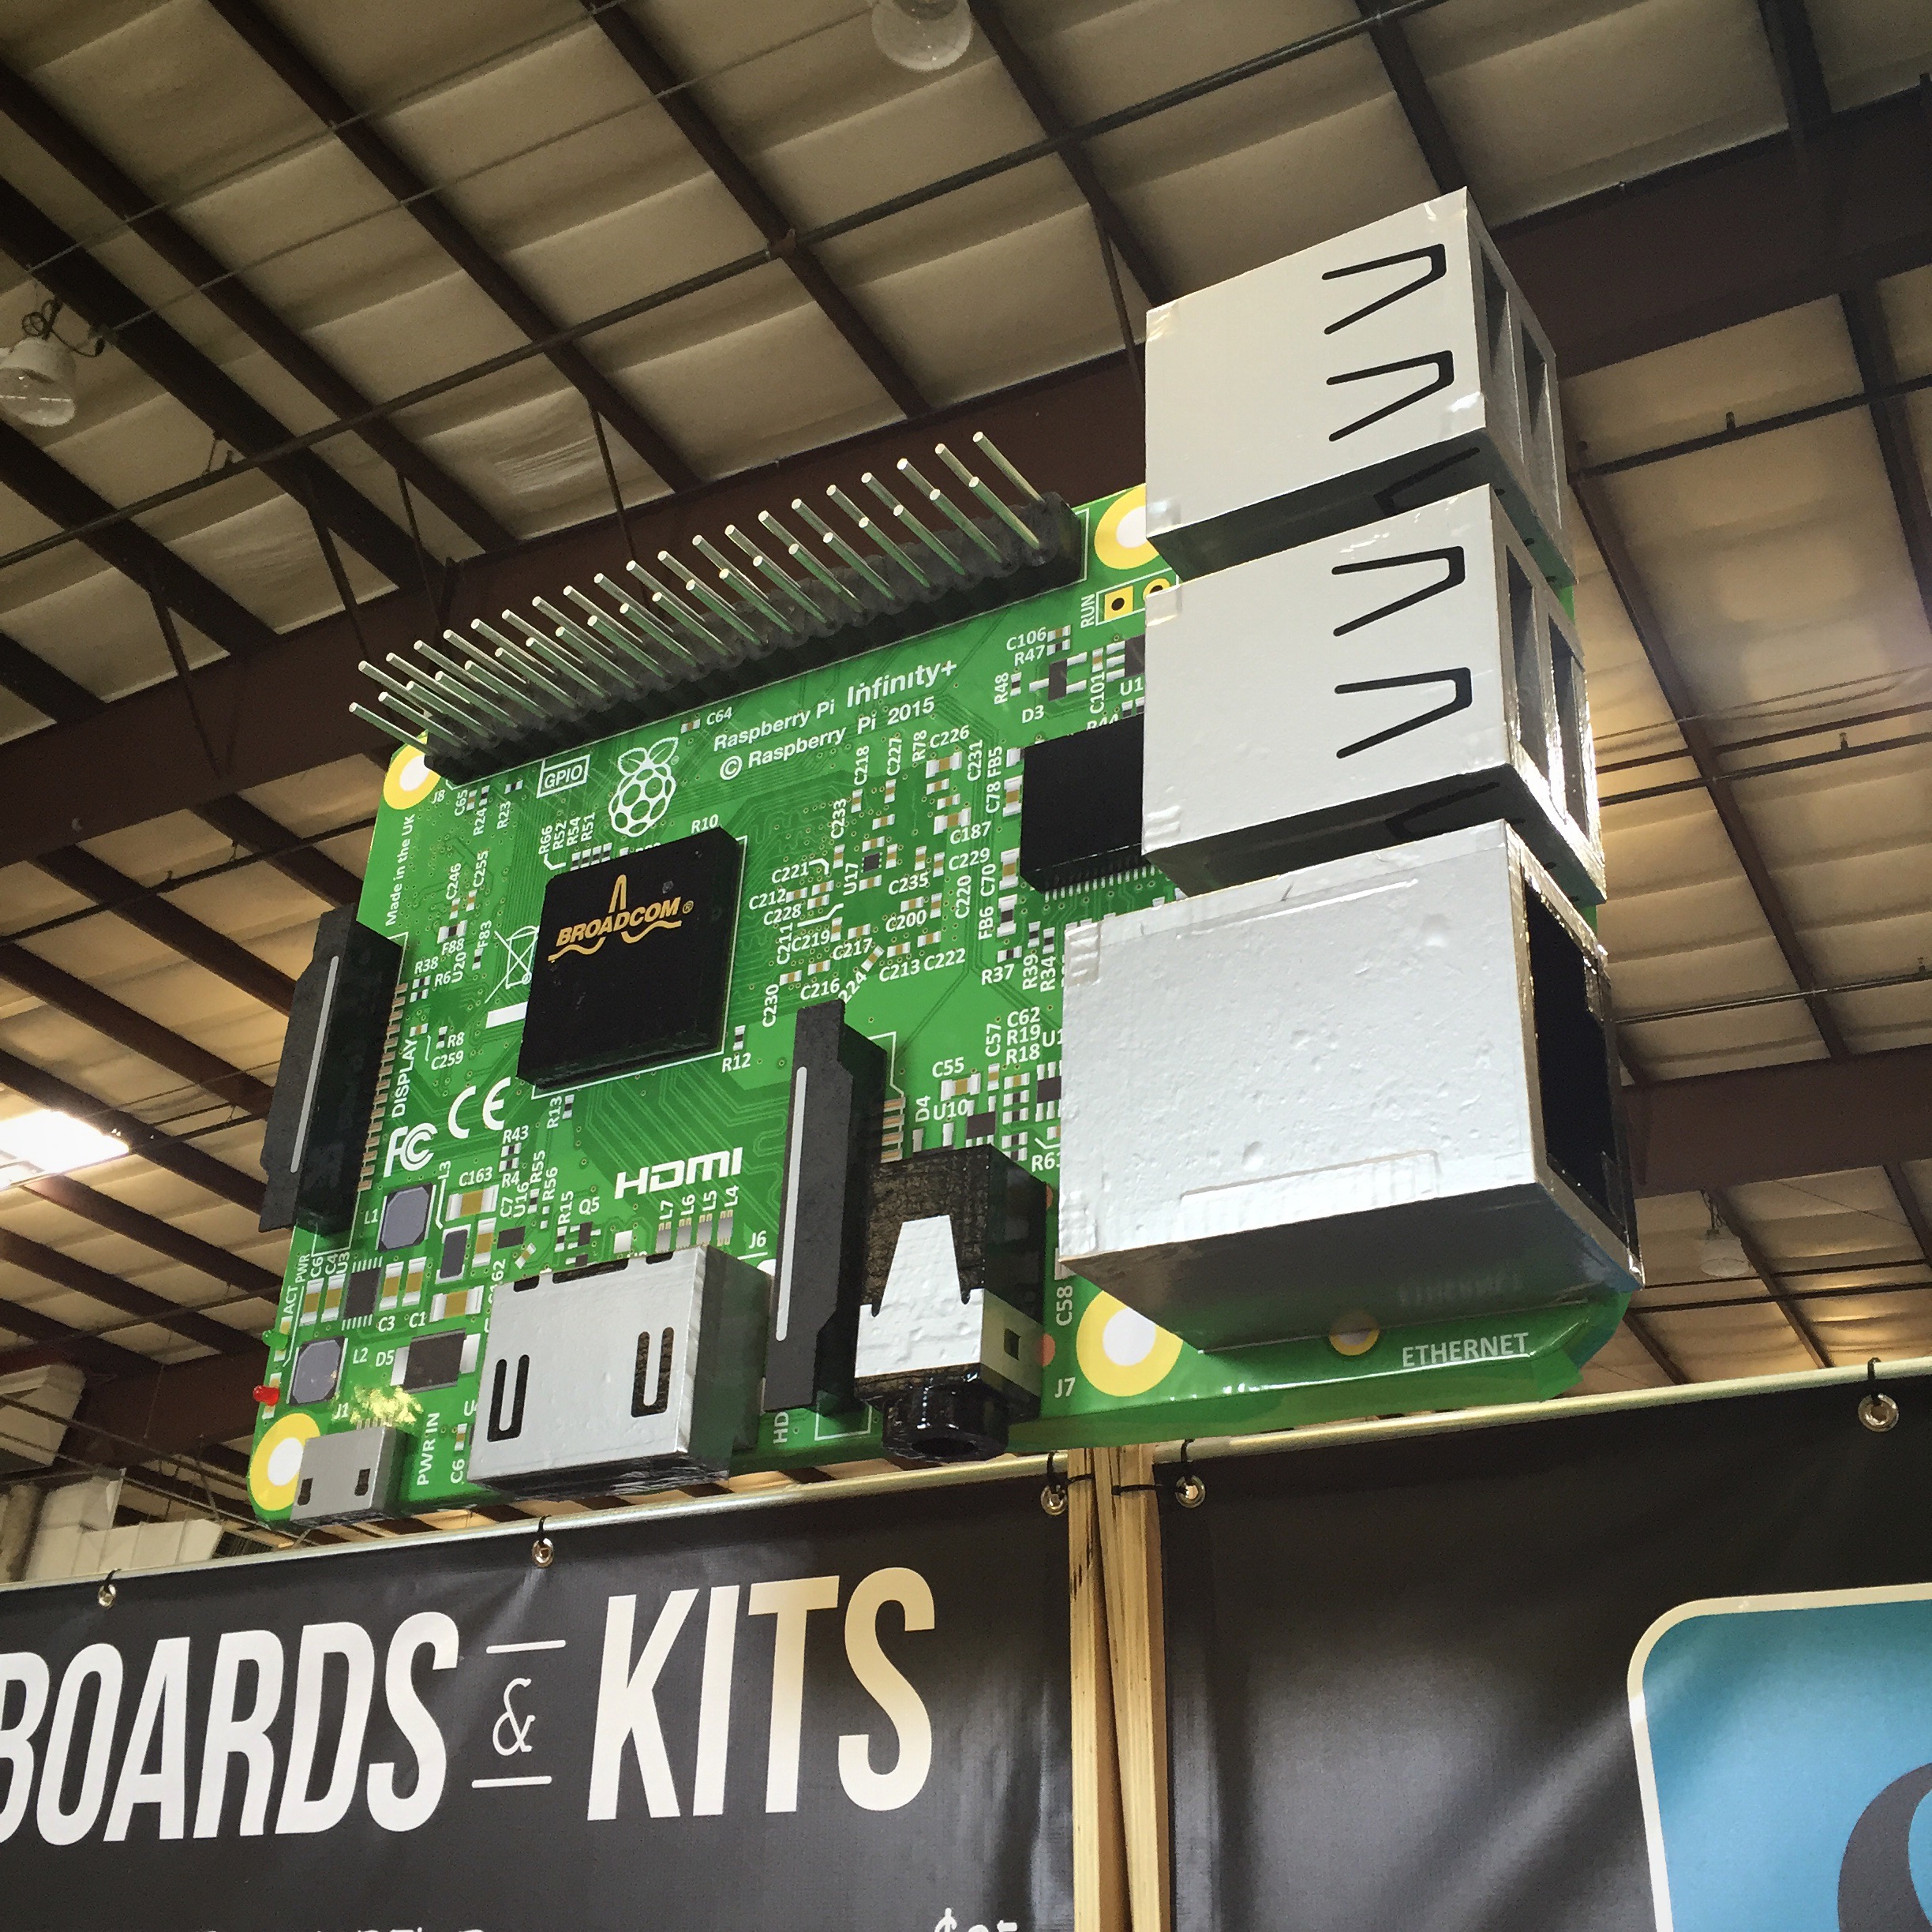
Building the Huge Raspberry Pi Infinity+
We’ve just arrived back from the Bay Area Maker Faire, where MCM Electronics was a sponsor, having a booth right next to the Raspberry Pi Foundation. The show was a great success. One of the coolest parts of our booth was the Pi Infinity+, which Michael Castor and I made over the course of a week. It’s basically a functional model of a Raspberry Pi 3 Model B. It’s just bigger. And awesomer. Here’s how it went down.
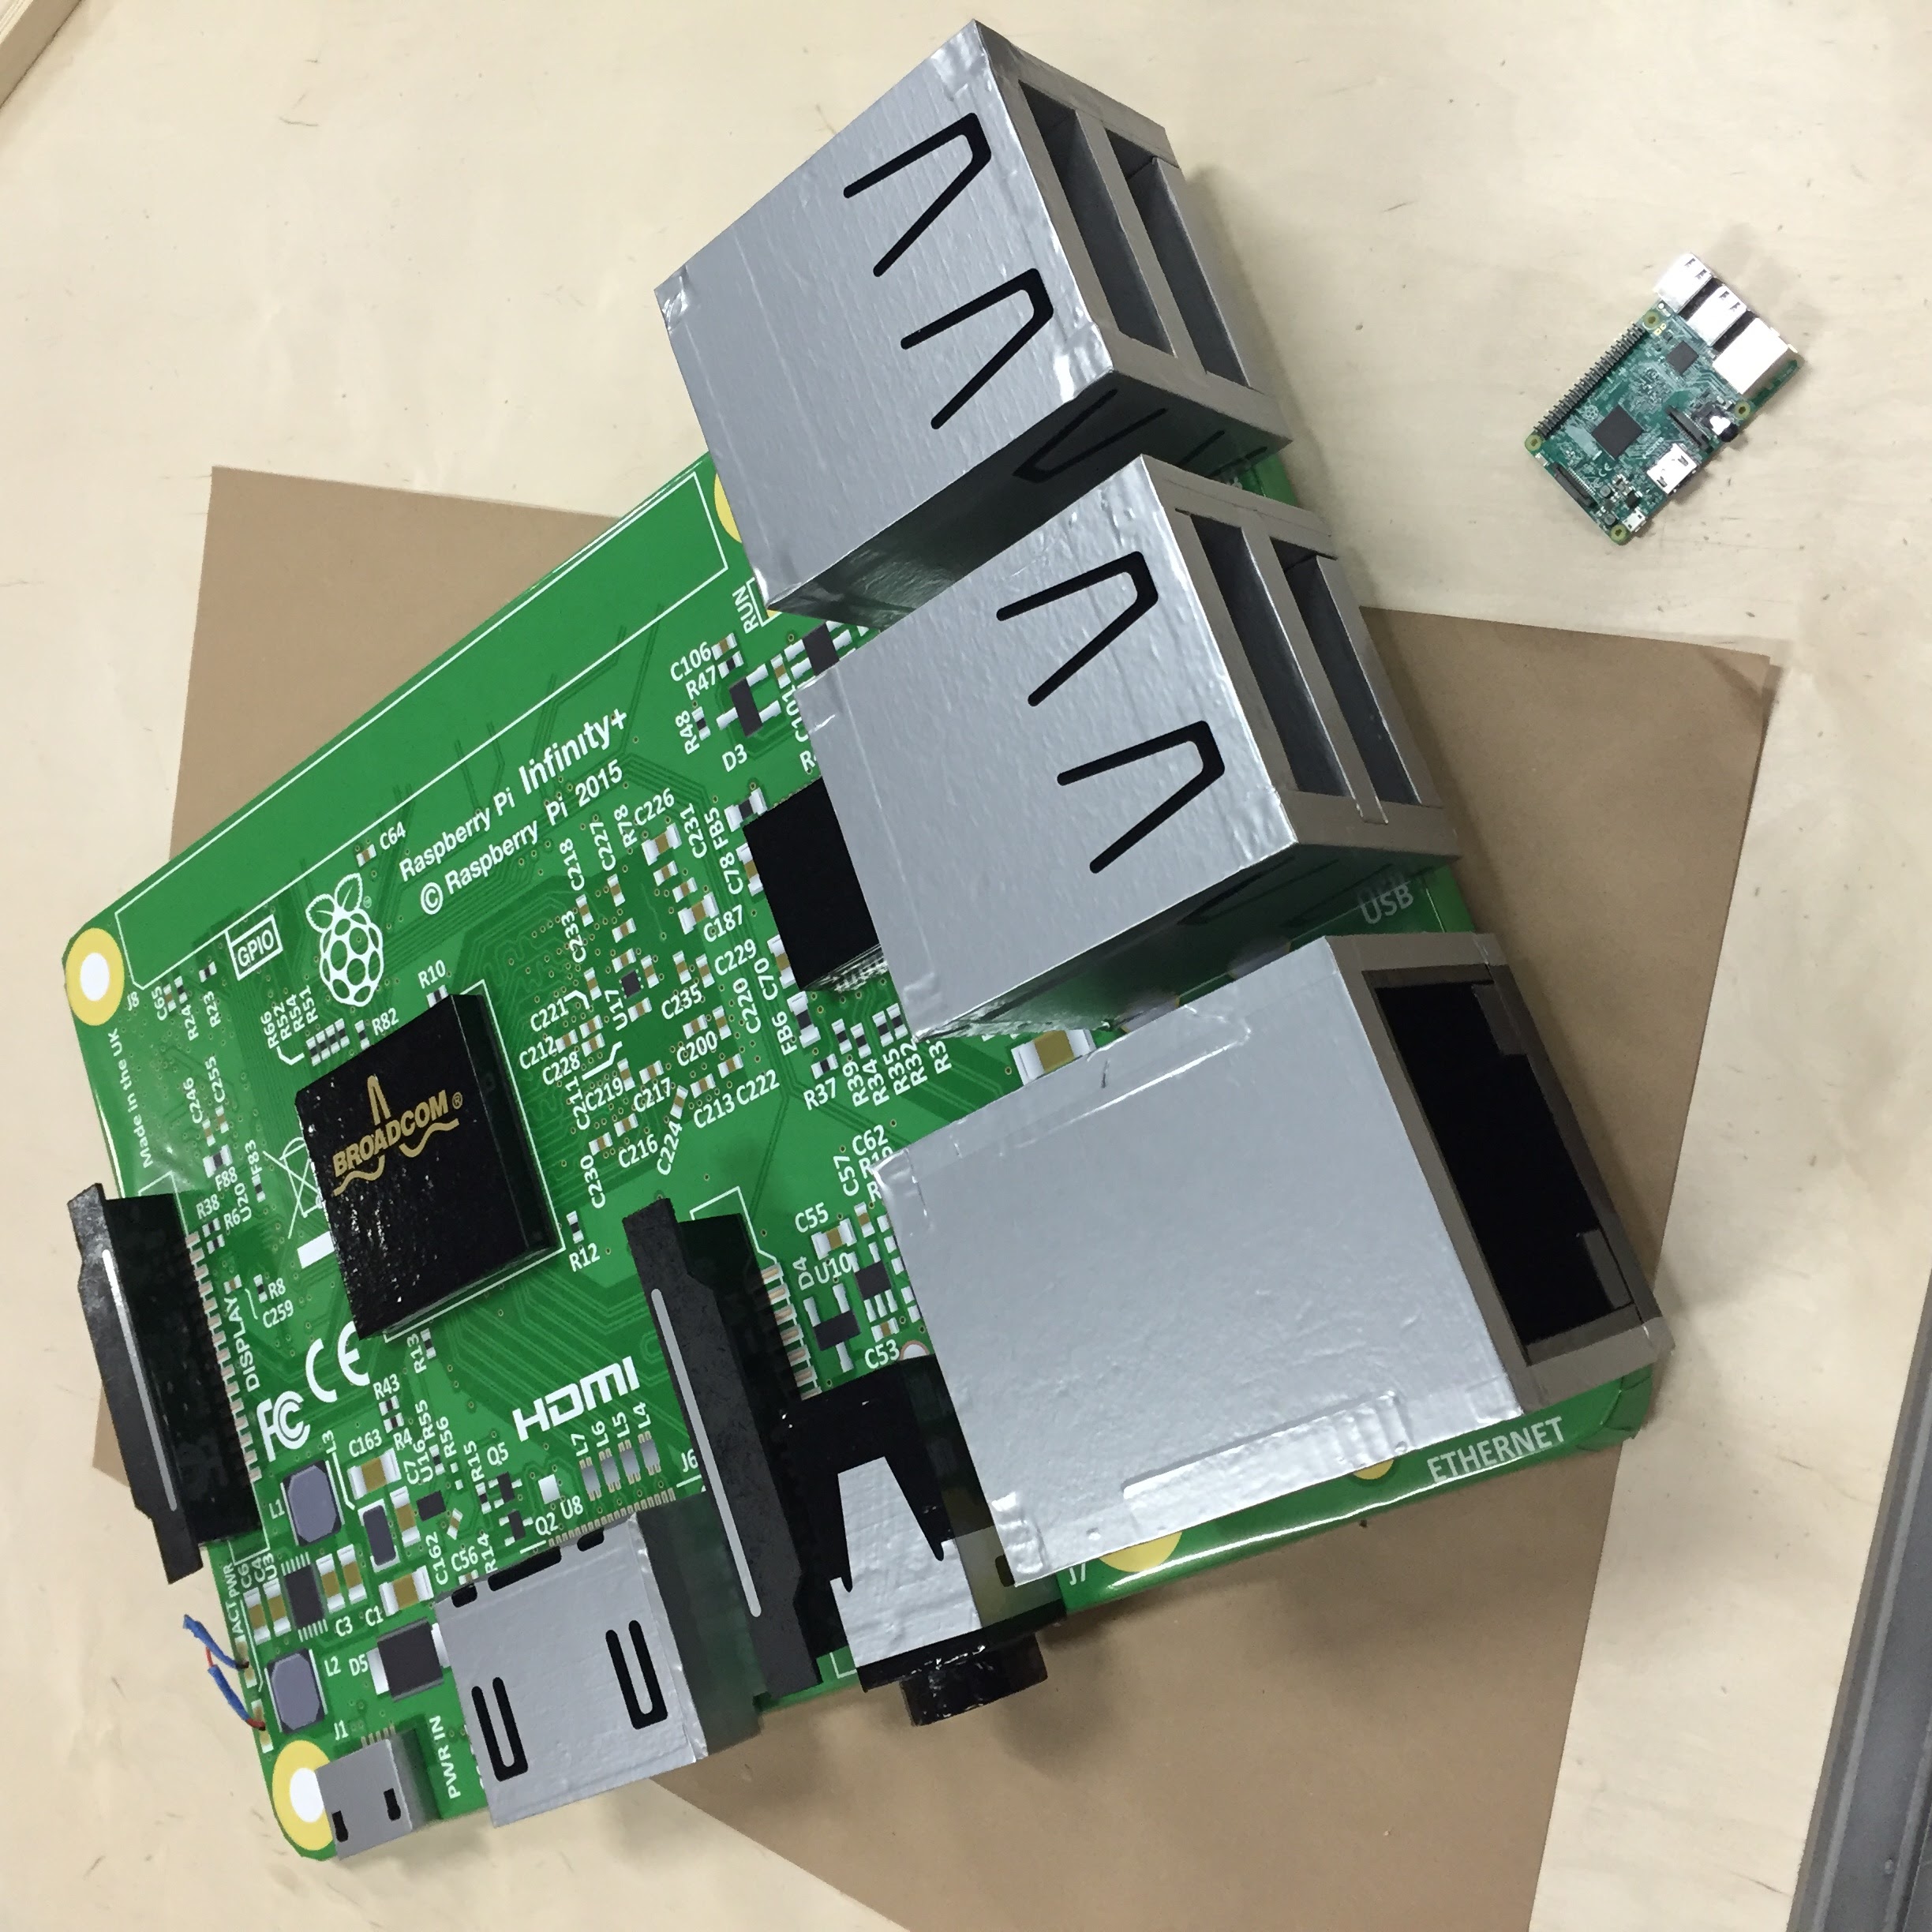
Just how big should it be? Bigger is better, right? We had to be able to ship it to Maker Faire, so while a 4ft x 8ft Pi would be awesome, it would be cumbersome and costly to ship. Nothing would ruin our fun like having two halves of a Pi Infinity+ show up at the show, you know, instead of a whole one. We decided that a 10x size would be cool. A Pi Model B is about 85mm x 56mm without the overhanging ports. 10x means 850mm x 560mm, which is around 33.5in x 22in. Perfect.
There are a lot of details on the Raspberry Pi. There are components on components. Traces on traces. Labels on labels. Not all of these will get built into 3D objects. So I got busy illustrating both the top and bottom of a Pi 3 in Illustrator. Lots of caffeine and sleepless nights were involved in this step, and UV blocking glasses were necessary. I left most of the components off that were going to be built in 3D – the USB ports, ethernet port, camera and display ports, etc. 4800 man-hours later, and we had finished artwork with only a few mistakes.
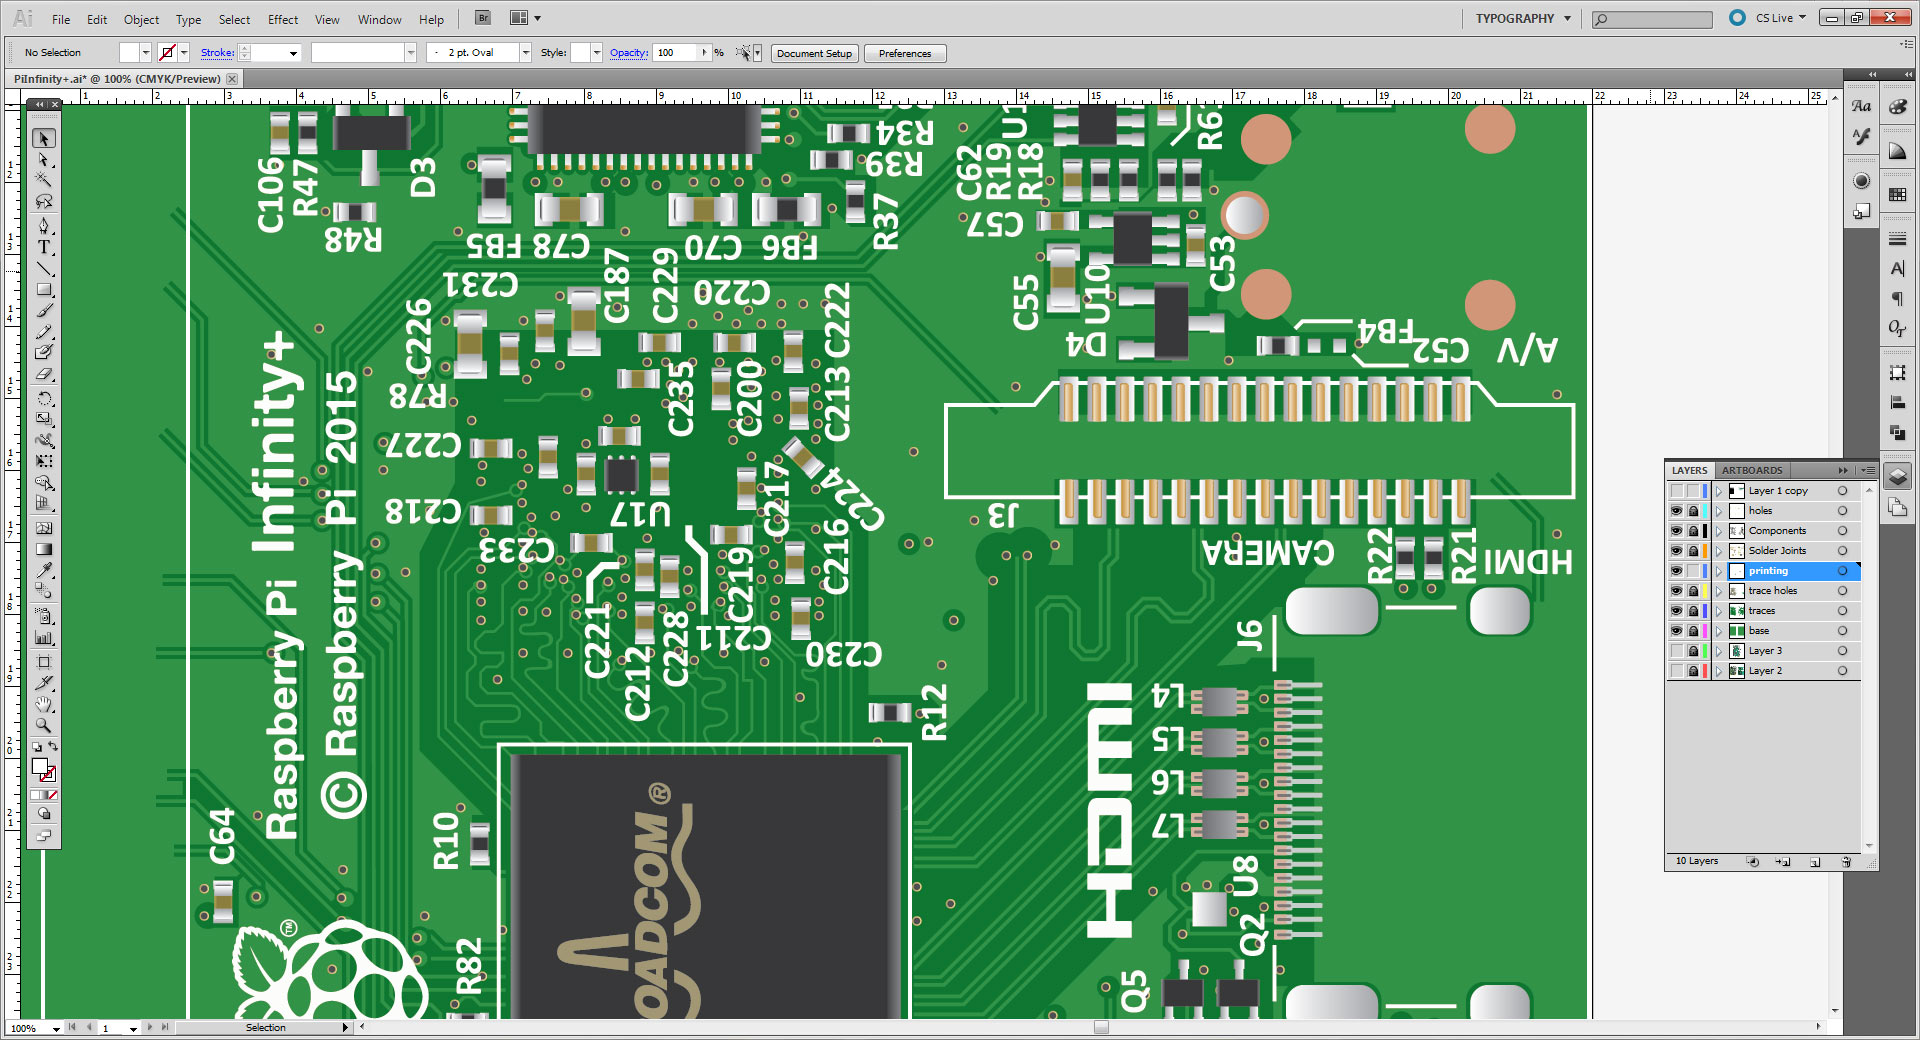
There are a ton of details!
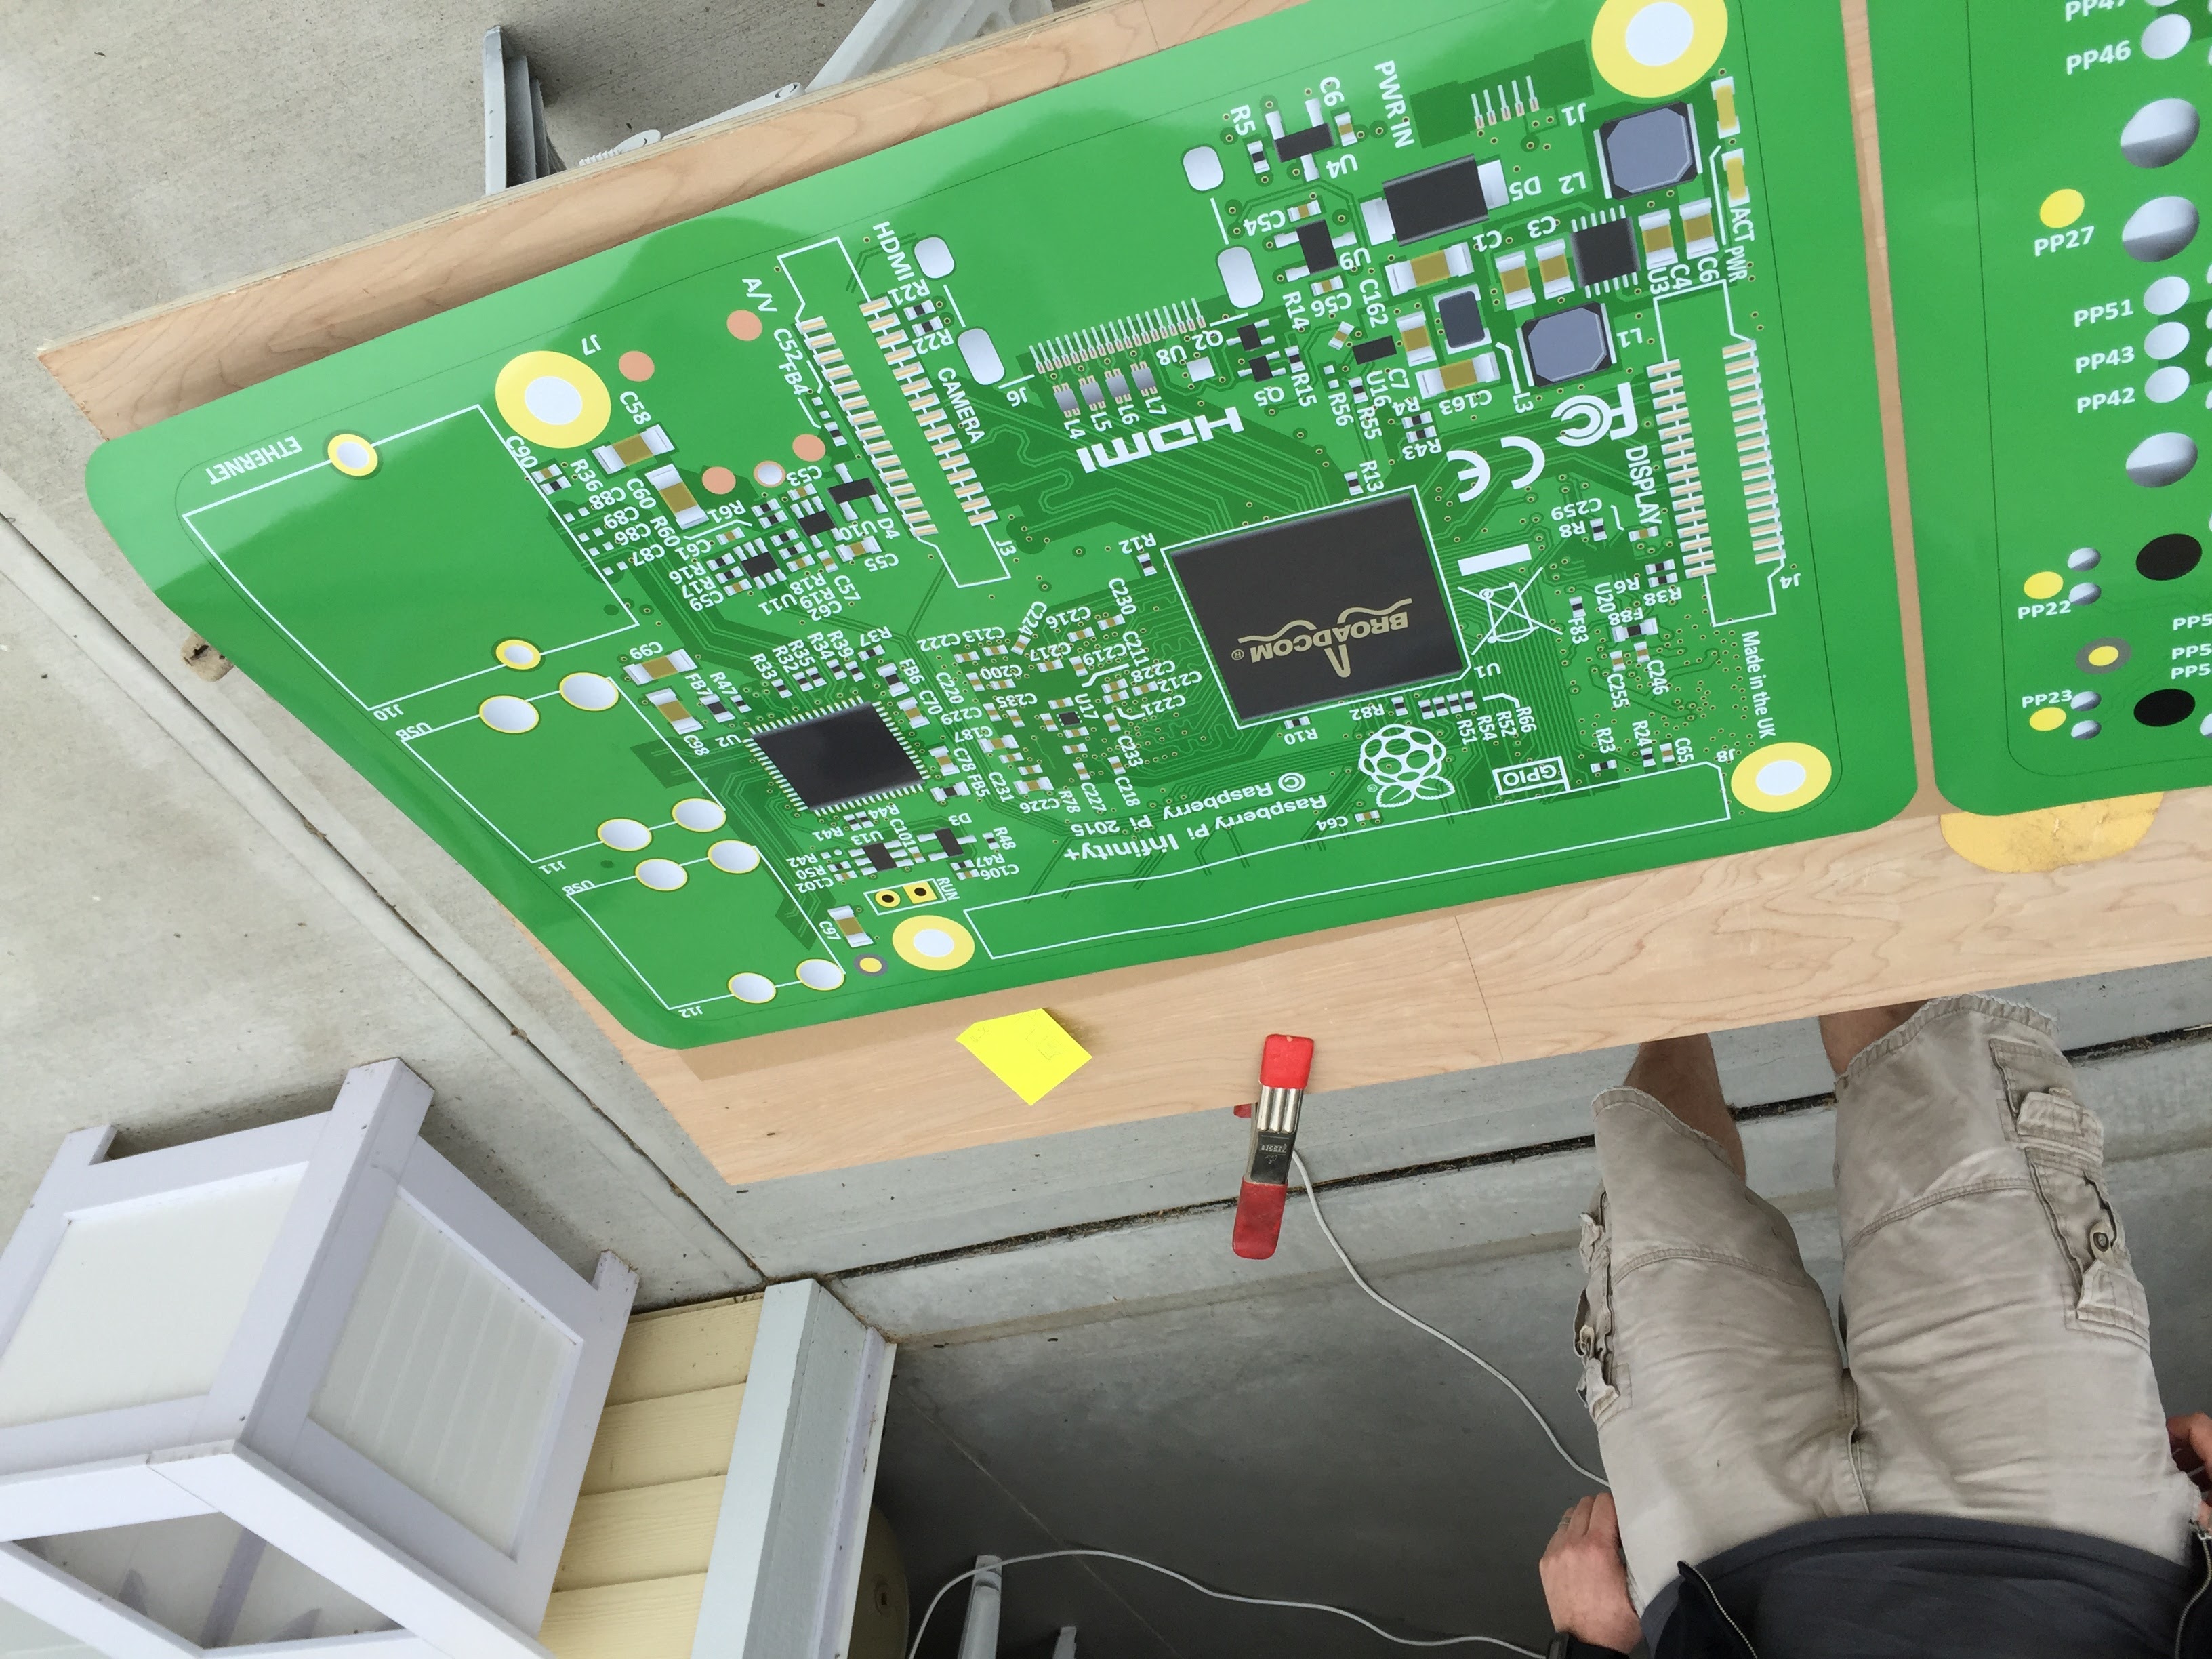
Next was to get the whole thing printed. We’ve got a great print shop in Dayton called The Digital Fringe. They do quick, awesome, reasonably-priced work. They printed and laminated our prints, and had them ready the next day!
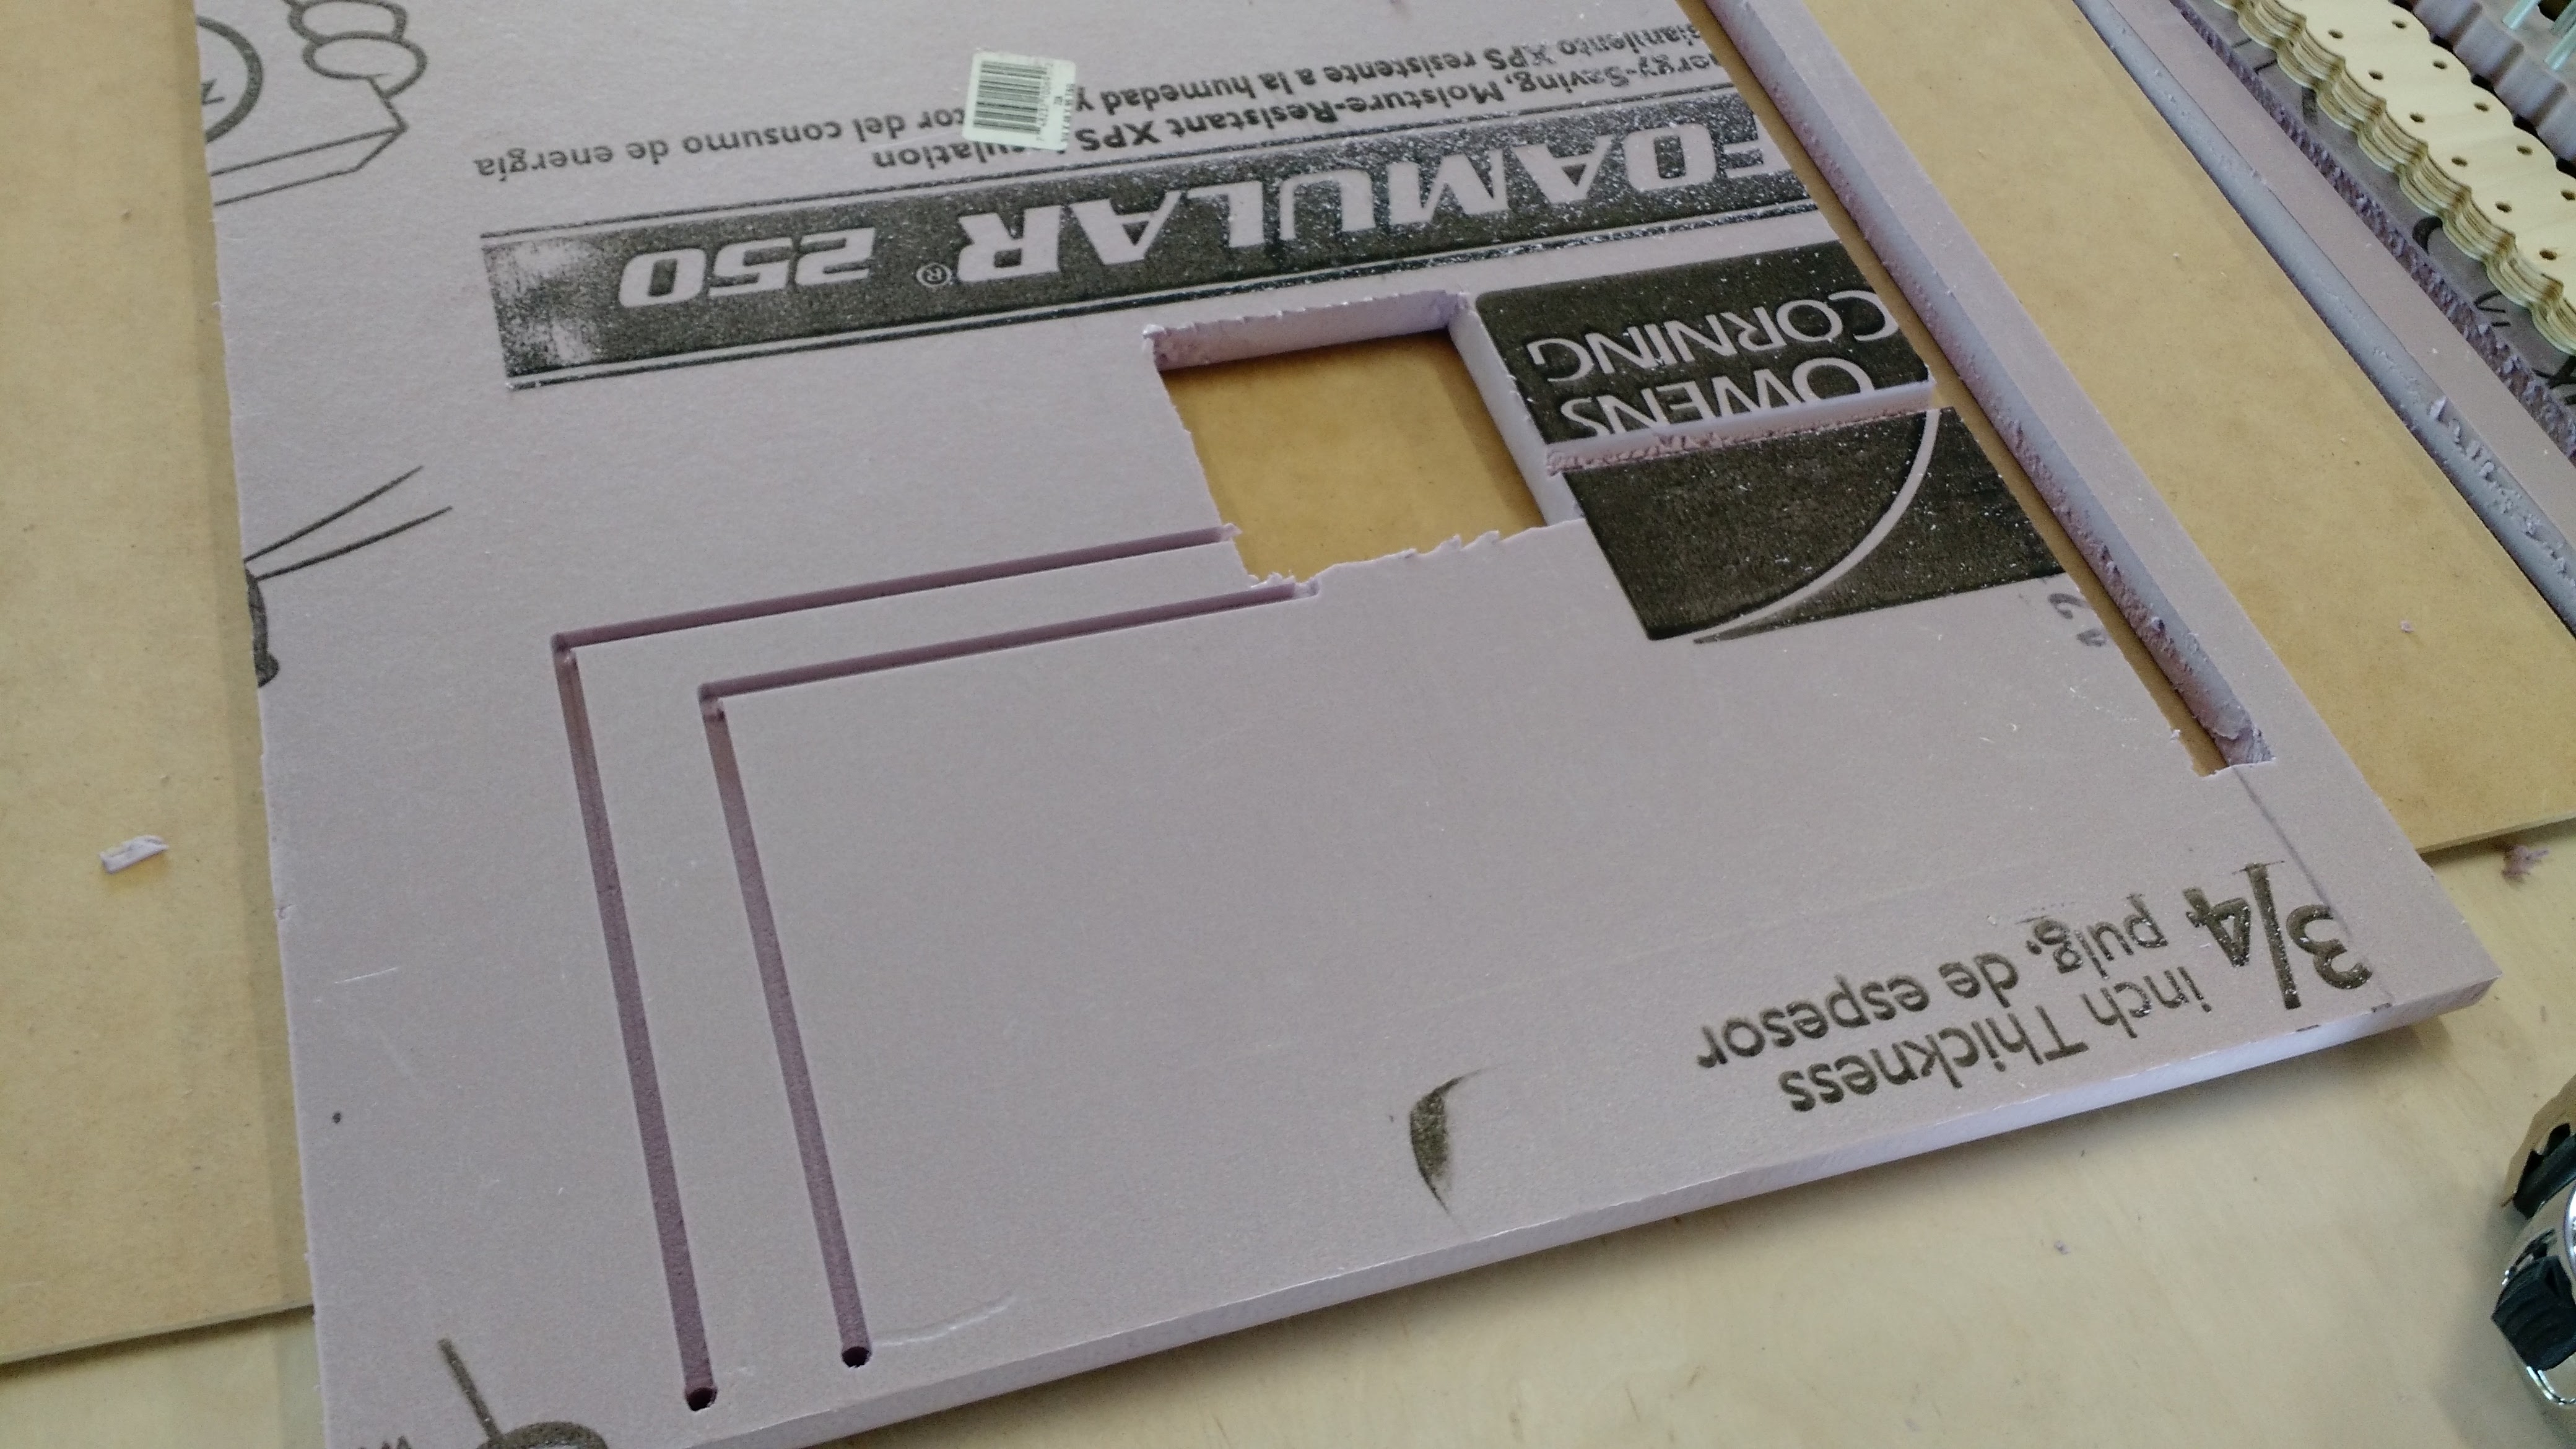
Now that we had the prints back, the real fun could begin. We grabbed the largest vehicle accessible to us and drove at a high pace to the local hardware store. Like kids in a candy store, we grabbed all kinds of supplies. A full sheet of 3/4″ rigid XPS foam, a sheet of 1/4″ MDF, magnets, aluminum rod, and a large dose of spray adhesive.
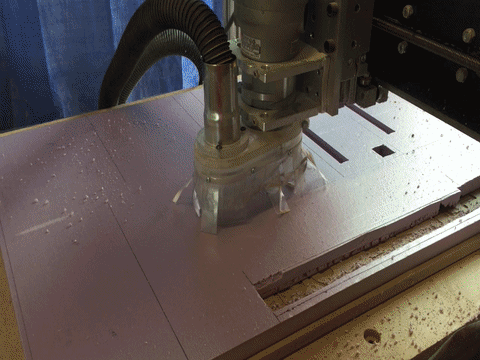
Michael got busy routing holes under where the GPIO header will go, a hole under the Broadcom chip where the real Pi would reside, two channels through which LED status lights would be routed, as well as a channel for an external USB port to power the Pi. I think he started with a machete, but later switched to the CNC router for the final details.
Once all the electronic logistics were sorted, and the wiring was run, we sandwiched the 3/4″ foam onto the 1/4″ MDF to add rigidity and a protective layer using spray adhesive. It turns out 3M spray adhesive wont melt foam if sprayed from a distance. Weird. Cool.
Next, the corners were rounded on the band saw, and we were ready to adhere the top and bottom prints to the board’s foam and MDF core. Somehow, no pictures were taken of this step, which was arguably the most stressful step of the build. It took all four hands, some feet and plenty of verbal persuasion to get everything perfectly aligned and glued in place. Alas, success was found.
Next, the fun started, as it was time to start creating ports! It ended up being somewhat of a long list, as we chose to create:
- Two display ports (camera and display)
- One ethernet port
- Two dual USB ports
- HDMI port
- Micro USB port
- 4-pole analog 3.5mm port
- USB/ethernet controller chip
- Wifi/BLE antenna
- CPU/GPU chip
- GPIO header
As with any project like this, there were iterations. The USB ports were originally built by layering sheets of foam. This proved to leave a very rough edge that was difficult to tidy up.
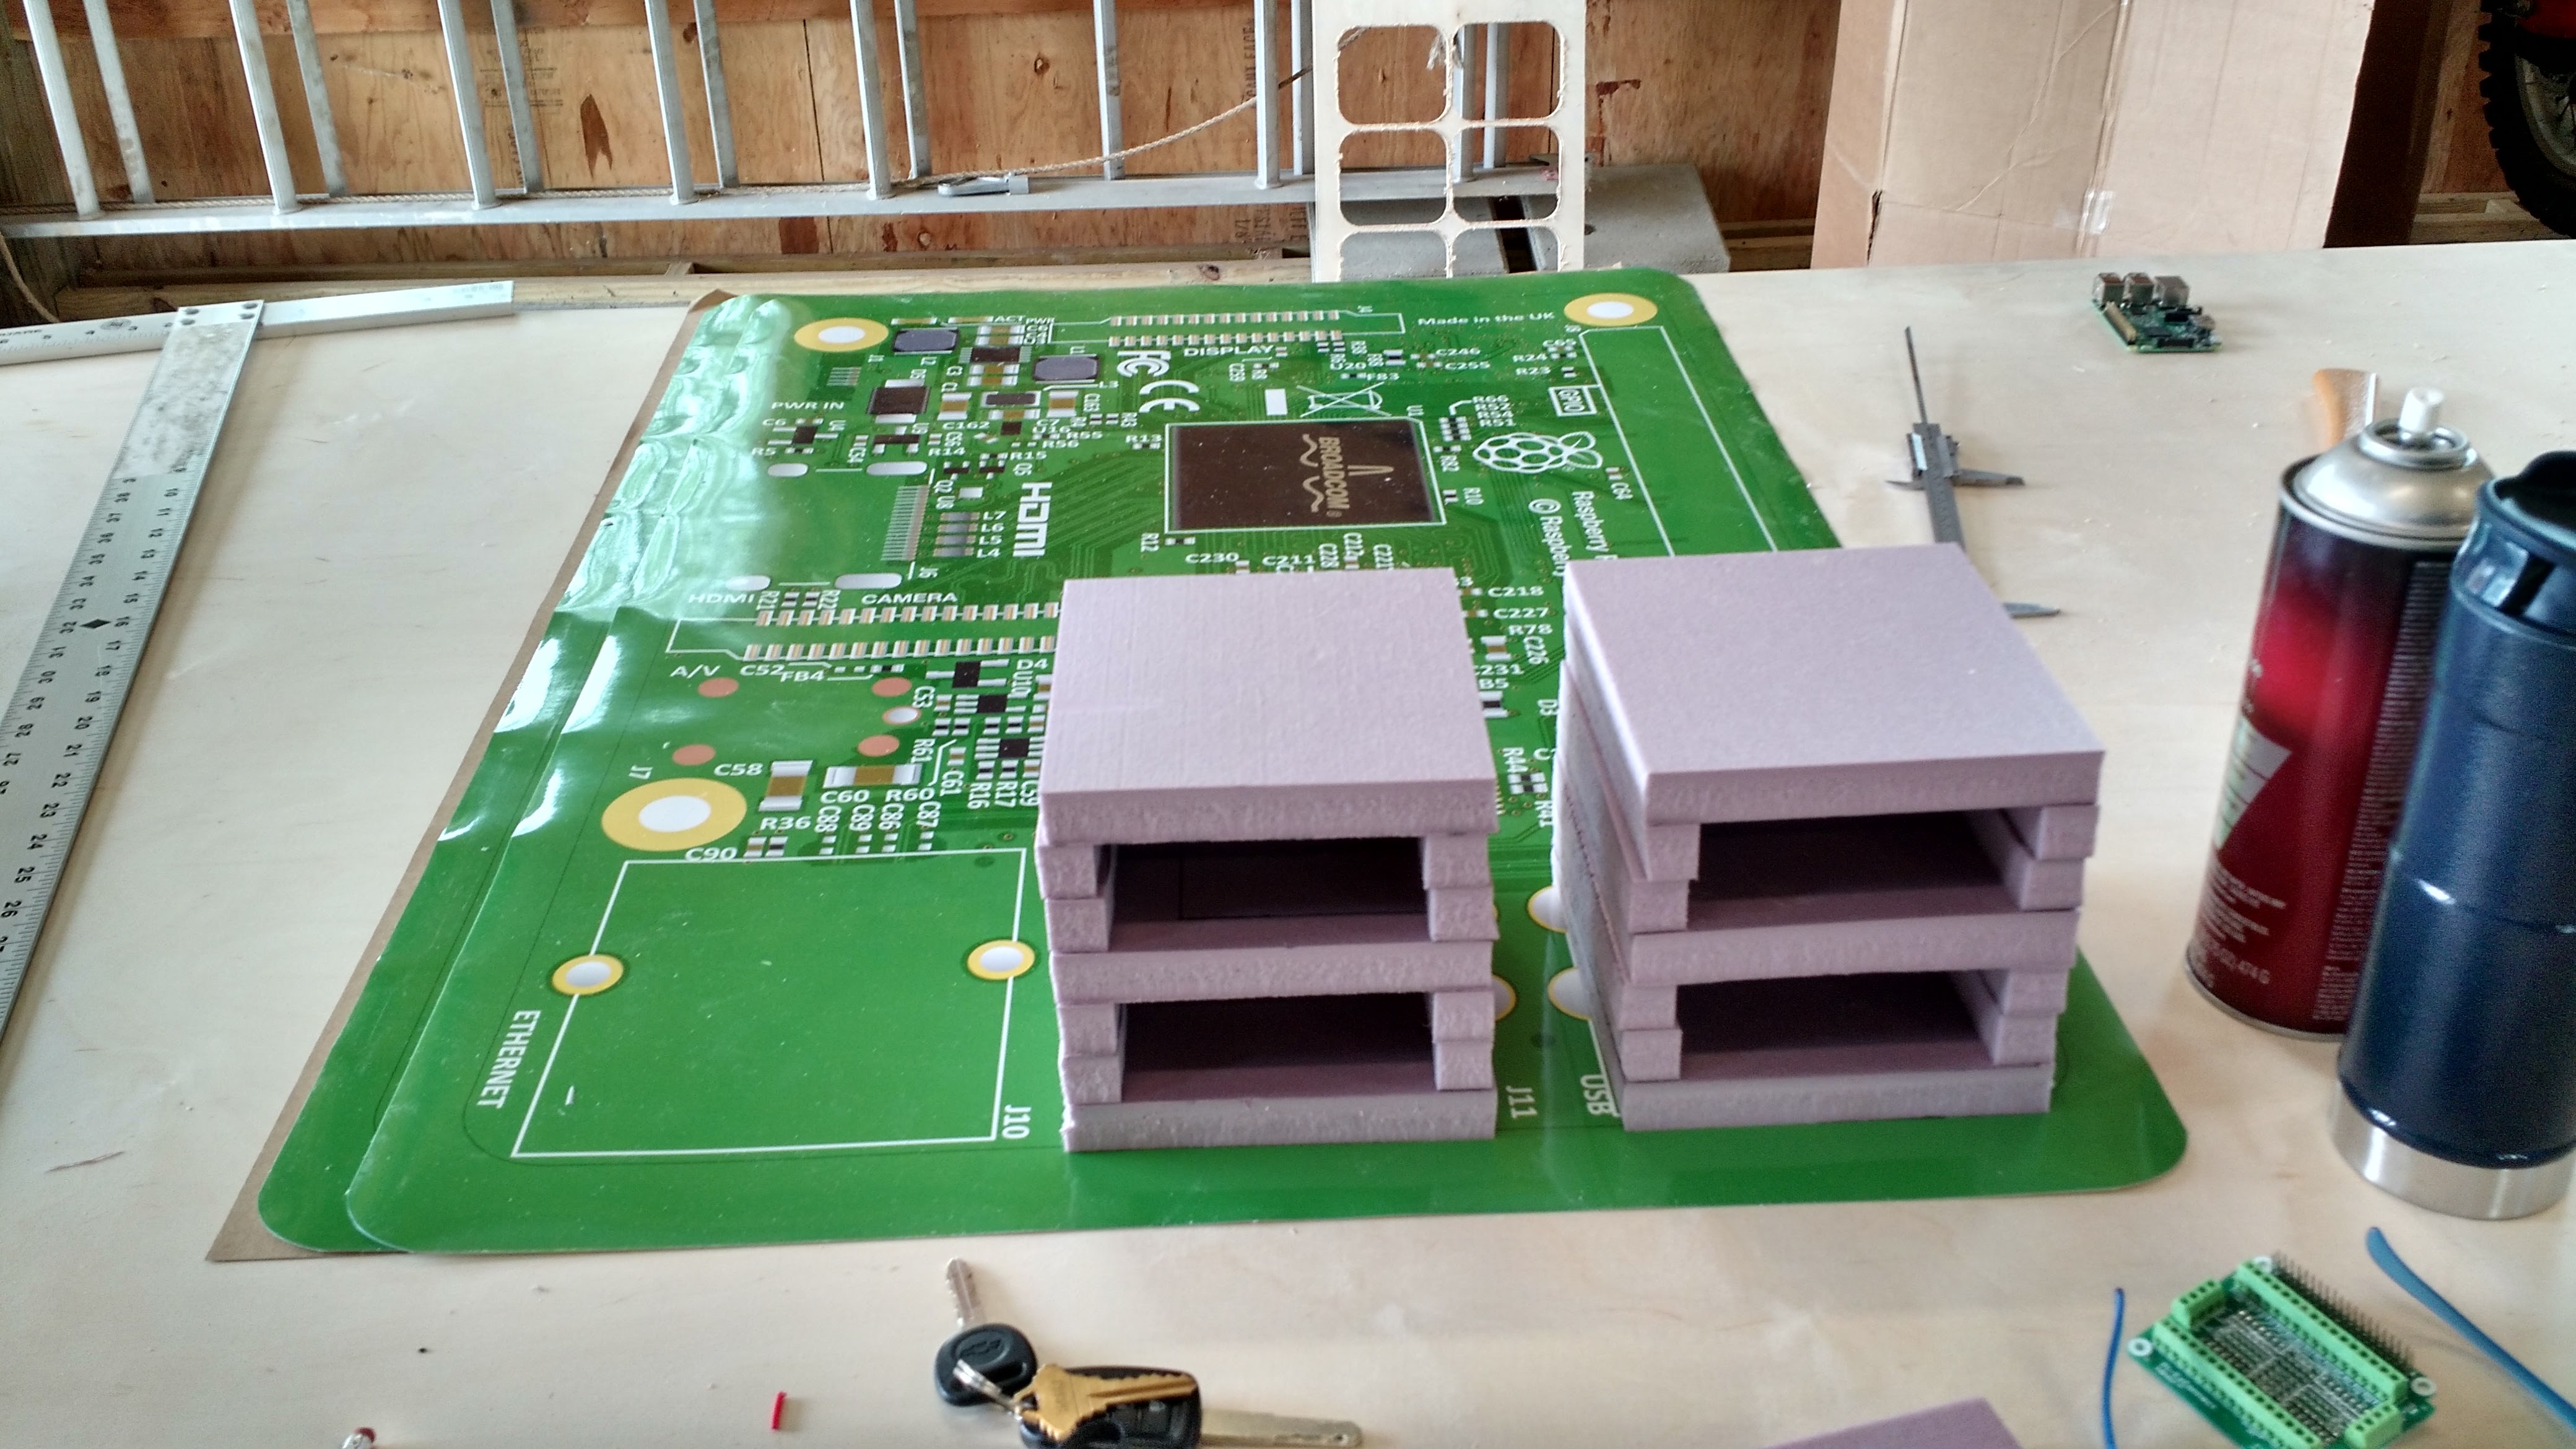
I thought it would be a good idea to take a stab at designing and cutting the sides and top/bottom of the ports on the CNC router, then fitting them together like fine Japanese joinery. It also allowed me to use vocabulary like “dogbone fillets”. This turned out to work well for the USB ports and the ethernet jack.
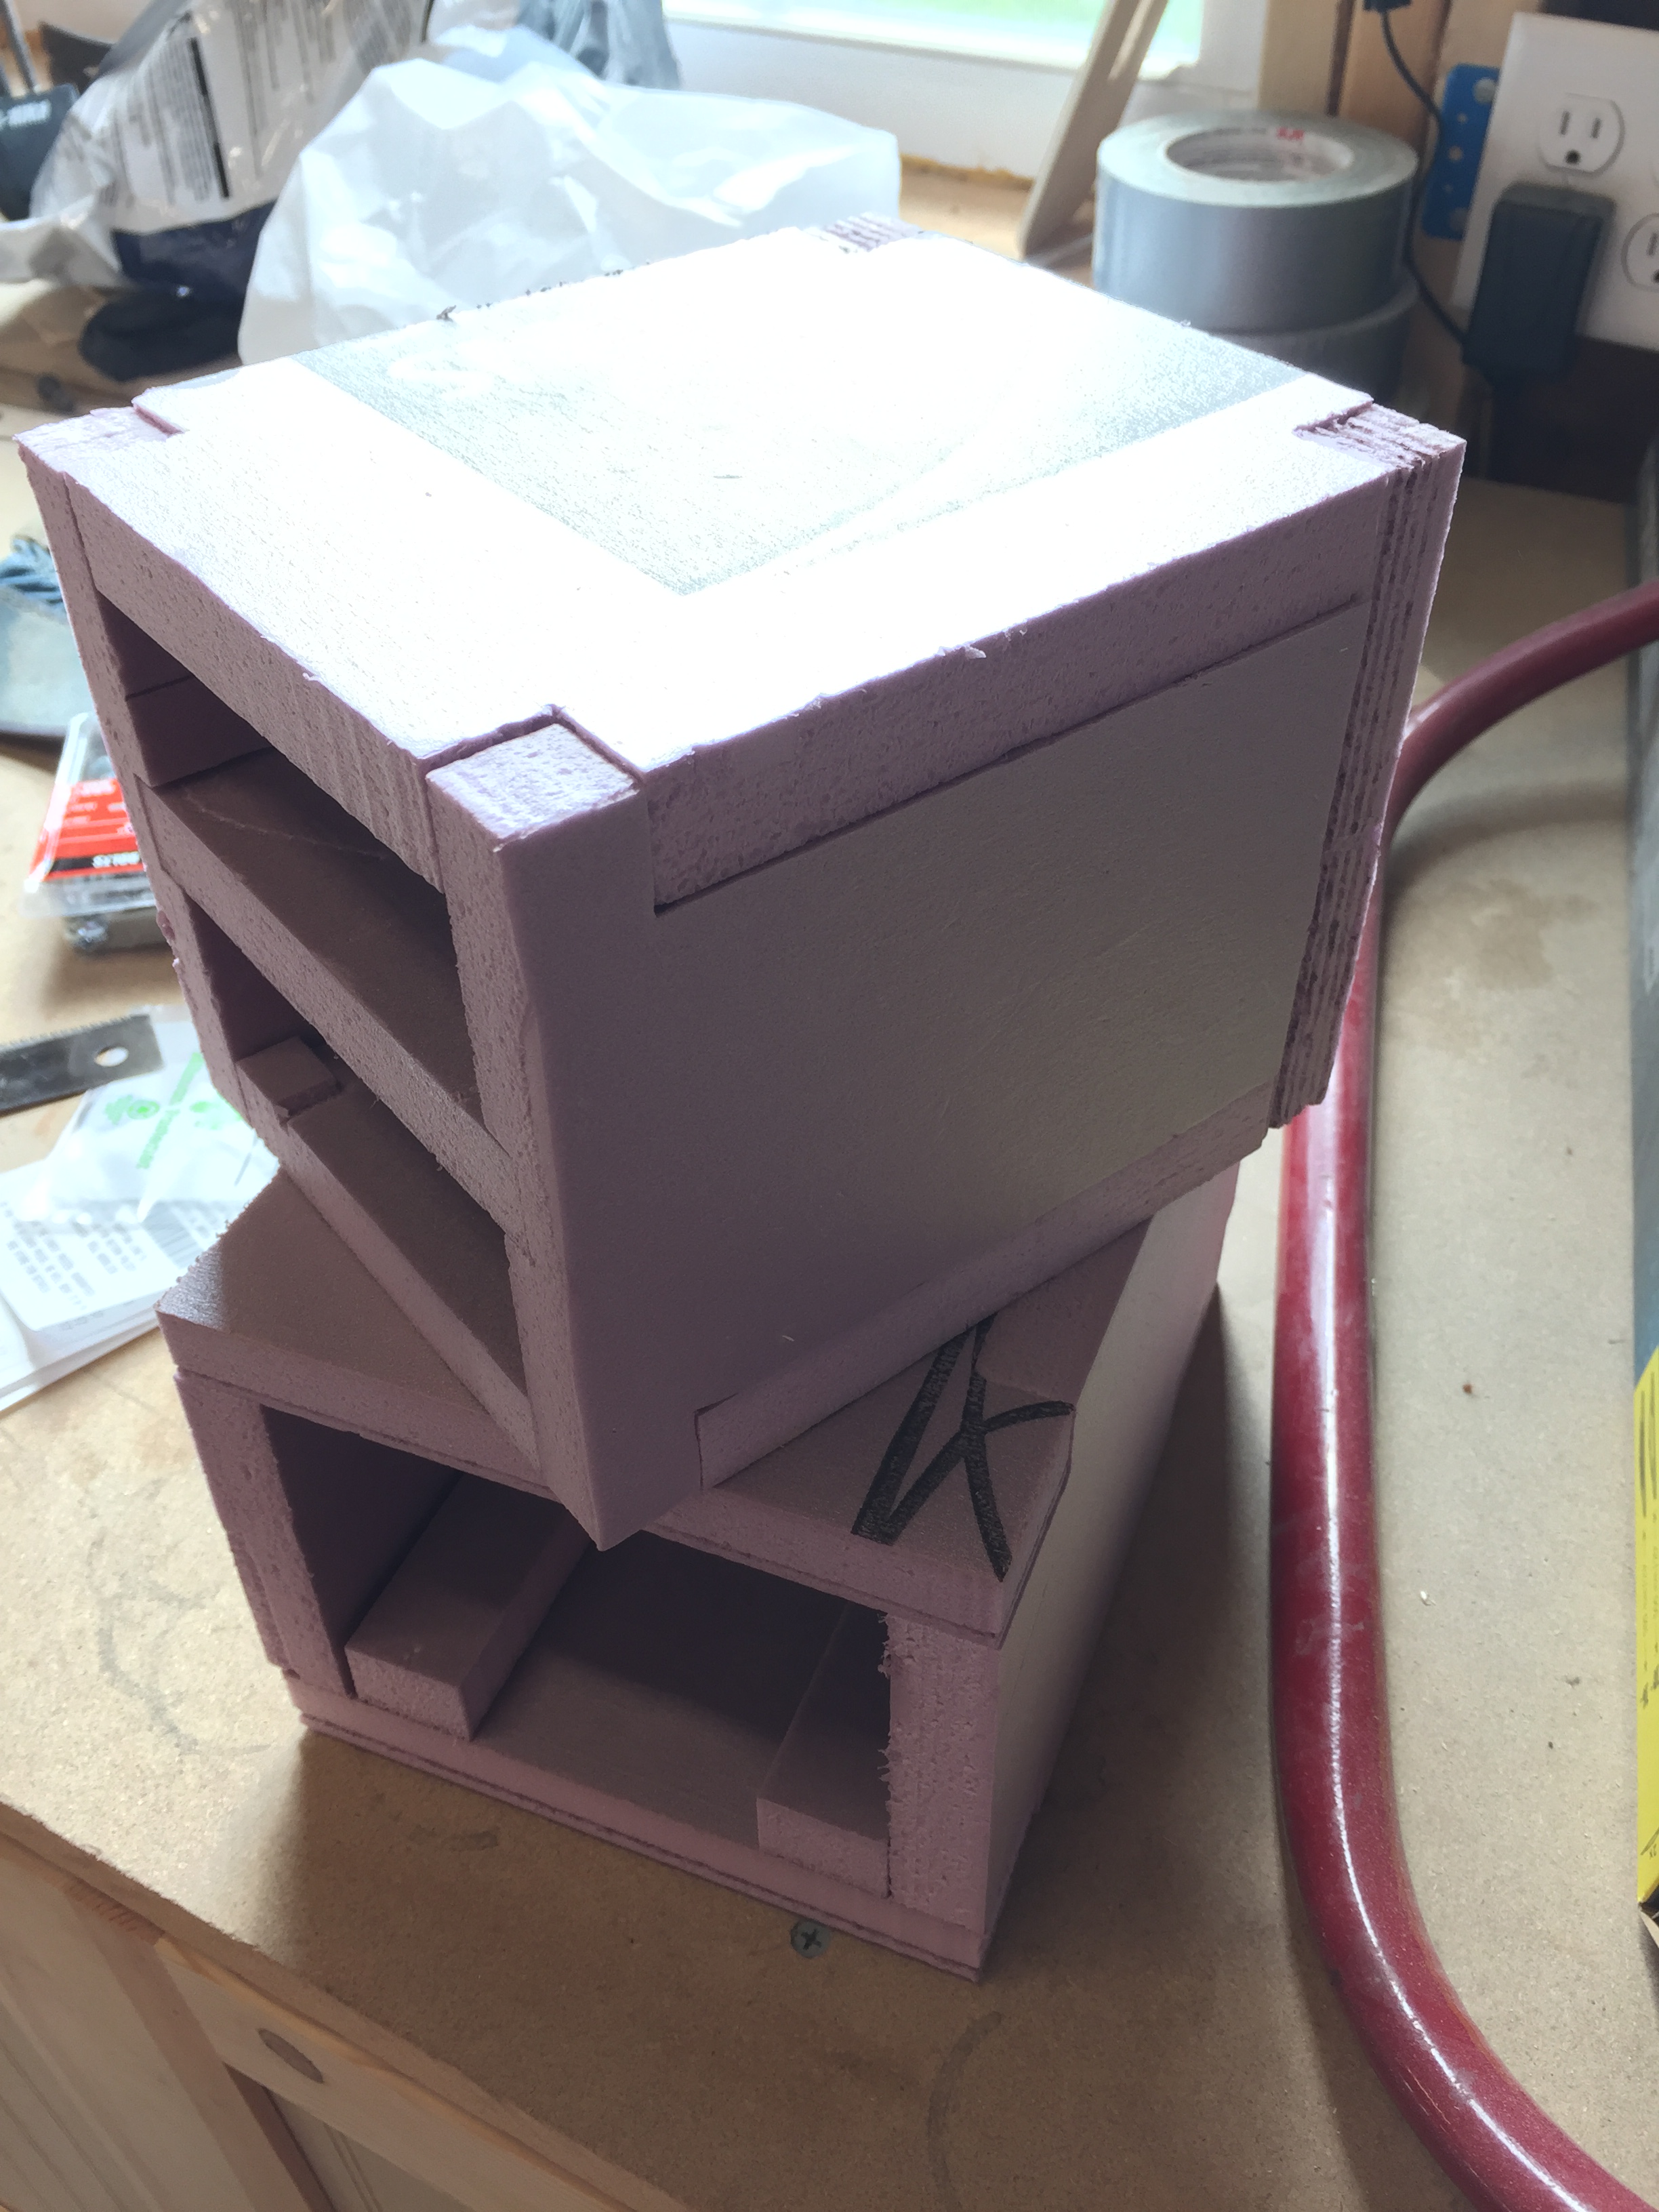
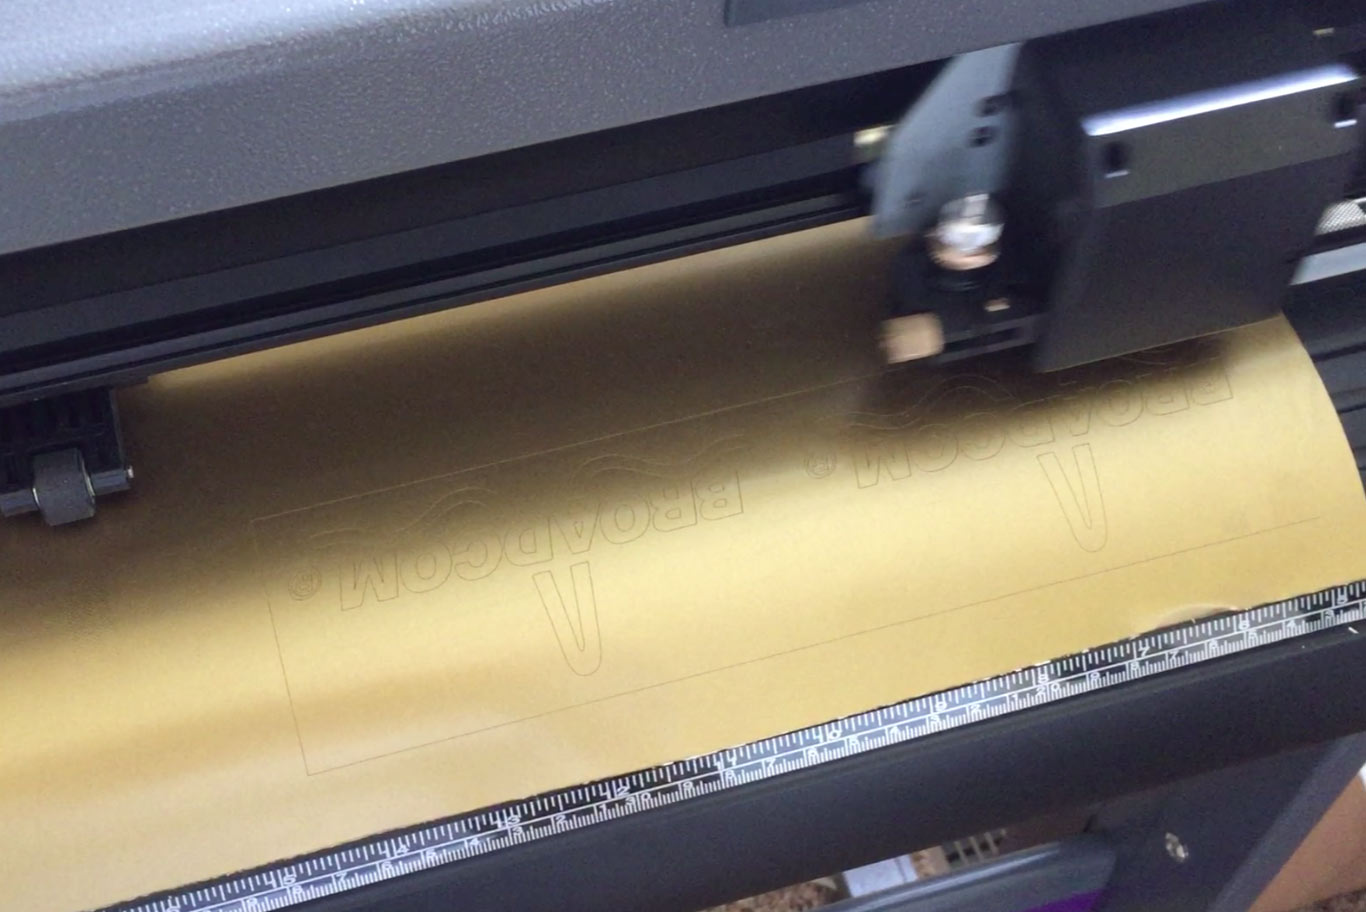
The majority of the other components and ports were made from simply layering and shaving foam blocks to size. Once they were all created, each was covered completely with various colors of vinyl, then detailed with decals cut by the vinyl cutter.
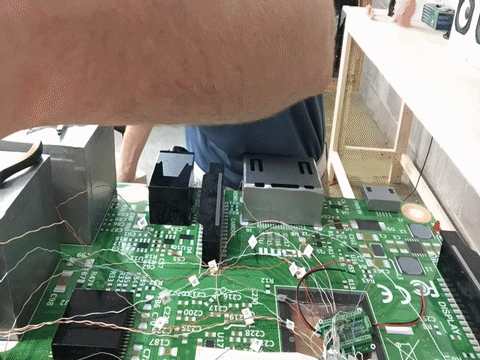
They were then mounted to the board with strips of extra-sticky 3M VHB adhesive tape. The exception to this was the CPU, which was mounted with magnetic strips to allow access to the Raspberry Pi.
The final piece was to finish the GPIO header. This required several steps in itself. The space had to be cut out under where the header will sit. Next, the base of the header had to be expertly designed and milled on the CNC router. Originally, we tried using pink XPS foam, though it didn’t offer enough support to hold our pins. We ended up cutting two layers of 1/2″ plywood and gluing them together. 1/4″ aluminum rod was cut into 40 individual pins of the proper length and pounded into holes in the header base. Michael then stayed awake for the next 48 hours, using torches, drills and other manly tools, soldering leads to each pin.
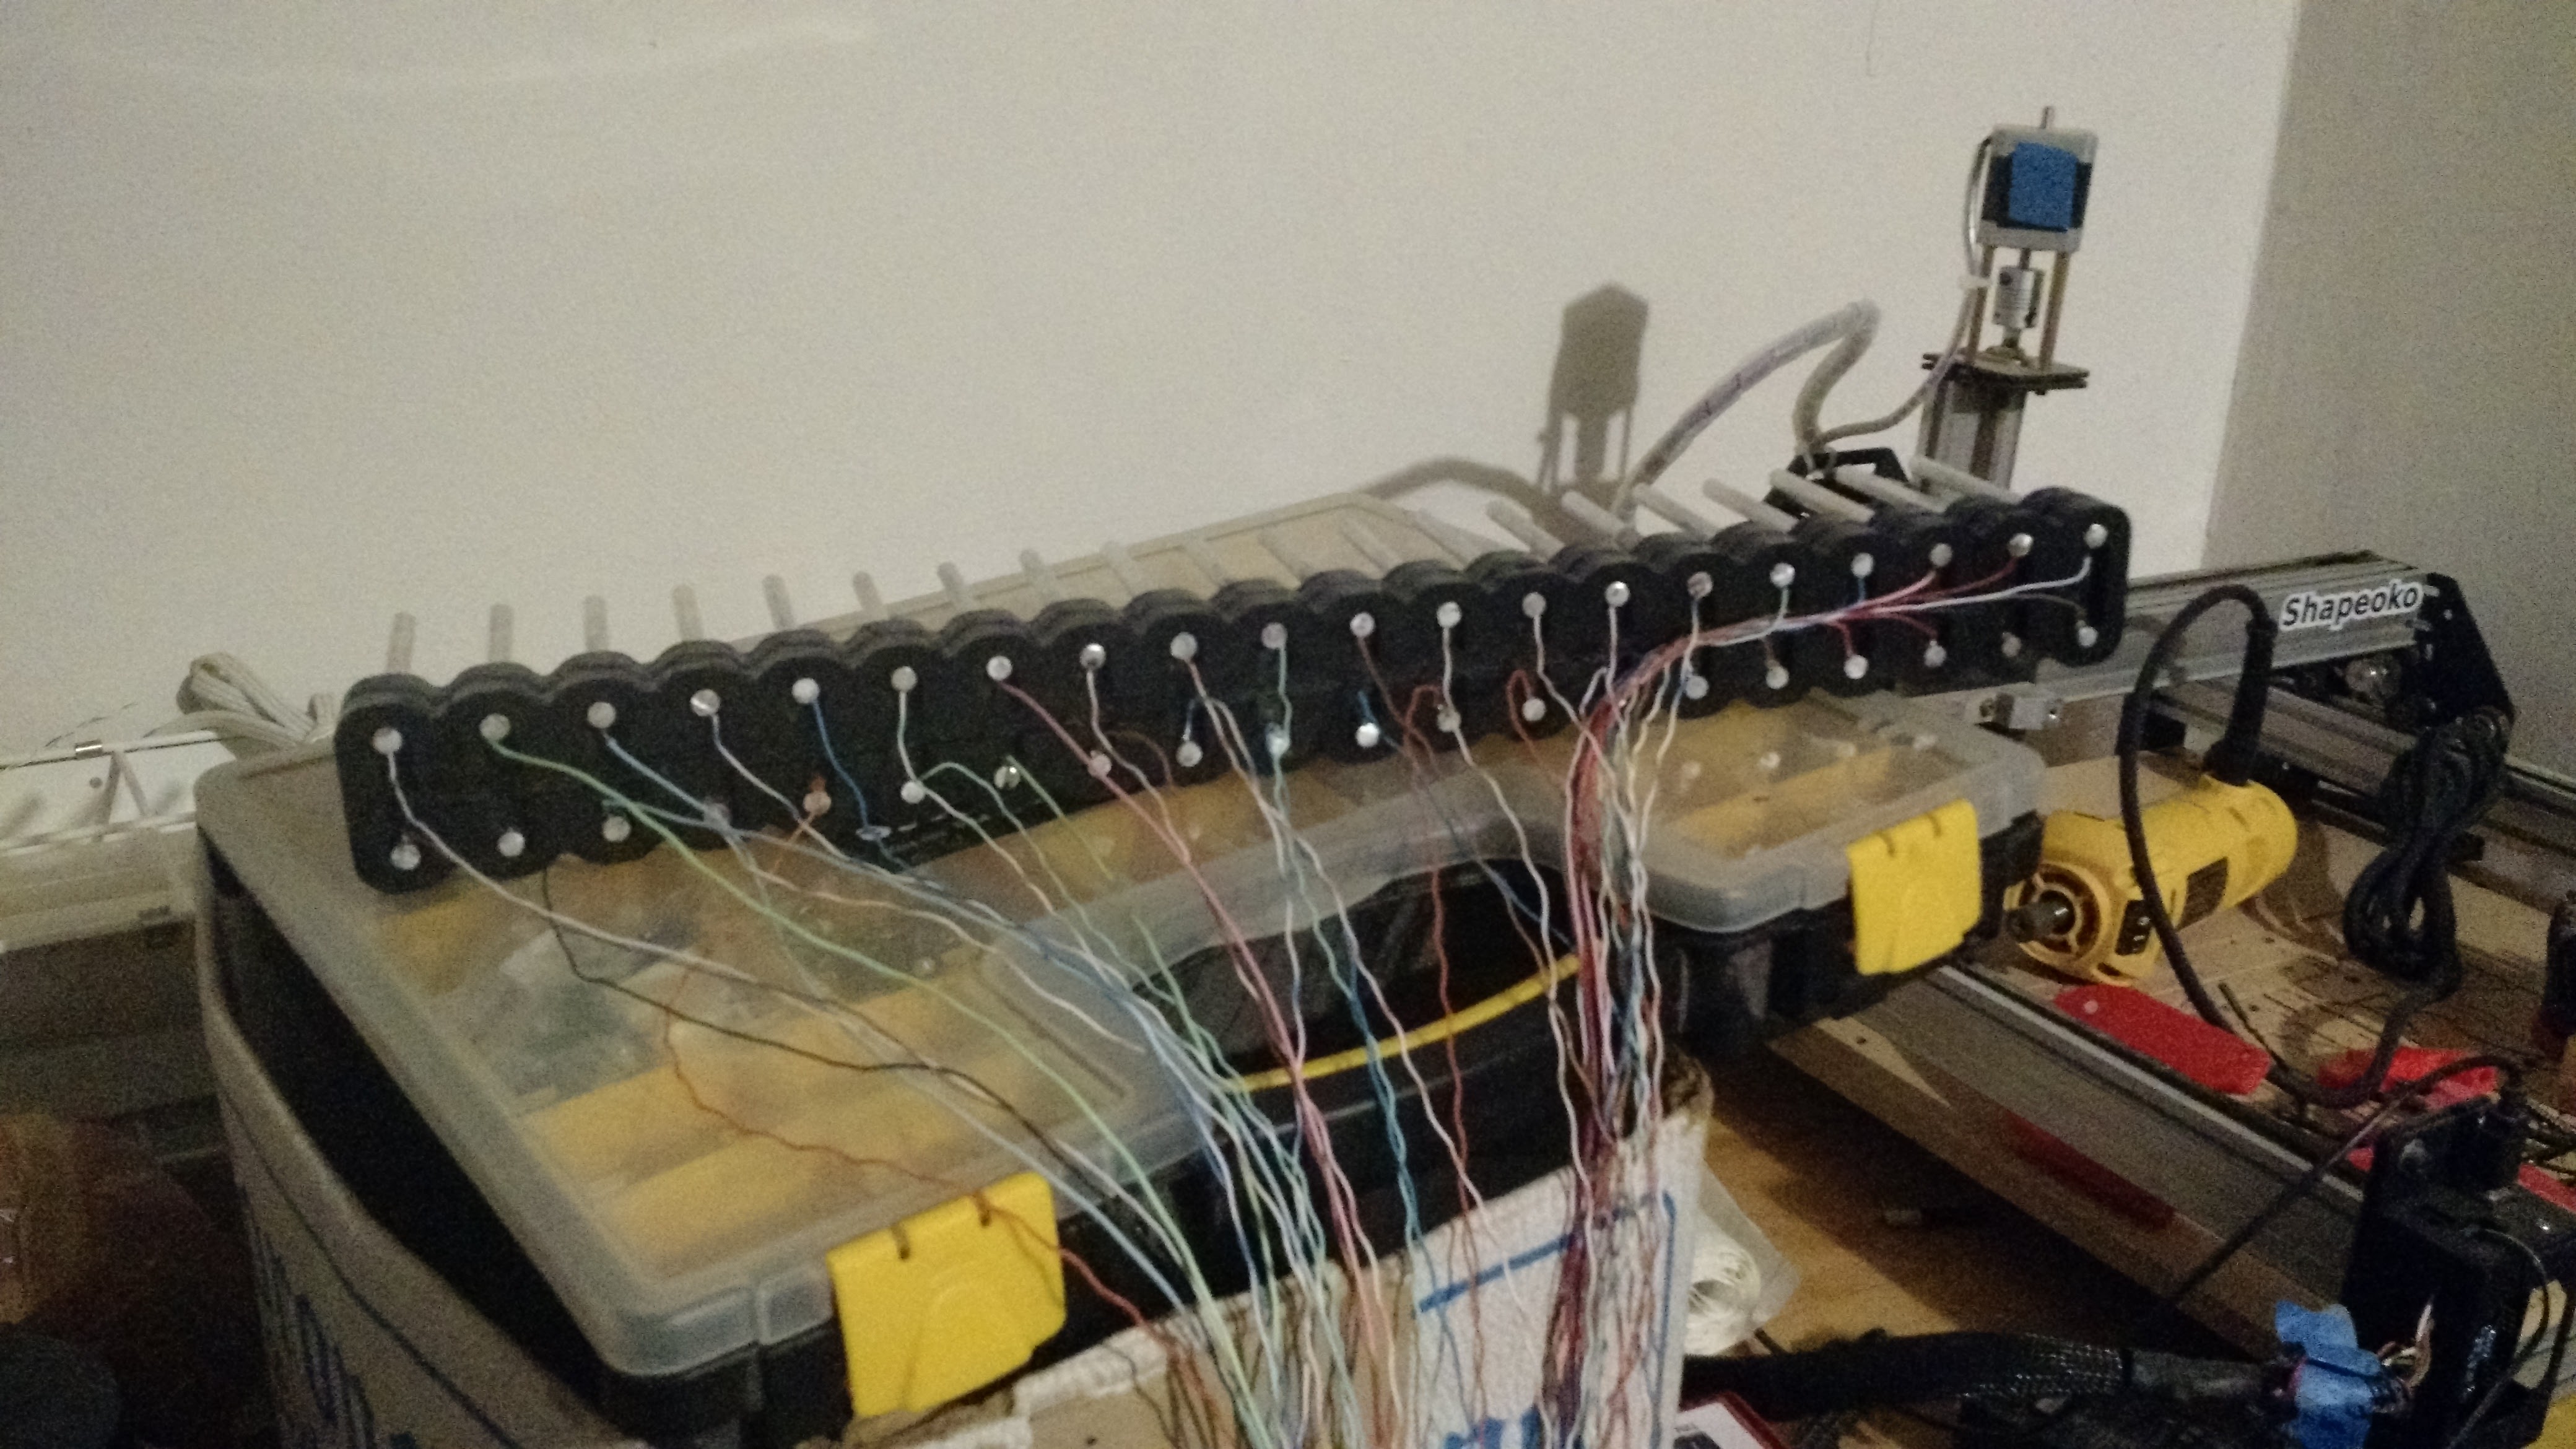
It was then wired to a breakout HAT under the CPU/GPU chip with the help of many tiny hands (or maybe just a few, regular-sized hands).
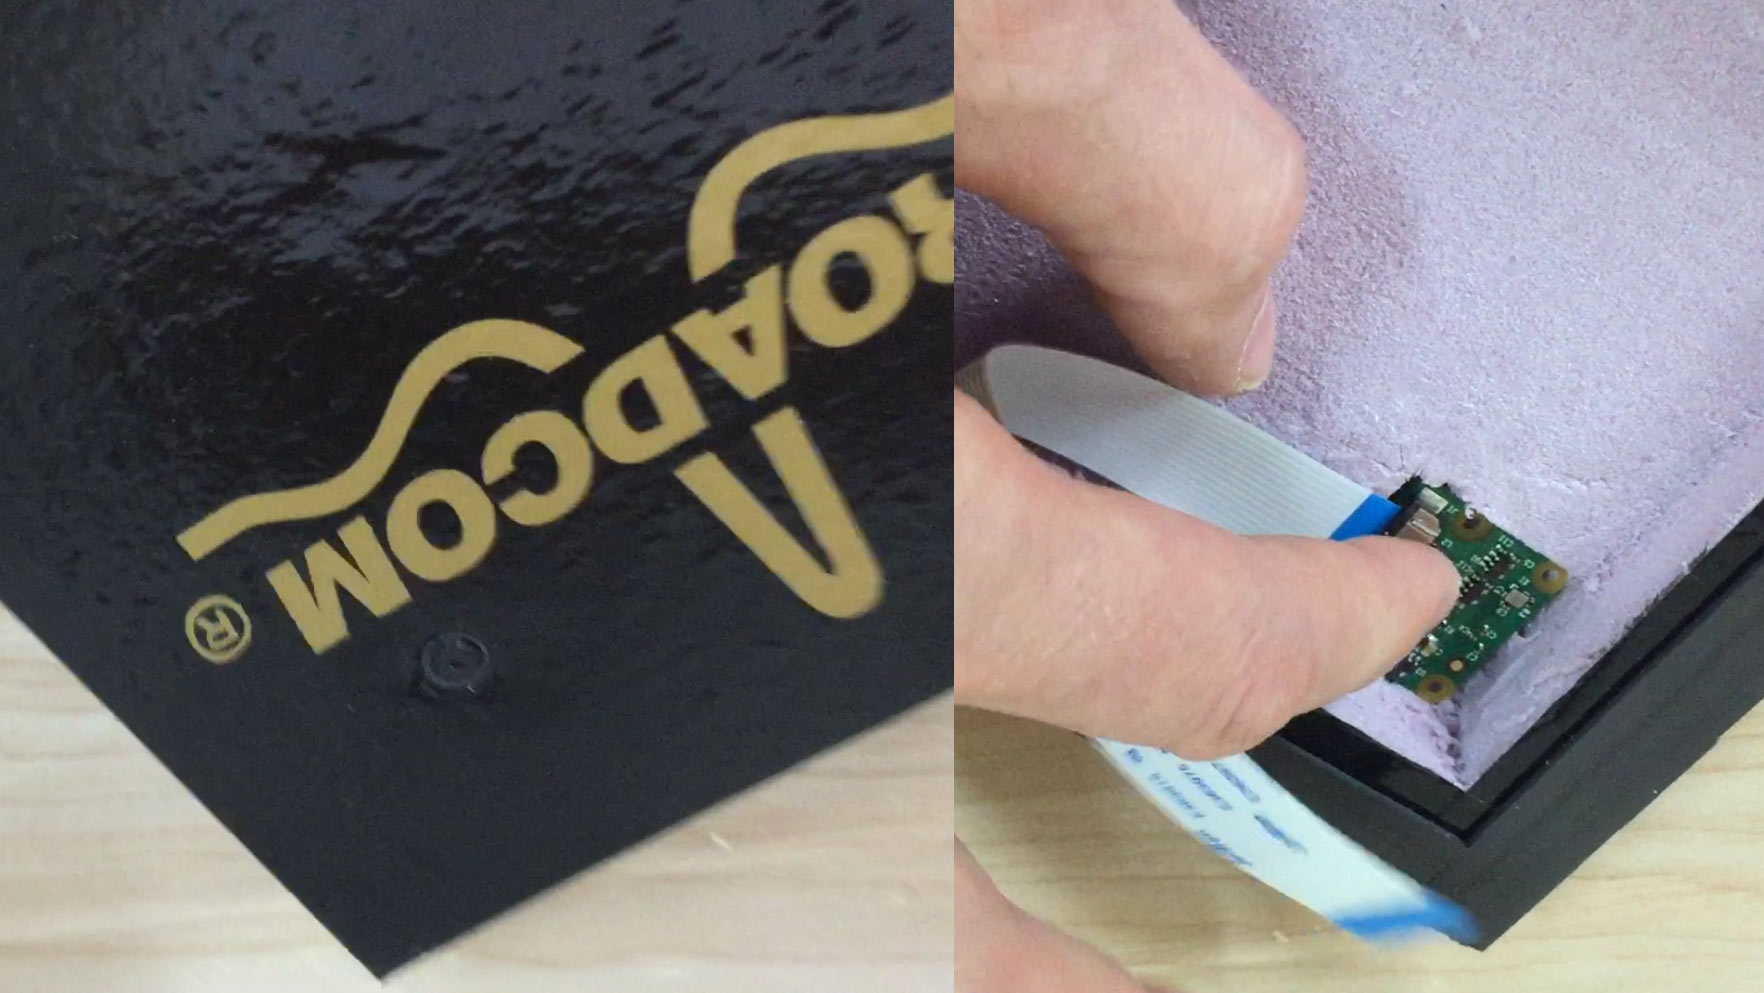
Also, in a very, very sneaky fashion, we even added a Raspberry Pi 8MP camera into the CPU/GPU chip lid! This took time lapse photos from atop our booth of the crowds, which can be seen in the MCM Electronics review video (link TBA).
In the end, it all worked out. It was delivered successfully to Maker Faire. It sat atop our booth. It lit up, took pictures, and partied along with us all weekend long.
It even got a fair bit of publicity from various sources!
At @makerfaire you can buy Raspberry Pis and kits from our friends at @mcmelectronics. Look for the huge Pi! pic.twitter.com/nyhcql5Qfb
— Raspberry Pi (@Raspberry_Pi) May 20, 2016
Right now, @cortlentz1 is getting our @makerfaire stand ready in San Mateo. She spotted this: IT’S FULLY FUNCTIONAL. pic.twitter.com/8WBYAp0ynW
— Raspberry Pi (@Raspberry_Pi) May 19, 2016
We like big boards and we cannot lie…
A @Raspberry_Pi 10X bigger than the usual board: https://t.co/gHiNvCiq4e pic.twitter.com/0tMusvl64O
— Hackster.io (@Hacksterio) June 13, 2016
And on these websites:
WDTN.com (in video)

[…] purchase at the event. Of course, one does not simply arrive at Maker Faire without a project, so Christian Moist (MCM’s web marketing guru and all around awesome guy) and I teamed up to build the biggest […]
[…] is ten times the size of a Raspberry Pi Model B. It was made by our friends Michael Castor and Christian Moist over at MCM Electronics, an official distributor of Raspberry […]
[…] is ten times the size of a Raspberry Pi Model B. It was made by our friends Michael Castor and Christian Moist over at MCM Electronics, an official distributor of Raspberry […]
Congratulations! Amazing work!!!! Would be cool a big SenseHAT or camera attached on the board 🙂
It’s in reality a great and helpful piece of info. I’m glad that you shared this useful information with us. Please keep us informed like this. Thank you for sharing.
[…] isn’t the first enormous Raspberry Pi the world has seen. We’re reminded of the Raspberry Pi Infinity+ that Michael Castor and Christian Moist made for MCM’s booth at the Bay Area Maker Faire back in […]