
Make an ADA Compliant Vanity for Your Bathroom
There aren’t a lot of options out there for ADA compliant vanities. Most are wall-mounted, which I didn’t want. They’re also very expensive. I wanted an ADA compliant vanity that would look have legs, but still accommodate a wheelchair under it. The best part? It’s exactly what I wanted, at a fraction of the cost.
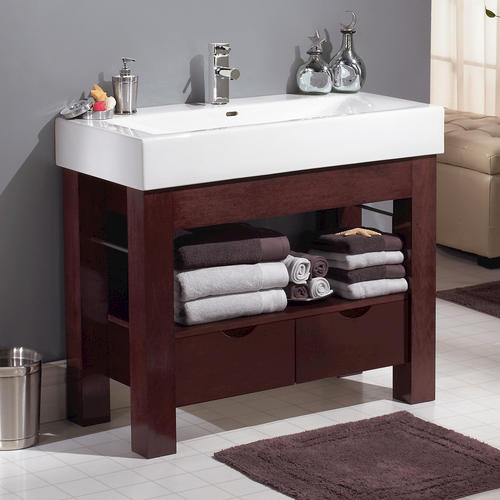
For me, all builds start with a good bit of planning. I found inspiration from a vanity I had spotted at Menards. I liked the chunky look of the legs, but planned on having a wider unit, and it couldn’t have a shelf or drawers, of course.
In SketchUp, I designed everything to get a better feel of how it would turn out, and how it would be assembled. Projects like this are super easy and quick to build in SketchUp; no complex shapes.
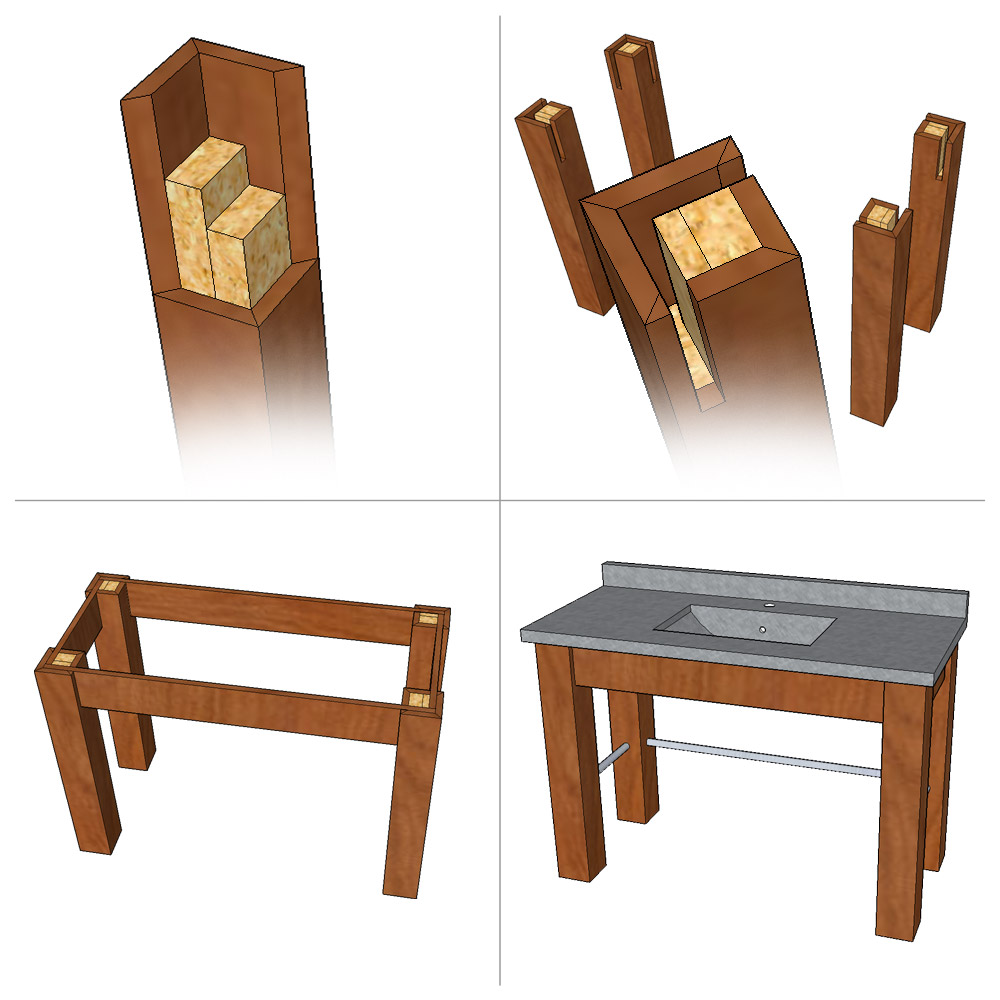
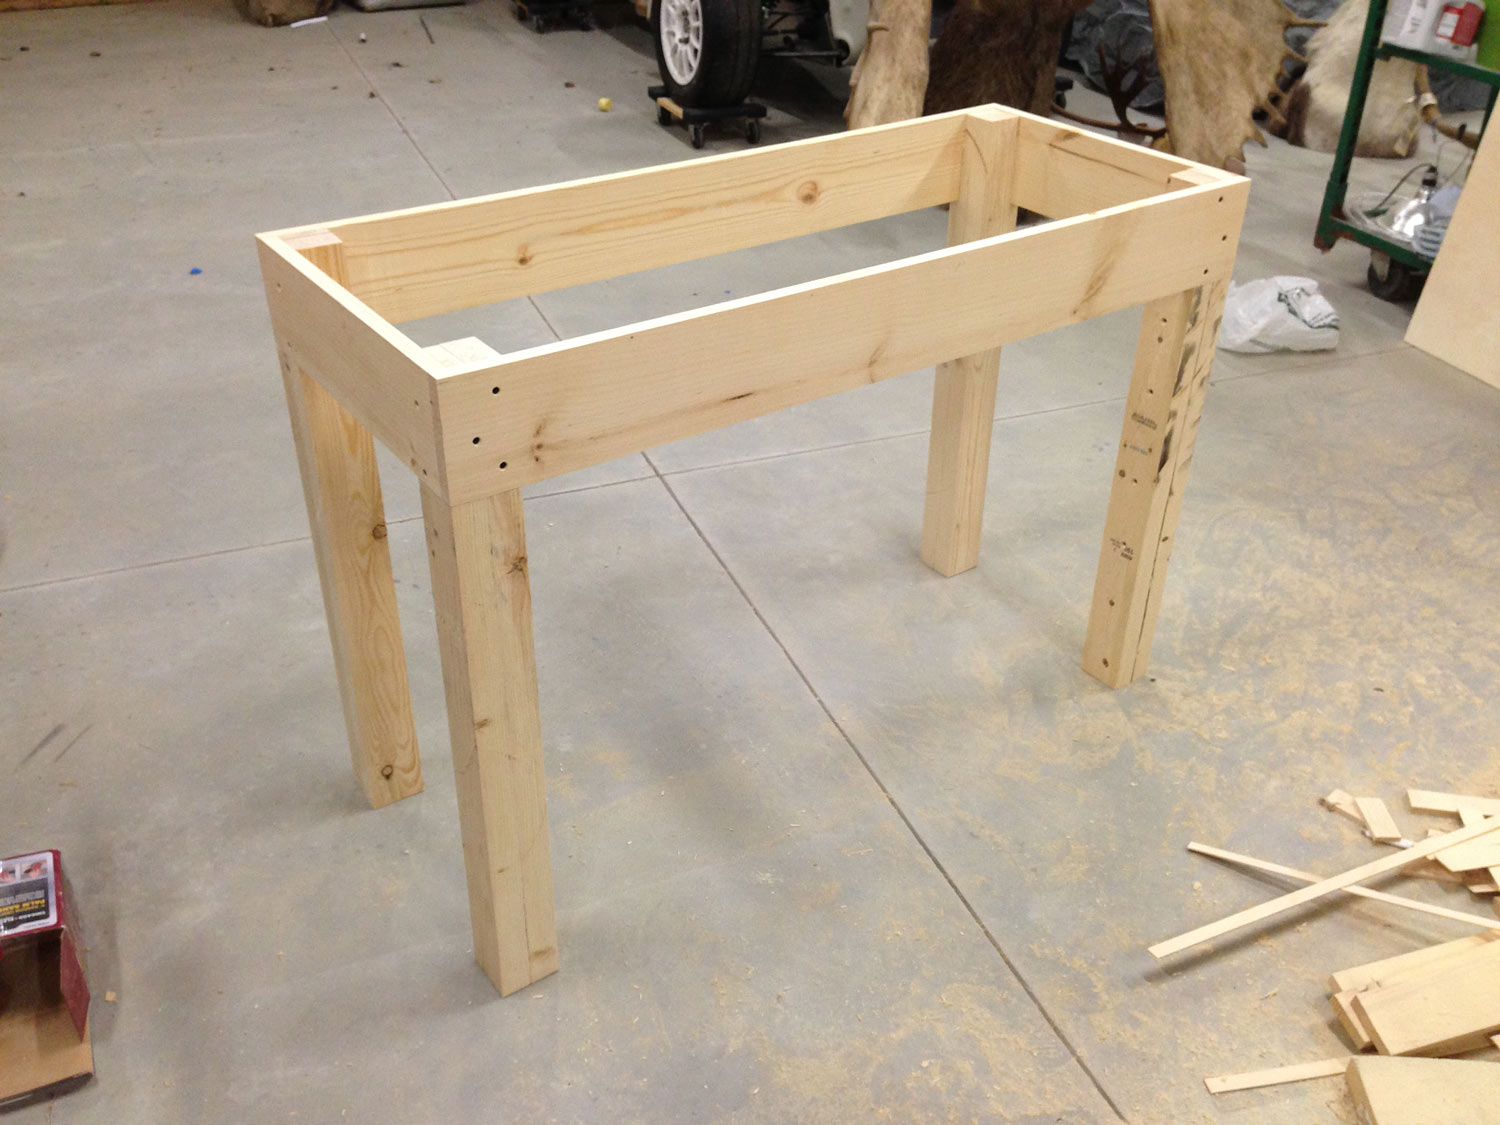
The inside portion of the legs would be made of standard 2x4s. Two were laminated together, then ripped to 3″ x 3″ on the table saw. This would provide the front, rear, and side fascias something to attach to. Each of the legs would be sheathed with 1x stock, which will give the unit the meaty legs I was looking for, and an overall width/depth of 4.5″.
The legs are 32.5″ tall, and the fascias are 5.25″ tall. This provided about 27″ clearance underneath after adding a 1/4″ decorative molding to the bottom of the fascias; plenty for any wheelchair.
After the skeleton was created, it was time to make the outside portion of the legs. Again, these were made from 1x stock, which is really 3/4″ thick. Each was ripped to width and mitered all the way down both sides.
This is where it got a little complicated. My design called for aluminum tubes to connect the sides and rear legs. I ran threaded rod through the legs, then the tubes and cinched them down with nuts on each end. This meant the rods had to go through the 2×4 cores of the legs, as well as the inside of the 2/4″ thick leg sheathing. Then it needed to be covered by the outside of the leg sheathing, so the nuts couldn’t be seen. Whew.
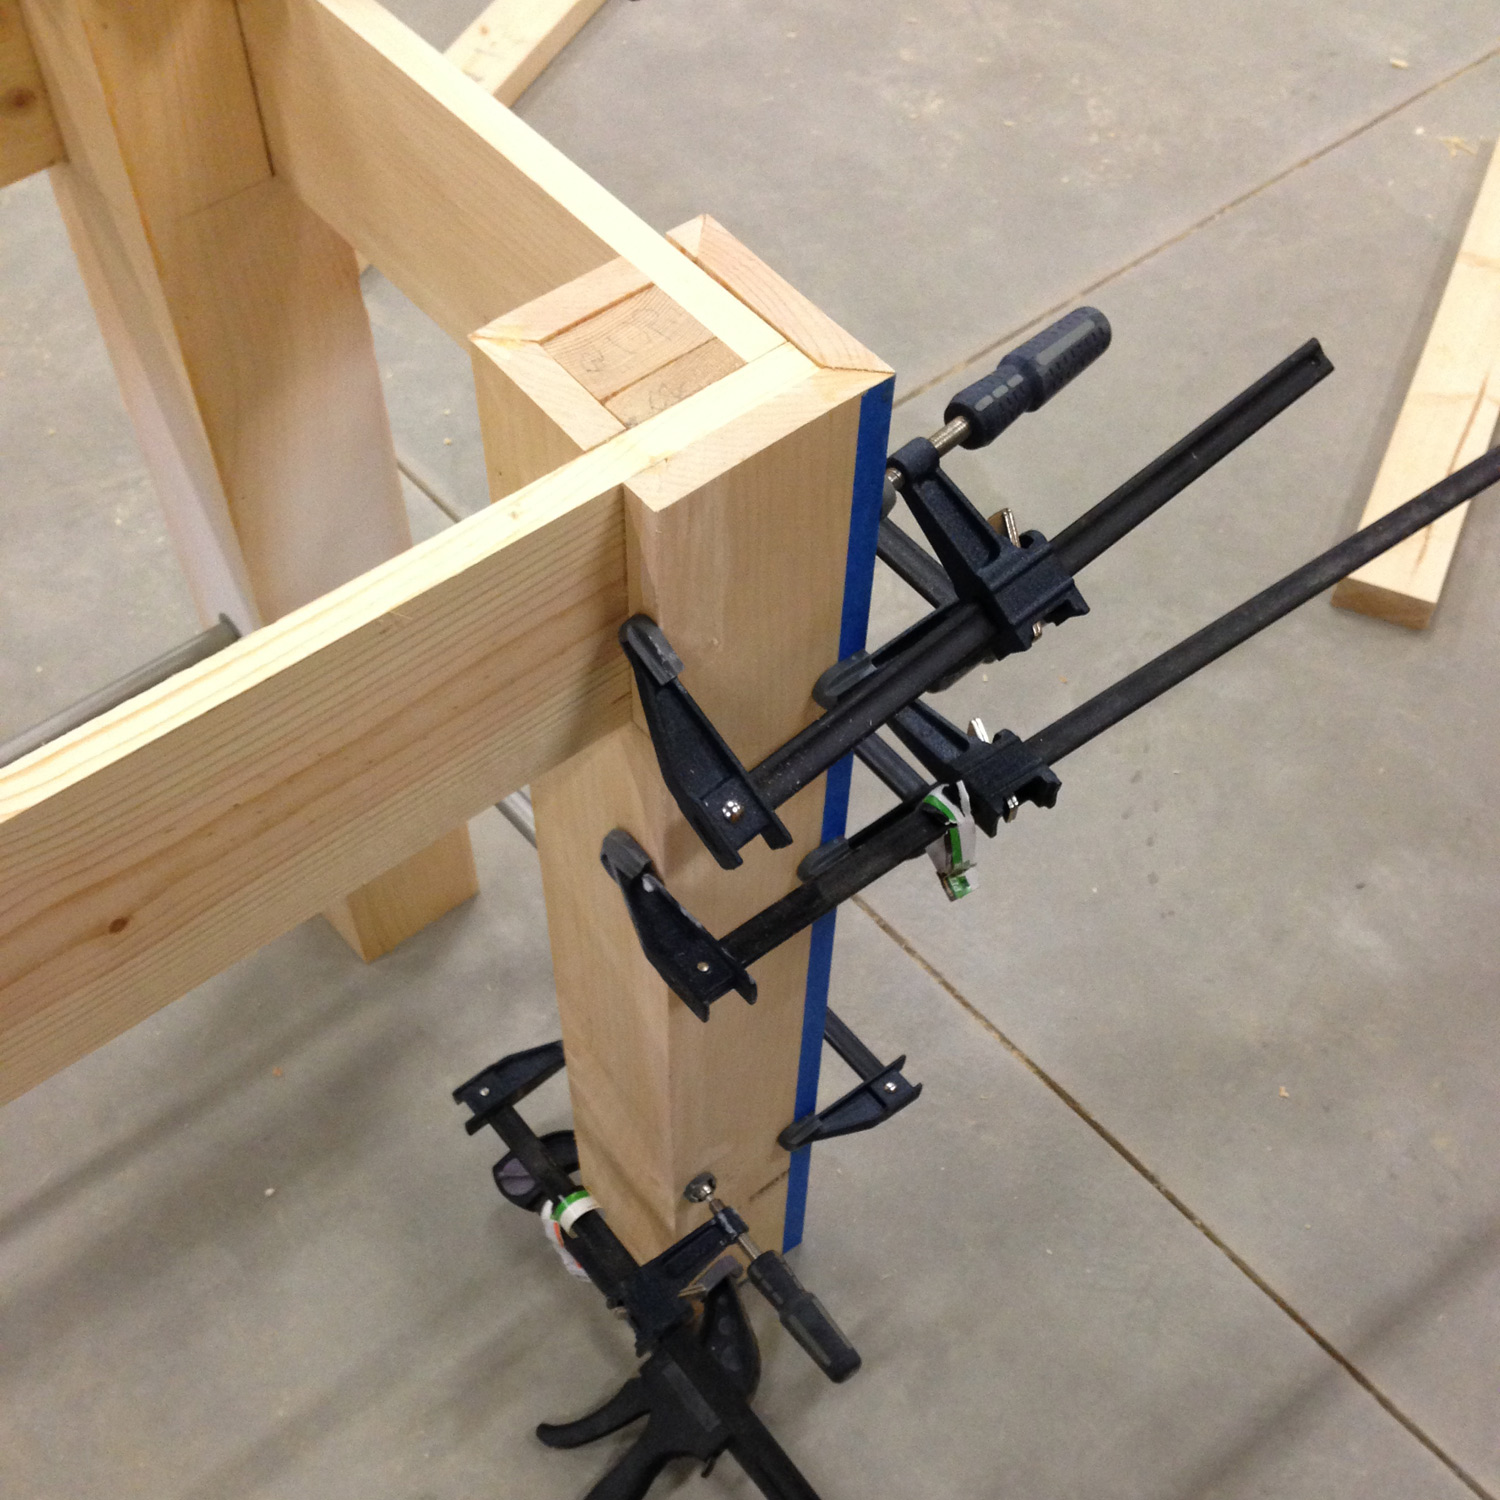
After the rods were installed, the remaining outside leg sheathing was glued. Quick tip – when gluing a miter, tape works amazingly well as a clamp.
Putting the vanity in place with its top before finishing ensured everything was going to work out as planned.
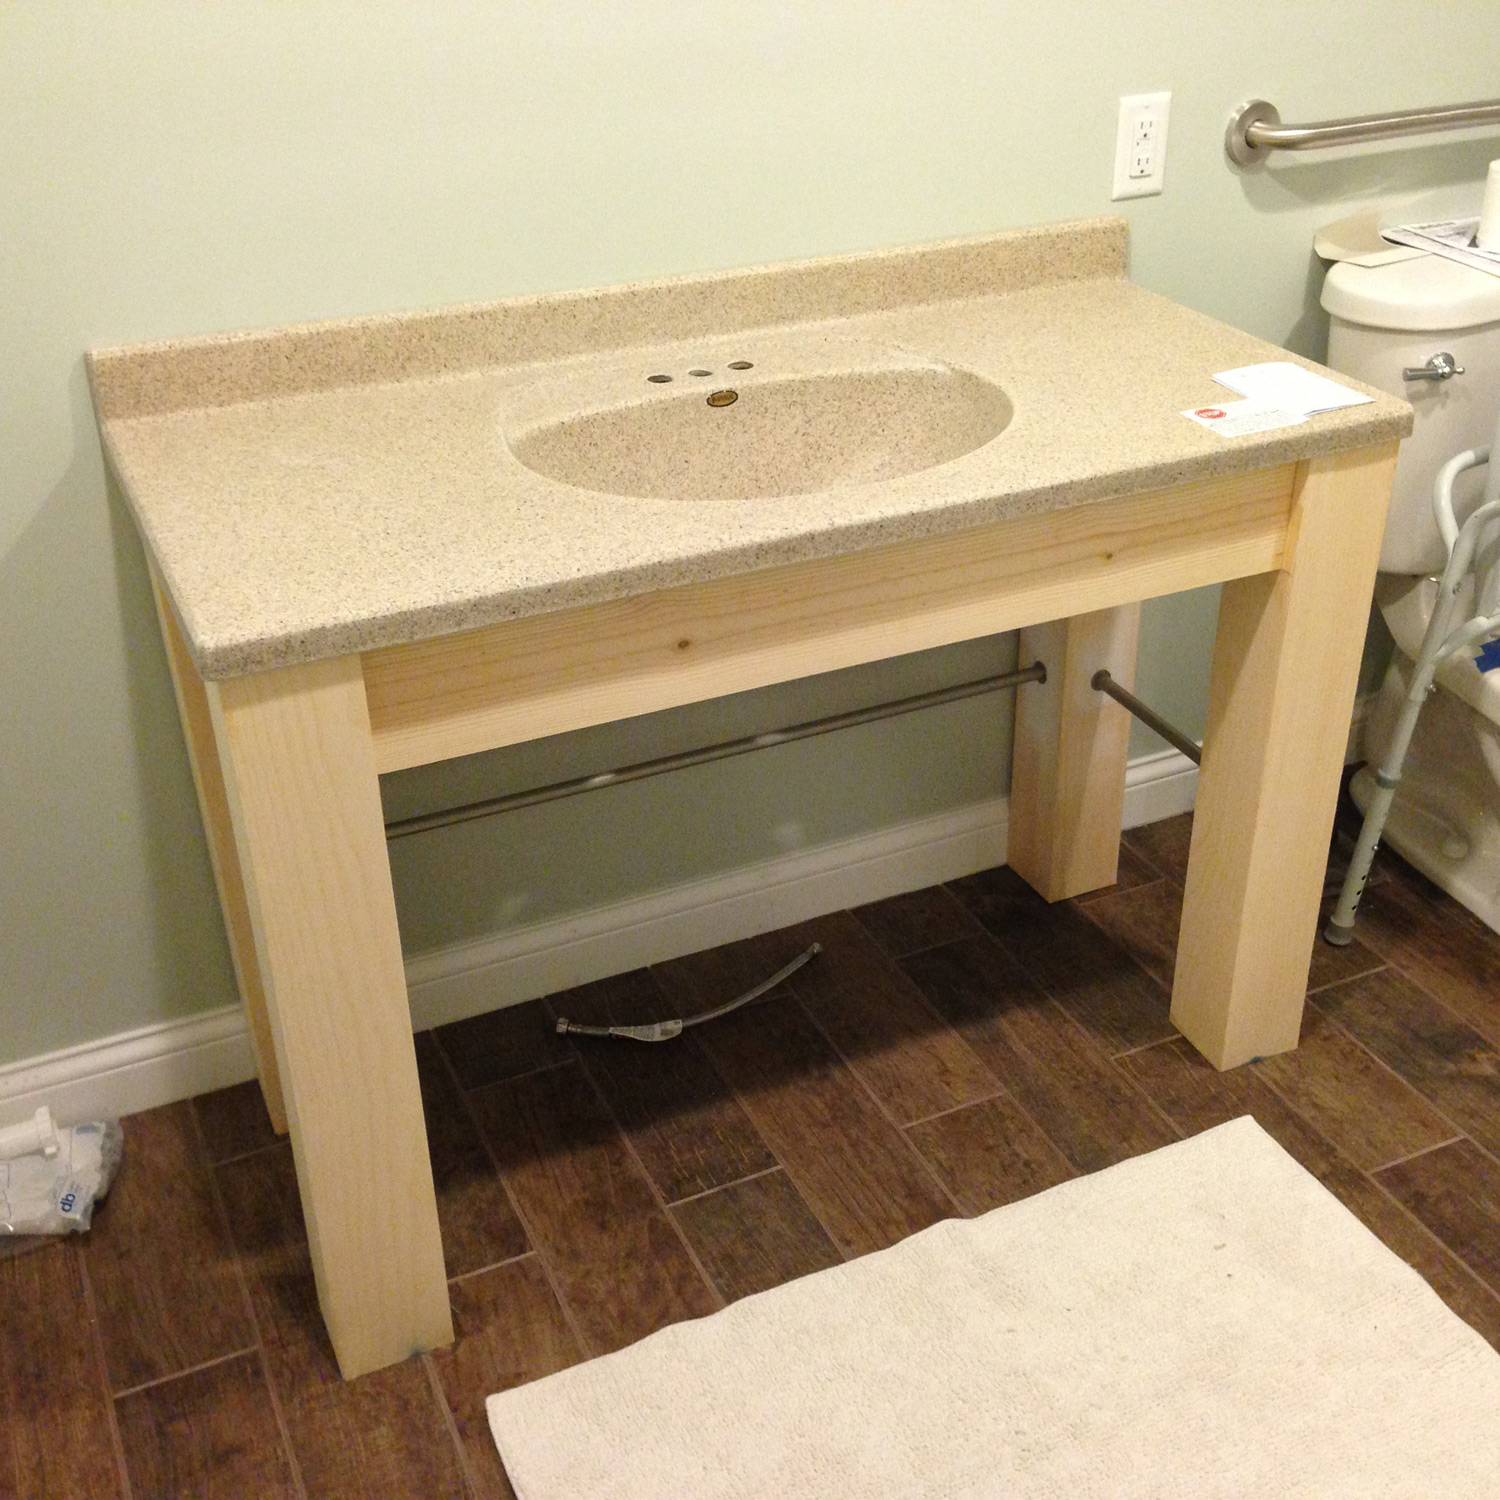
A 1/4″ quarter round was added to the bottom edge of all fascias and the rods were taped off. I had planned on doing a weathered finish with flat white over the brown (which is the reason for paint instead of stain), but it turns out the brown looked so good that I left it! The whole thing was primed, then painted, then cleared with a satin clear.

Not including the counter/sink, which will vary in price, the material list looked like this:
3) 2x4s for inside legs, cut at 32.5″ tall
2) 1x6x6 Quality Pine for Fascias
8) 1×6 Quality Pine for Leg Sheathing cut at 32.5″ tall
2) 6ft Threaded 1/4″ Rod
2) 6ft Alum 1/2″ Tube
Misc screws
Spray cans of primer and paint
All of that amounted to less than $120 in materials, for a piece that looks like it costs four times that!

Great job – I wish I had the means to build one of these as I have been looking for months for a vanity for my 83 year old mother and they are practically impossible to find without paying around $900
Thanks!
How do i buy one of these? I am having such hard time finding an ADA complaint sink, and I need it ASAP.
Not sure. That’s why I built it!
Are the aluminum rods decorative or do they provide support?
How big was the sink?
The vanity top was 22 deep and 49 wide.
They provide support in that they hold the legs apart on a horizontal axis.
Looks great. Going to build using your design. What was the dimension of the sink top?
Thanks! It would have been a 19″ wide top.
OMG, this is what I was looking for when I move. I came across this on Google and at then end realized I know you!! What are the odds?!
Regina
Oh nice!!!! Hi Regina!
The sink top looks wider than 19”. Can you verify that please?
What is width of entire vanity without the top.
Thank you
That should have been 49″, not 19″.
Do you have the overall product dimensions? I’m not seeing the depth anywhere. Thanks!
The vanity top is 22 deep and 49 wide. The base, to the outer most edges is 21.25 (.75 overhang on the front, flush on the rear) x 48 wide (half inch overhang for the counter on each side).
Hello, do you make these to sell? I would like to order one, if possible. I would get my own vanity top but really love your design.
No, unfortunately I do not. It was just a one-time project.
Are they legs tapered? Or did you put the 3/4 all the way down the legs (on outside)- the horizontal pieces are attached, then the vertical but the verts on the outside are on top of the horizontals (so hollow? Tapered? Or outside pieces?)
Steve, they are not tapered. Essentially the legs are two 2x4s laminated together on the inside, then sheathed with 3/4″ all the way down.
This is a nice design! I am going to try to build it for my husband, who is in a wheelchair. I am building a smaller version of it. I need the sink to sit down inside the fascia a bit, due to the type of sink I bought. Would you have any suggestions on how to accomplish that? As far as the legs go, the sink will hit them.
Hmm. Not necessarily. The tolerances are already a bit tight from the bottom of the facia to the persons legs. It could be the type of sink you bought may not be ideal.
Yeah, you are probably right. It is only 30 inches wide. I need a width clearance of at least 22 inches. The legs will take up a lot of that room.