
Plastic and Plexiglass Bender on a Budget
First a little back story on this one. Since I started commuting to work more often on the DRZ, and from farther away, the wind has started getting to me. The design of the DRZ headlight bezel deflects wind directly at your chest. For that reason, going over 60 MPH or so gets to be a little uncomfortable.
There is a thing called the “$6 Windscreen” which a very crafty person invented that fits very well on DRZ400s or DR650s. Normally, they’re made from a $6 plastic wastebasket (hence the name). A template is traced onto the wastebasket and then cut out. It’s hand bent and ends up being a dirt-cheap windscreen, once attached to the headlight bezel of your DR or DRZ.
Example of the $6 windscreen
I loved the idea, and I loved the design. With aftermarket screens costing upwards of $100, this sounded like a great option. But I wasn’t in love with the solid white or black look. A clear screen would be better. Unfortunately, plexiglass isn’t easily bent by hand, and usually requires heat to be formed. Heat guns could work, but a tool that only heats the material along a straight line would be better to achieve this design. And so the Googling began. I came upon an article at Dale’s Homemade Robots, which detailed exactly how to go about doing this. My bender came out just a little different, in order to keep costs down and use mostly what I had available.
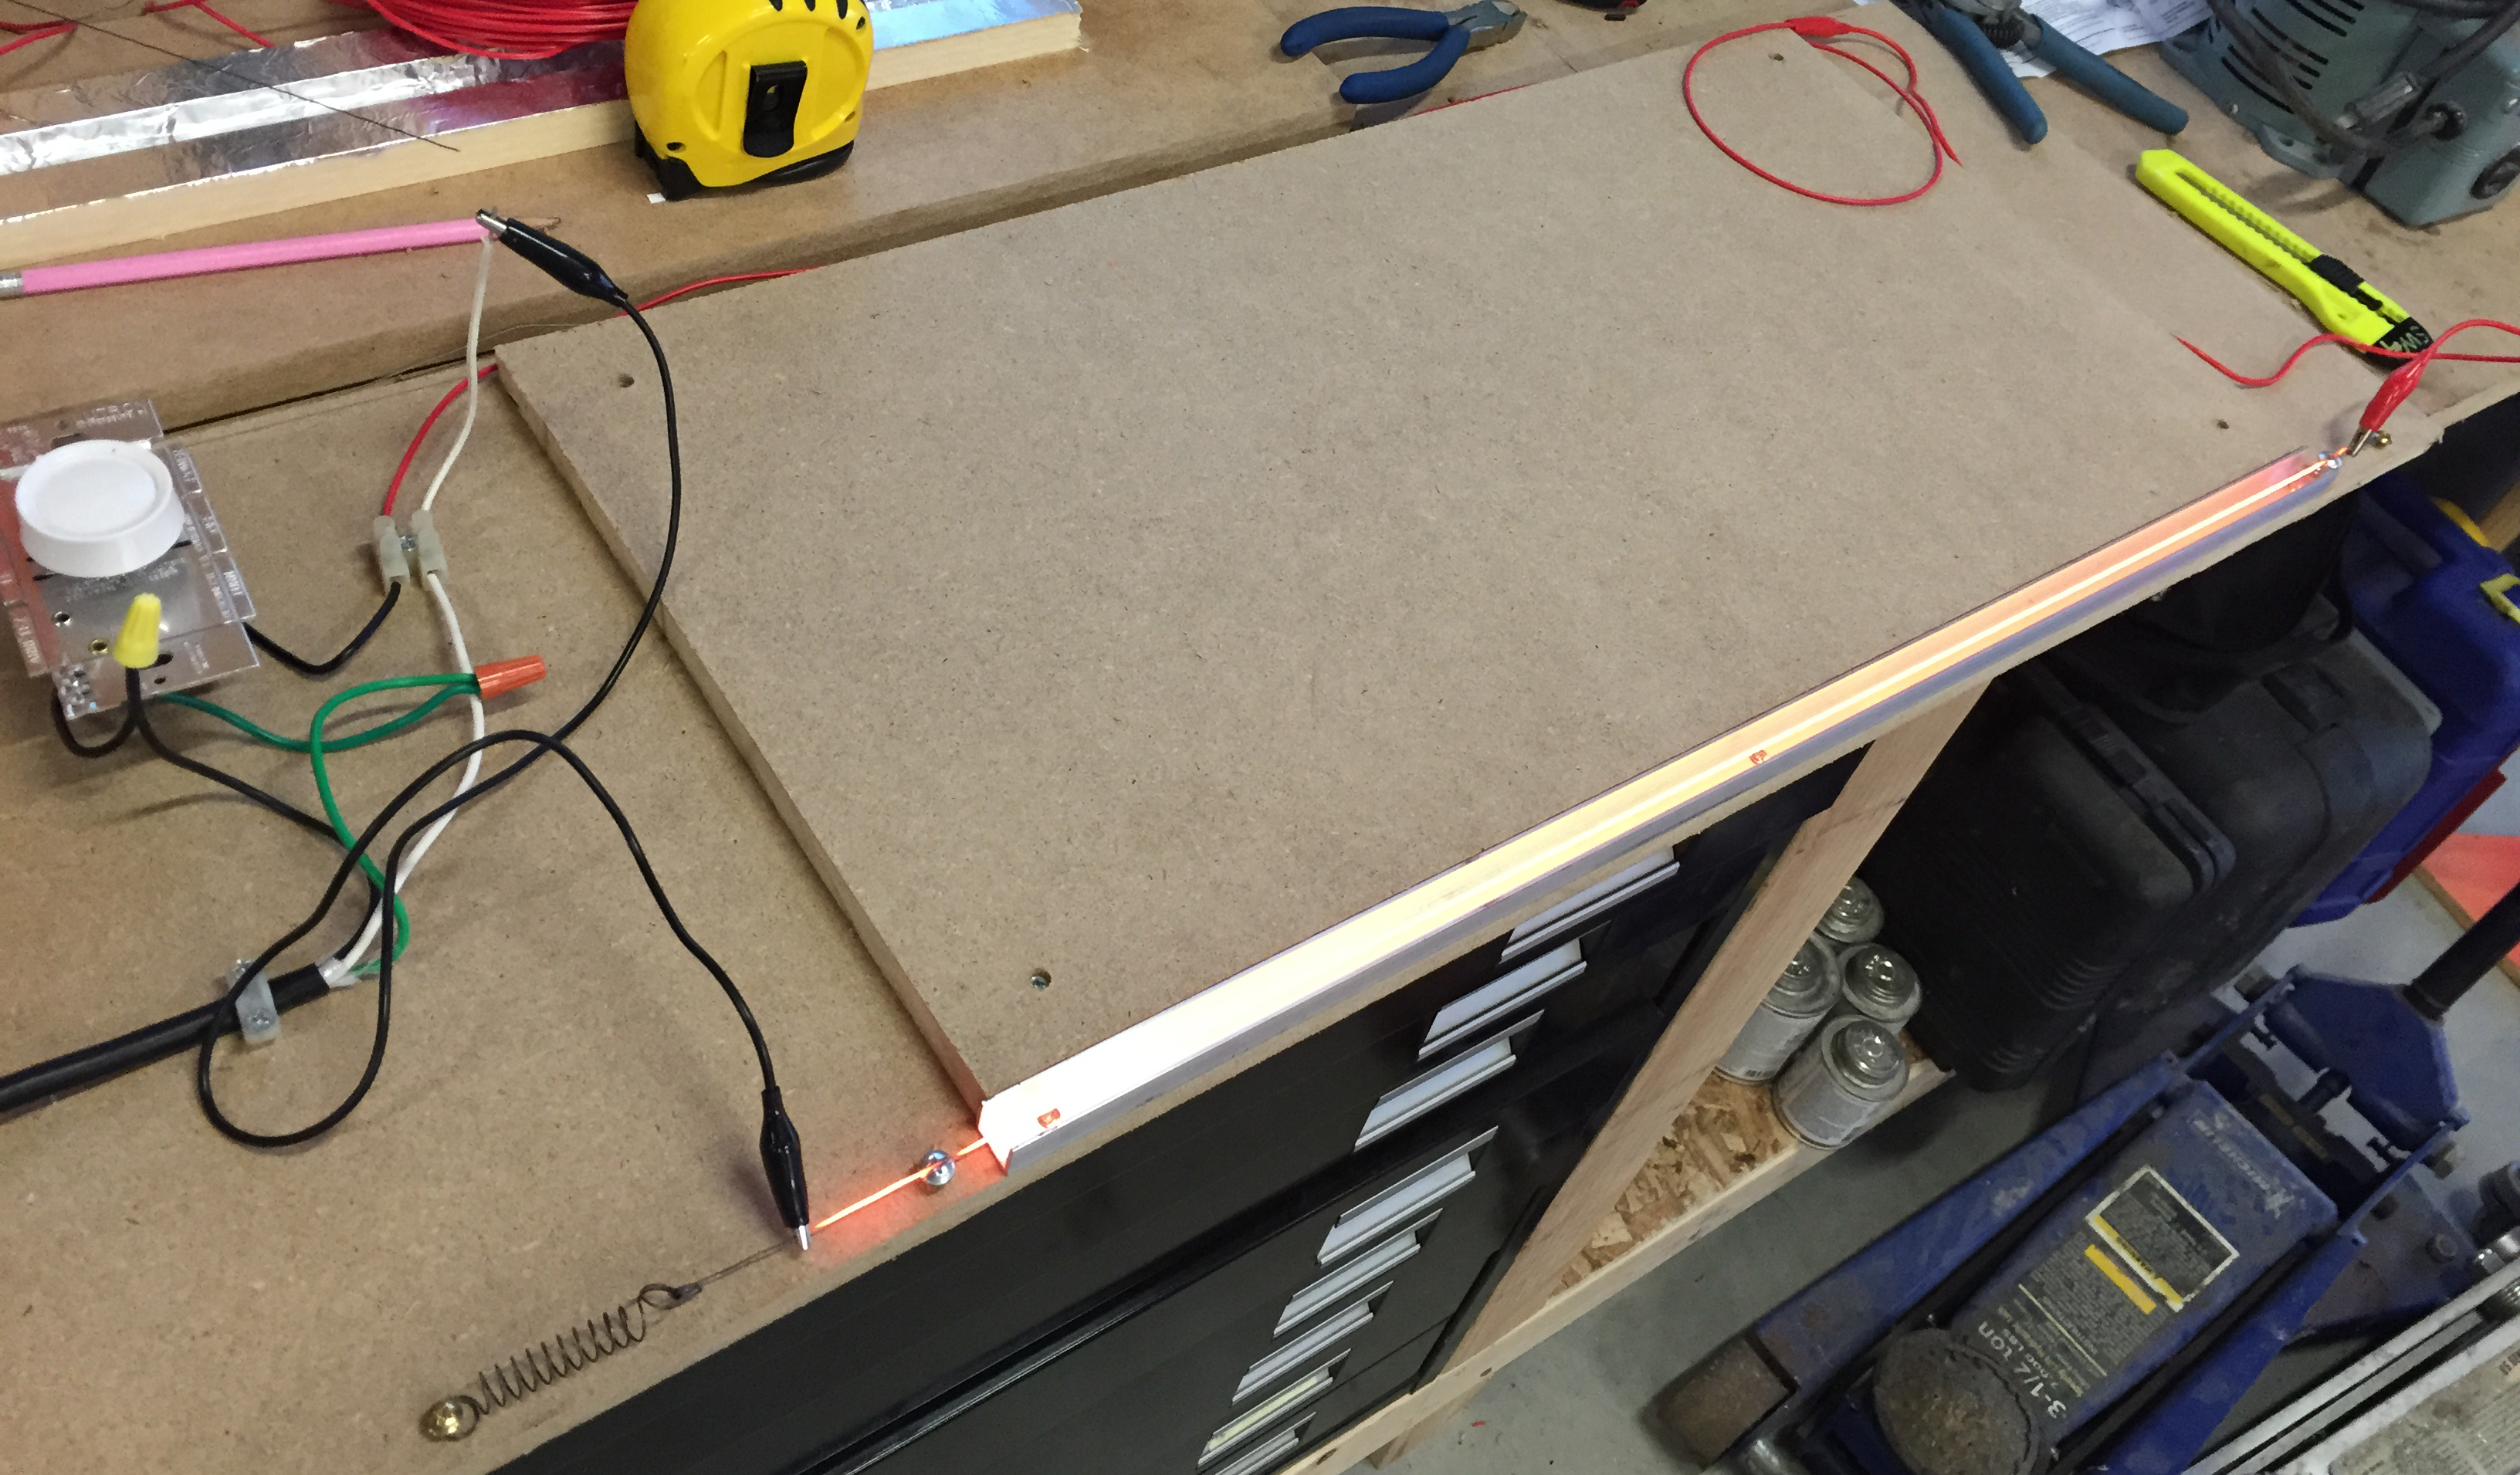
Here is what the end product looked like.
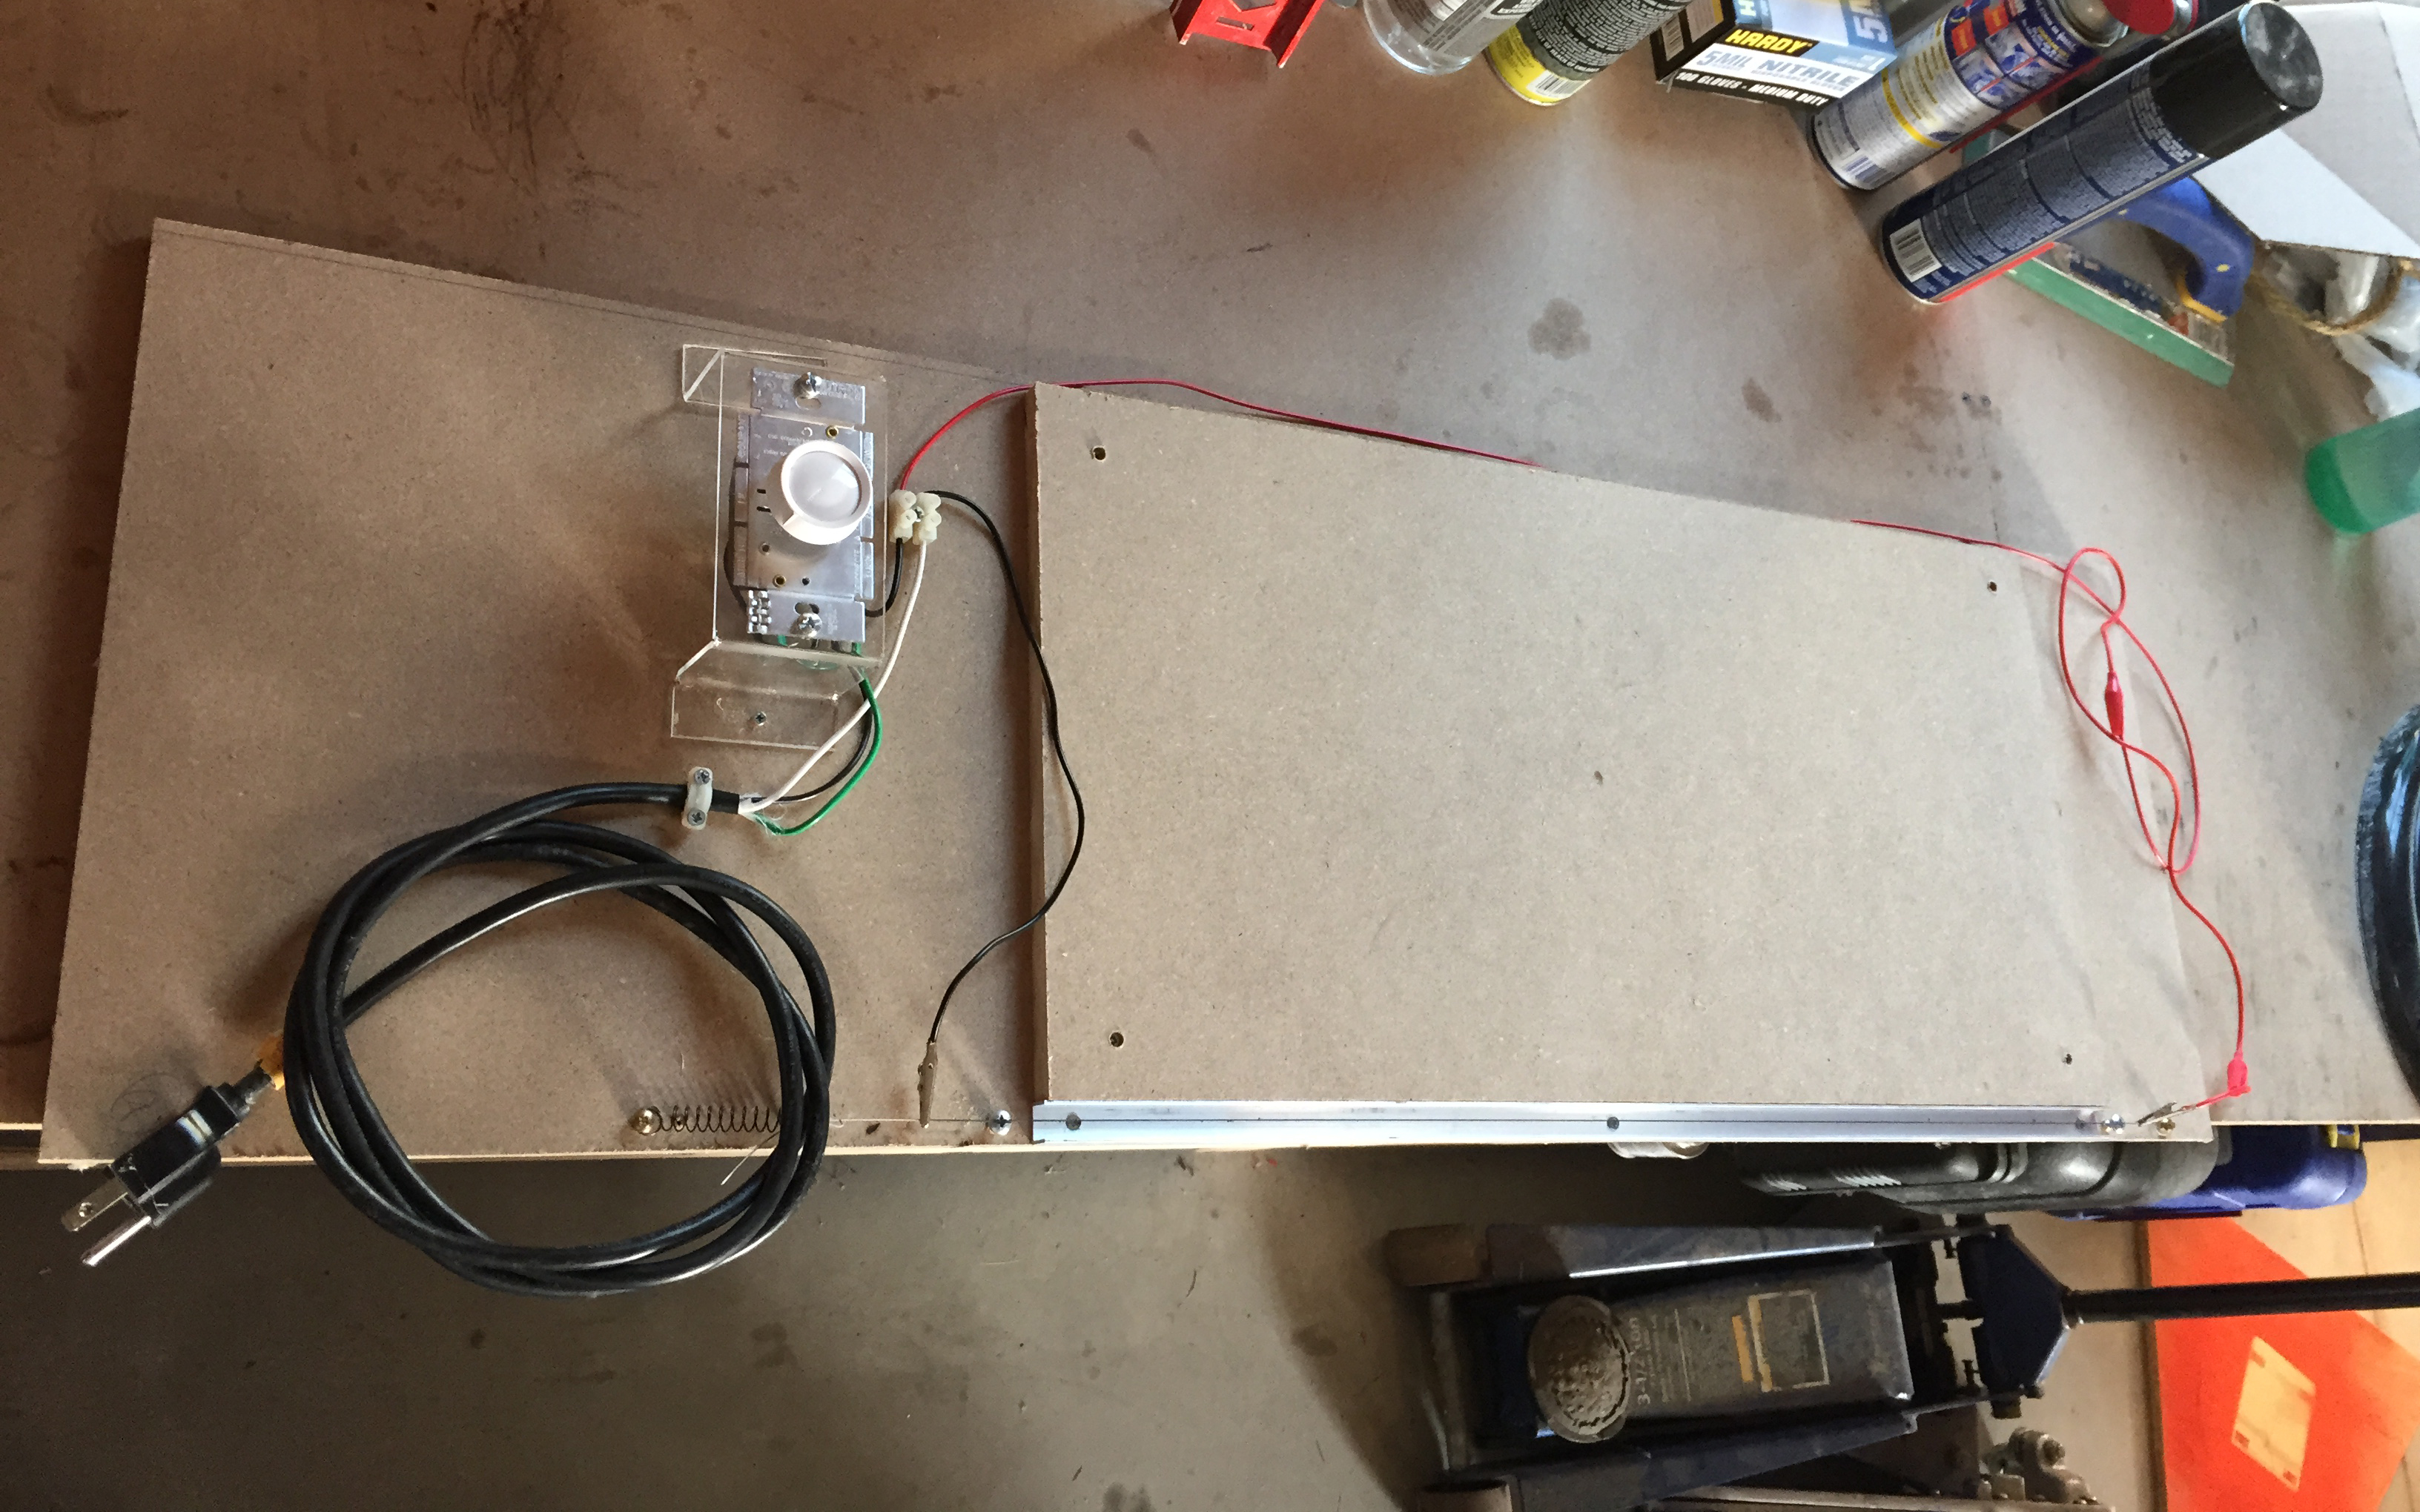
…and here is the filament with power running through it.
Instead of using a battery, I decided on using AC power, routed through a knob-style dimmer switch. This would enable me to fine-tune the heat coming off the wire. For the wire, I initially tried some salvaged nichrome from an old heat gun. I had trouble straightening the wire enough that it wouldn’t sag when heated, being that it comes coiled from the gun. Nichrome is available in spool form from various places online, but with time of the essence, I ended up using a guitar string I had laying around. Something like these strings work well, as they have a steel core and are nickel wound (the “ni” from nichrome). The strings still stretch when heated, so I employed Dale’s method of using a small spring to keep tension on the wire.
The parts list looked something like this:
- 1/2″ MDF for base and bed (free from scraps)
- 3-prong plug (I used an old computer plug, free)
- Knob-type dimmer switch (about $5)
- 1/2″ x 1/2″ aluminum U-channel (about $8)
- A couple of alligator clips (scrap pile)
- Guitar Strings (laying around)
- Small spring (free, from my “jar o springs”)
- Misc hardware (free)
Anyhow, with a little practice, I was able to achieve the $6 windscreen with plexiglass. A quick go-around with a file finished all the edges and corners. The bender is perfect for making all sorts of things, from business card holders to wind fairings to PC enclosures to car audio enclosure covers.
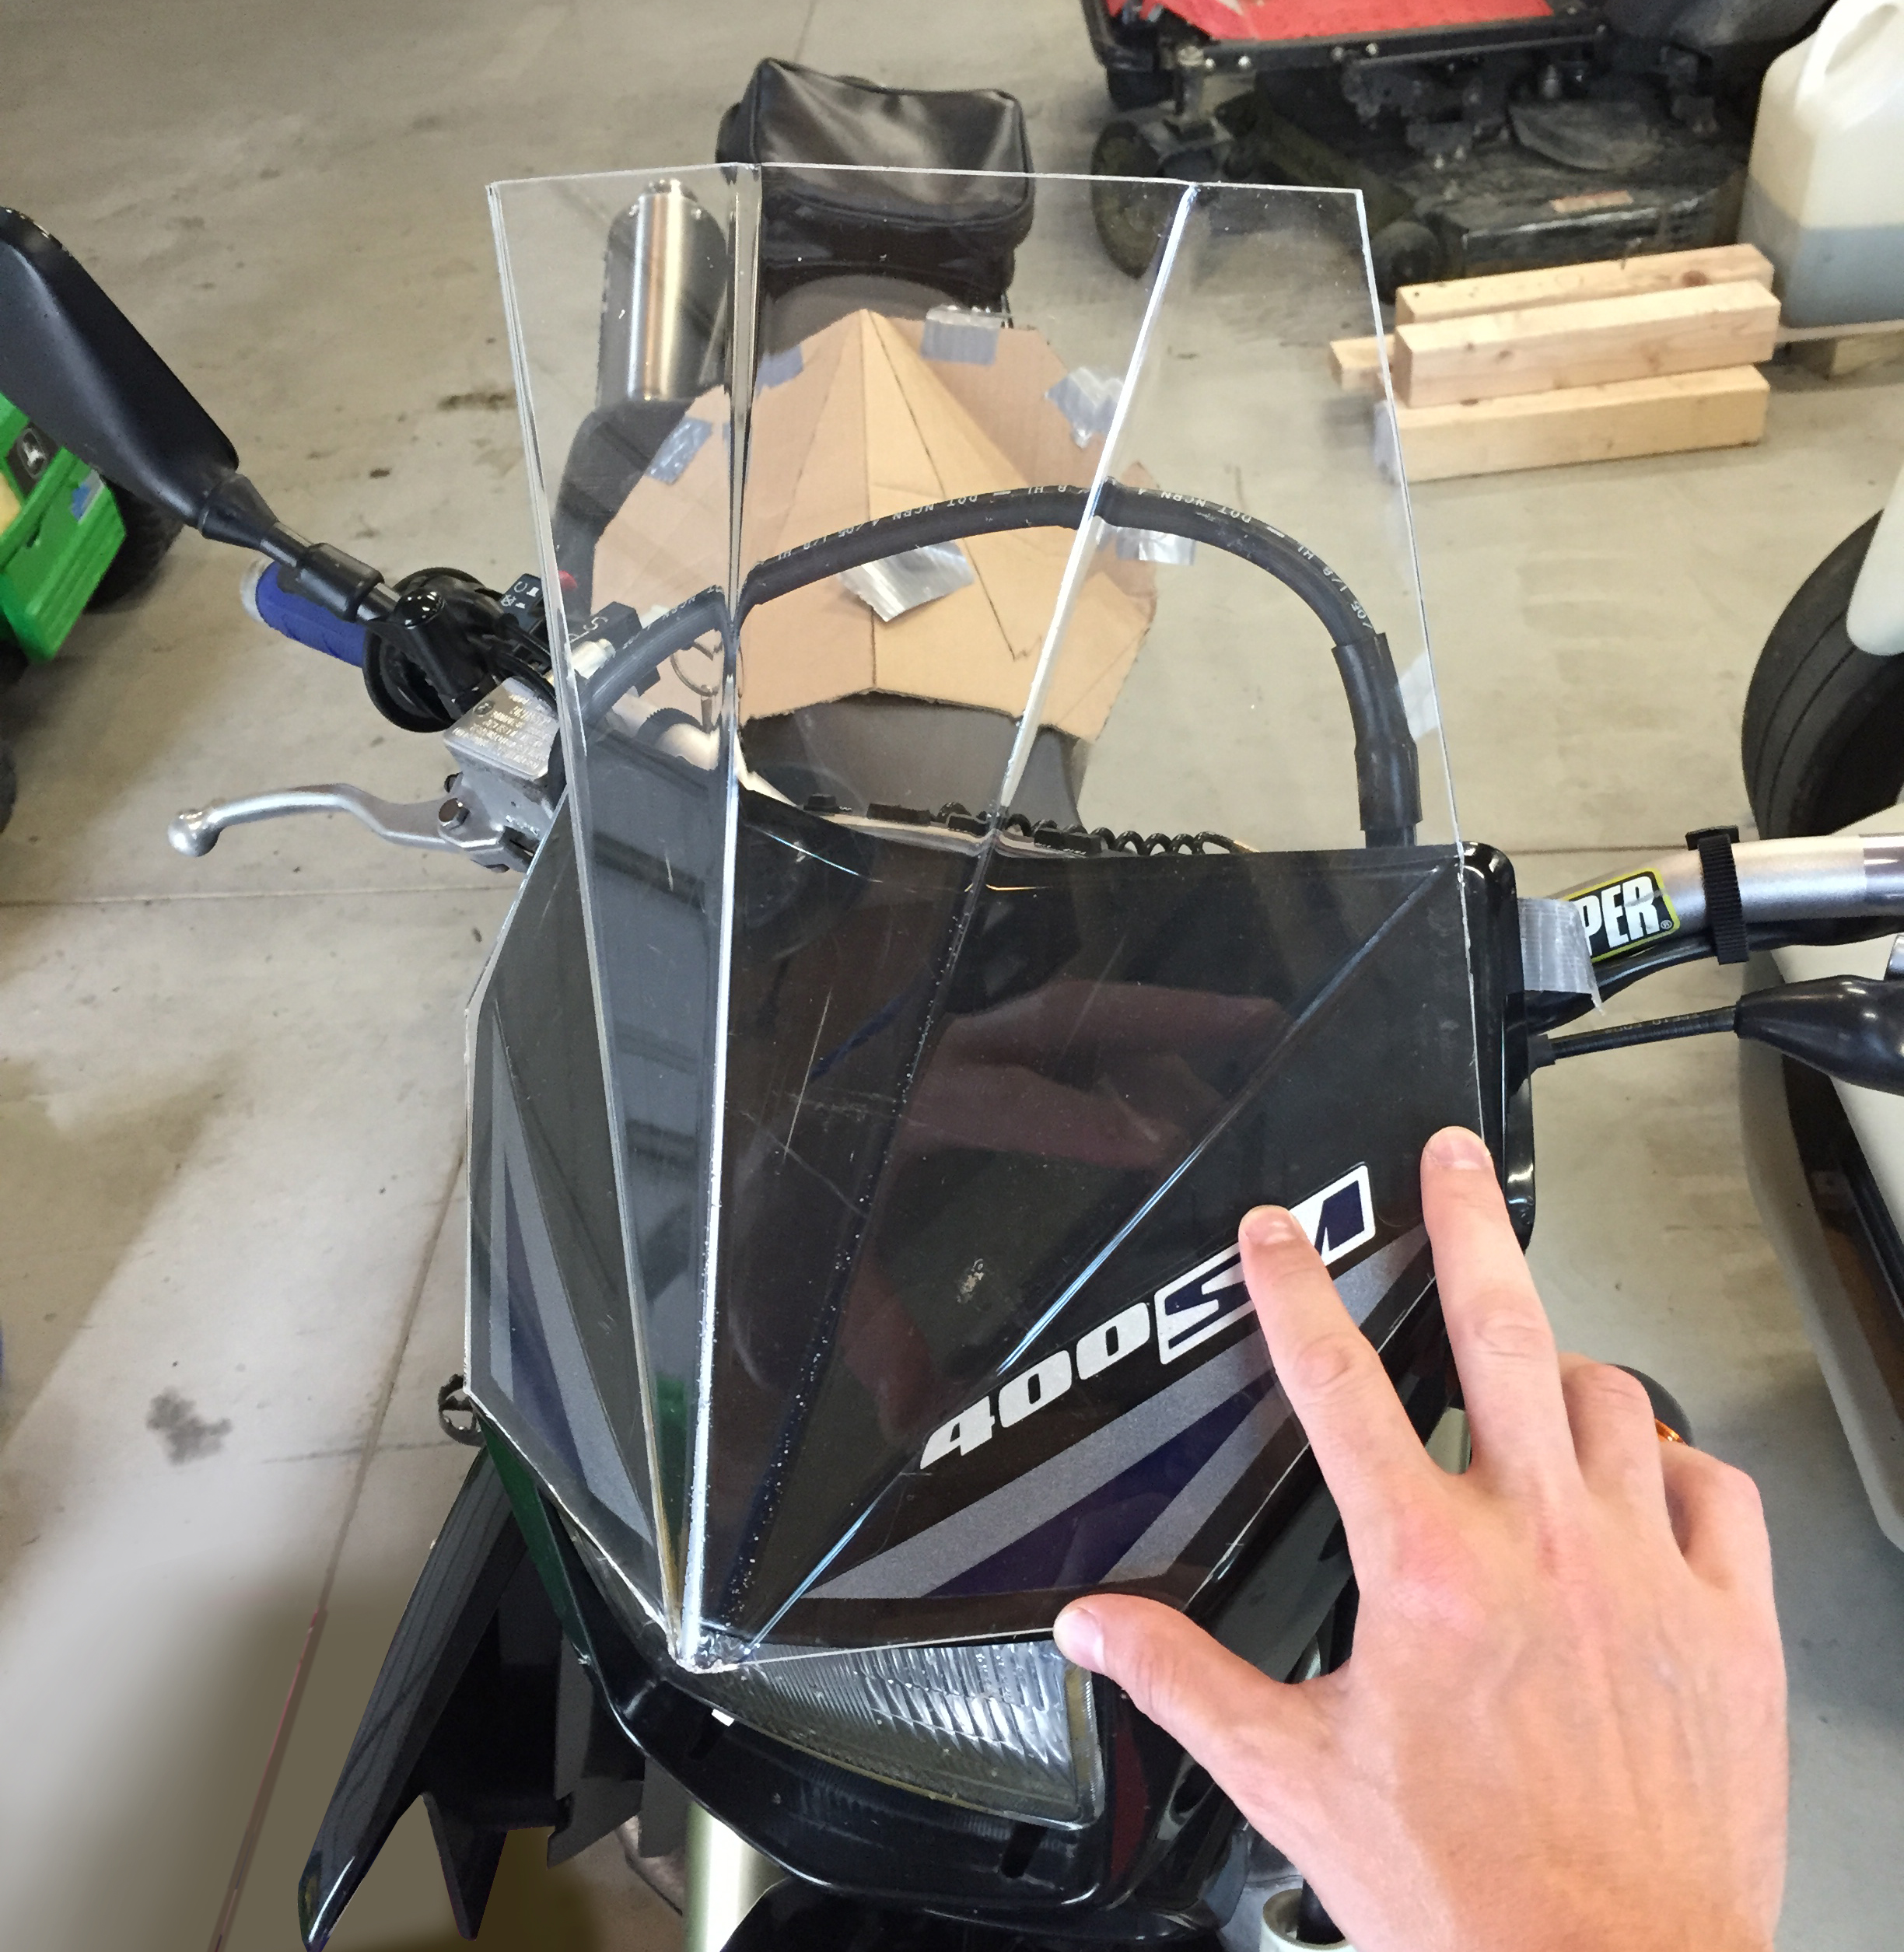
$6 Windscreen from Plexiglass
Wow this really turned out great!