
Building an Awesome Emmet Lego Halloween Costume
I’m unsure about how exactly it happened, but the family had committed to attending a Halloween costume party. The kids and wife already had costumes. Sure, I could buy something, but what’s the fun in that? Going through ideas in my head, I thought being a Lego brick would be cool, and then I came across Emmet. I was amazed. The problem was, I only had about a week and a half to build the costume.
I gained inspiration from all over the web and consolidated it into a Pinterest board. I thought about building the entire thing out of foam, then sewing a cover to go over it. That would allow for much better flexibility, as I could bend my legs at the knees. While it would probably last longer, it would be cost prohibitive and take too much time. I decided to do it much like the Emmet costume mentioned above, and use cardboard for the body. I stopped to see the nice folks at Vista Kawasaki. They were nice enough to let me raid their cardboard dumpster, which yielded a bunch of large, flat boxes. Cost so far; $0!
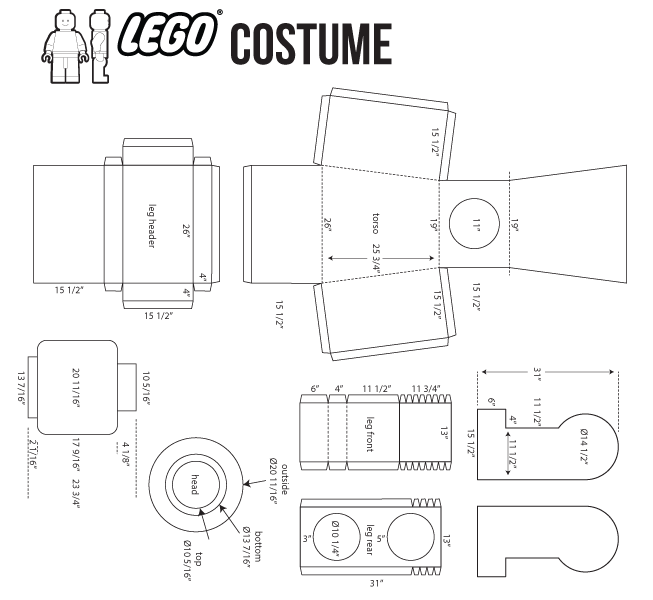
I set to work with a set of calipers and a few minifigs, then drew it all up in Illustrator. In the end, to better fit my body, I had to make some minor adjustments to the width of the legs and torso. As it turns out, Lego minifigs are a little “wide in the waist”, compared to standard humans. Nevertheless, the proportions weren’t altered enough to notice, and here are the measurements I ended up with. You can Download Lego Template PDF as well.
Next was to plot out all of the design onto cardboard and get to cutting and bending. I tried to align the major bends with existing bends in the cardboard to minimize any visible creasing in the cardboard. The additional bends were made by sandwiching the cardboard between two straight-edges and bending. I used a 4×4 post below and a drywall square on top. To assemble the parts, I originally used Duck brand duct tape. I’m not sure whether the cardboard was dusty, or if the stuff just doesn’t stick, but, well, it doesn’t stick. I tore all of it off and used packaging tape on the inside and outside. It stuck much better and laid much flatter.

Duck Brand duct tape = No good
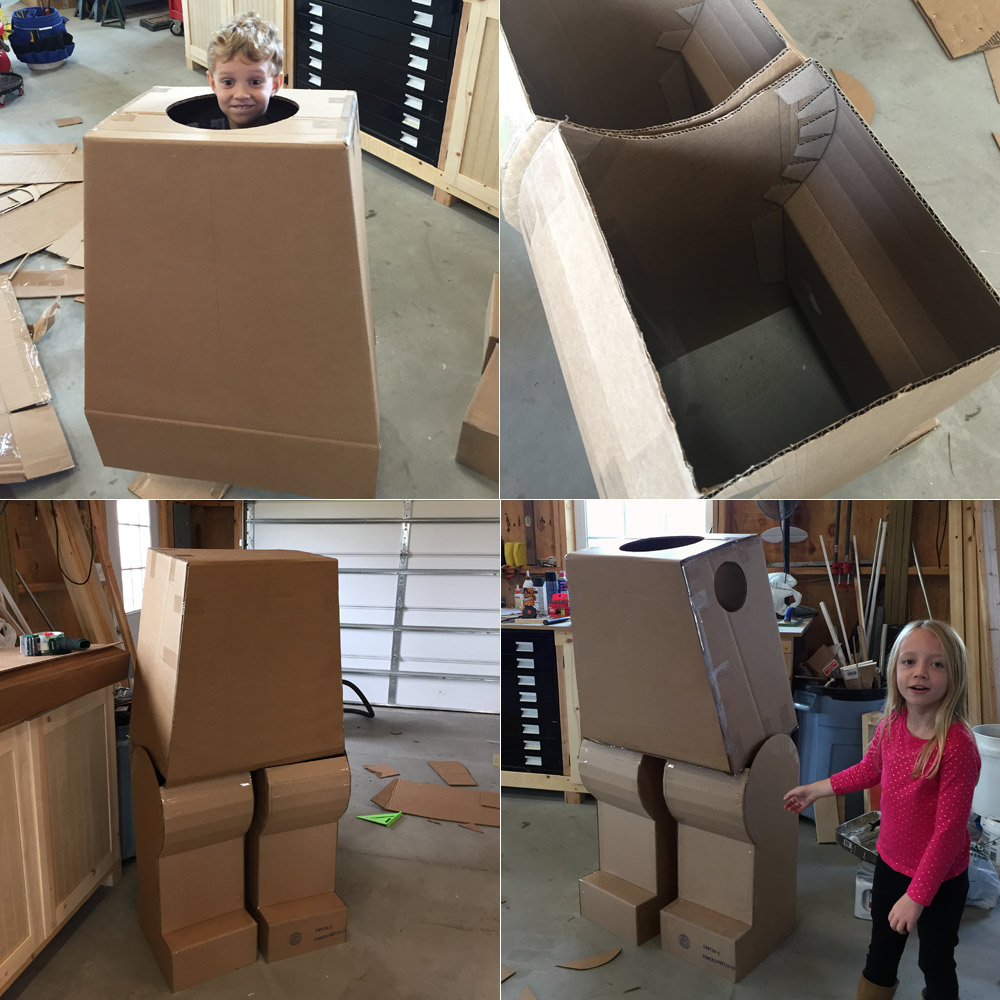
The body, sans the “leg header” – the kids thought it was a riot
The next step was to make the head. The popular method of using a concrete form proved to be not possible, as proportionally, the head needed to be around 20″ in diameter. I bought a 2″ think 4x8ft sheet of EPS foam from the local hardware store and using a compass, marked and cut eight ~20″ circles. I also cut two ~10″ discs for the top nub and one ~13 1/2″ disc for the neck. I aligned them and glued them up using wood glue, letting it dry overnight. EPS foam gets little bits of foam everywhere, so it’s best to do this part in the garage, where the mess can be contained and swept up. It’s important to note that I did not try to cut “head holes” at this point. I figured on doing that later. Cost so far; $20.
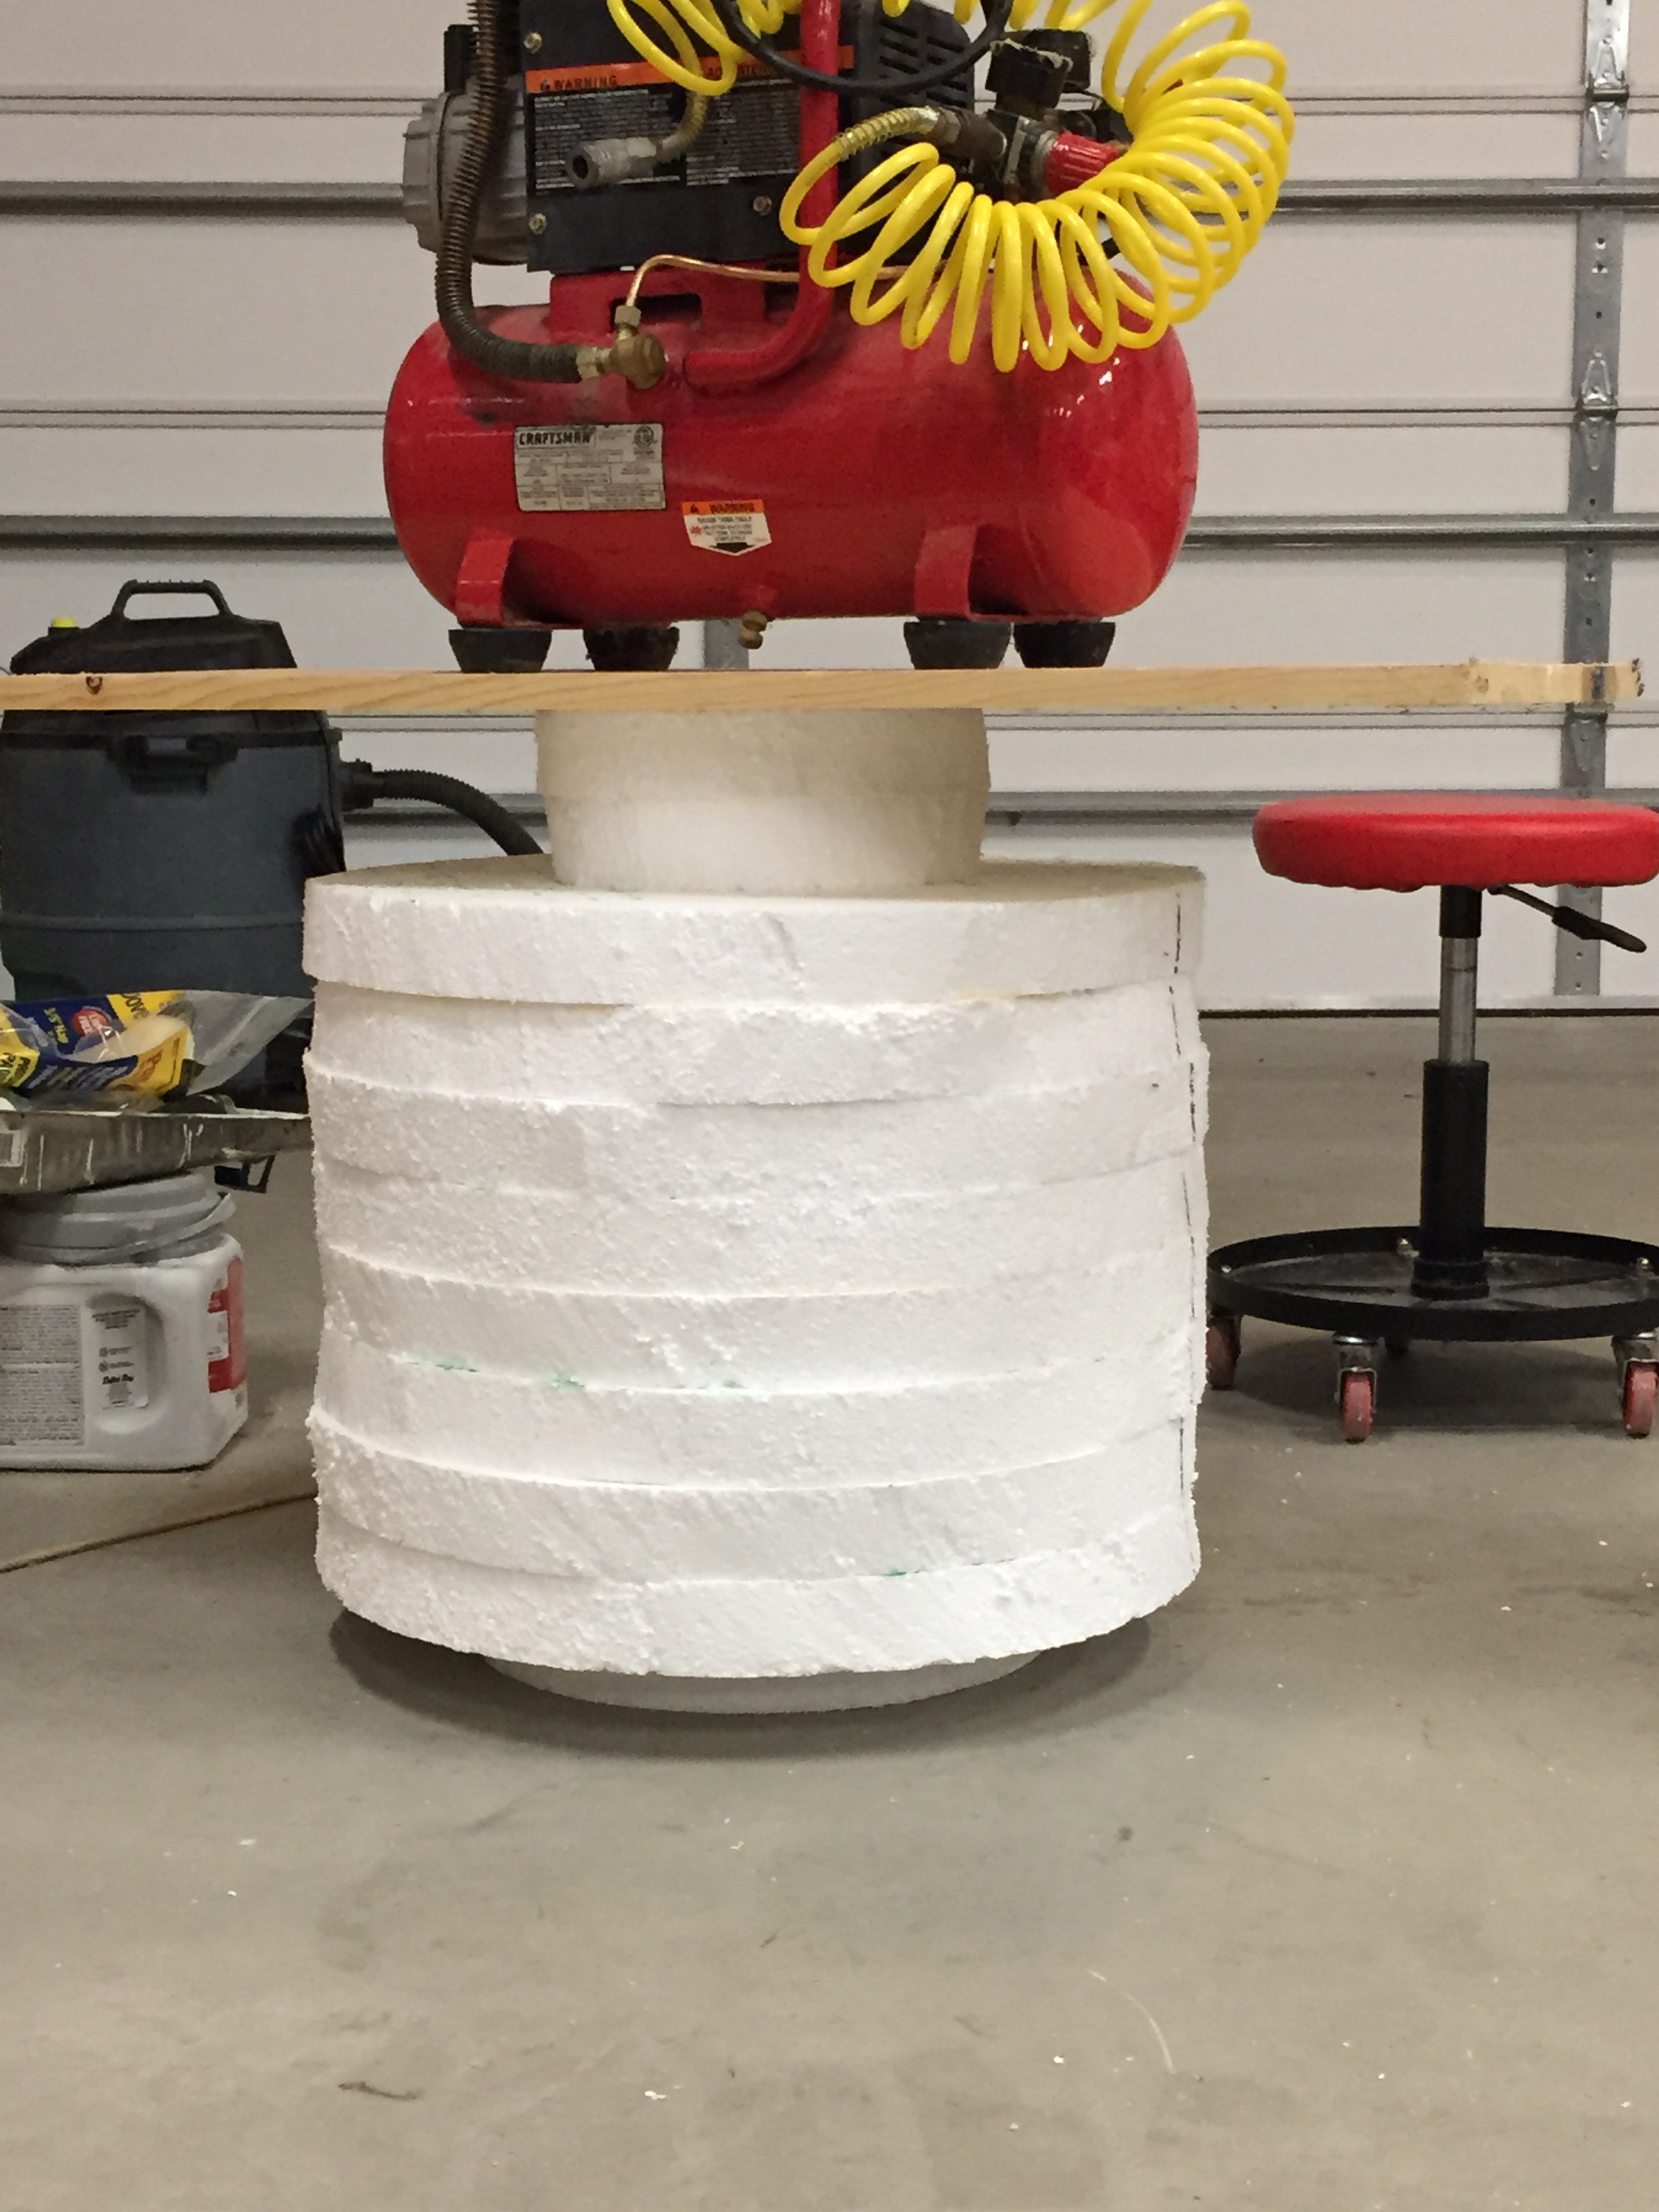
Gluing up the head – drying with something heavy on top
Of course, the shape above isn’t perfect. Using my plexiglass bender, I made a hot wire cutter by hooking up the wire from the bender in a vertical fashion, heating it up, then rotating the foam head around in a circle to shave off a bit of foam with the wire. The result was a smooth foam cylinder. Sorry – no picture of this step, however it could be avoided altogether if you can cut at a 90 degree angle better than I can. Then, to get the rounded profile that a minifig has along the top and bottom of the head, I used a retractable box cutter to shave a bit off at a time until the correct shape was achieved.
At this point, it’s looking pretty good. I had about four nights left before the party, but a major hurdle to overcome. All I had was a shape – and Emmet is orange, not brown and white. In the Instructable, they used resin to harden everything, then prime and paint it all. That’s cheap, but stinky, messy, and takes time. So in the interest of time, I ordered enough vinyl decal from the folks at Sign Warehouse, who did a great job of getting everything to me second-day air. It took about 10 yards of orange vinyl, three yards of yellow (could have used four), and a yard each of blue, black and silver. Cost so far; $83.45.
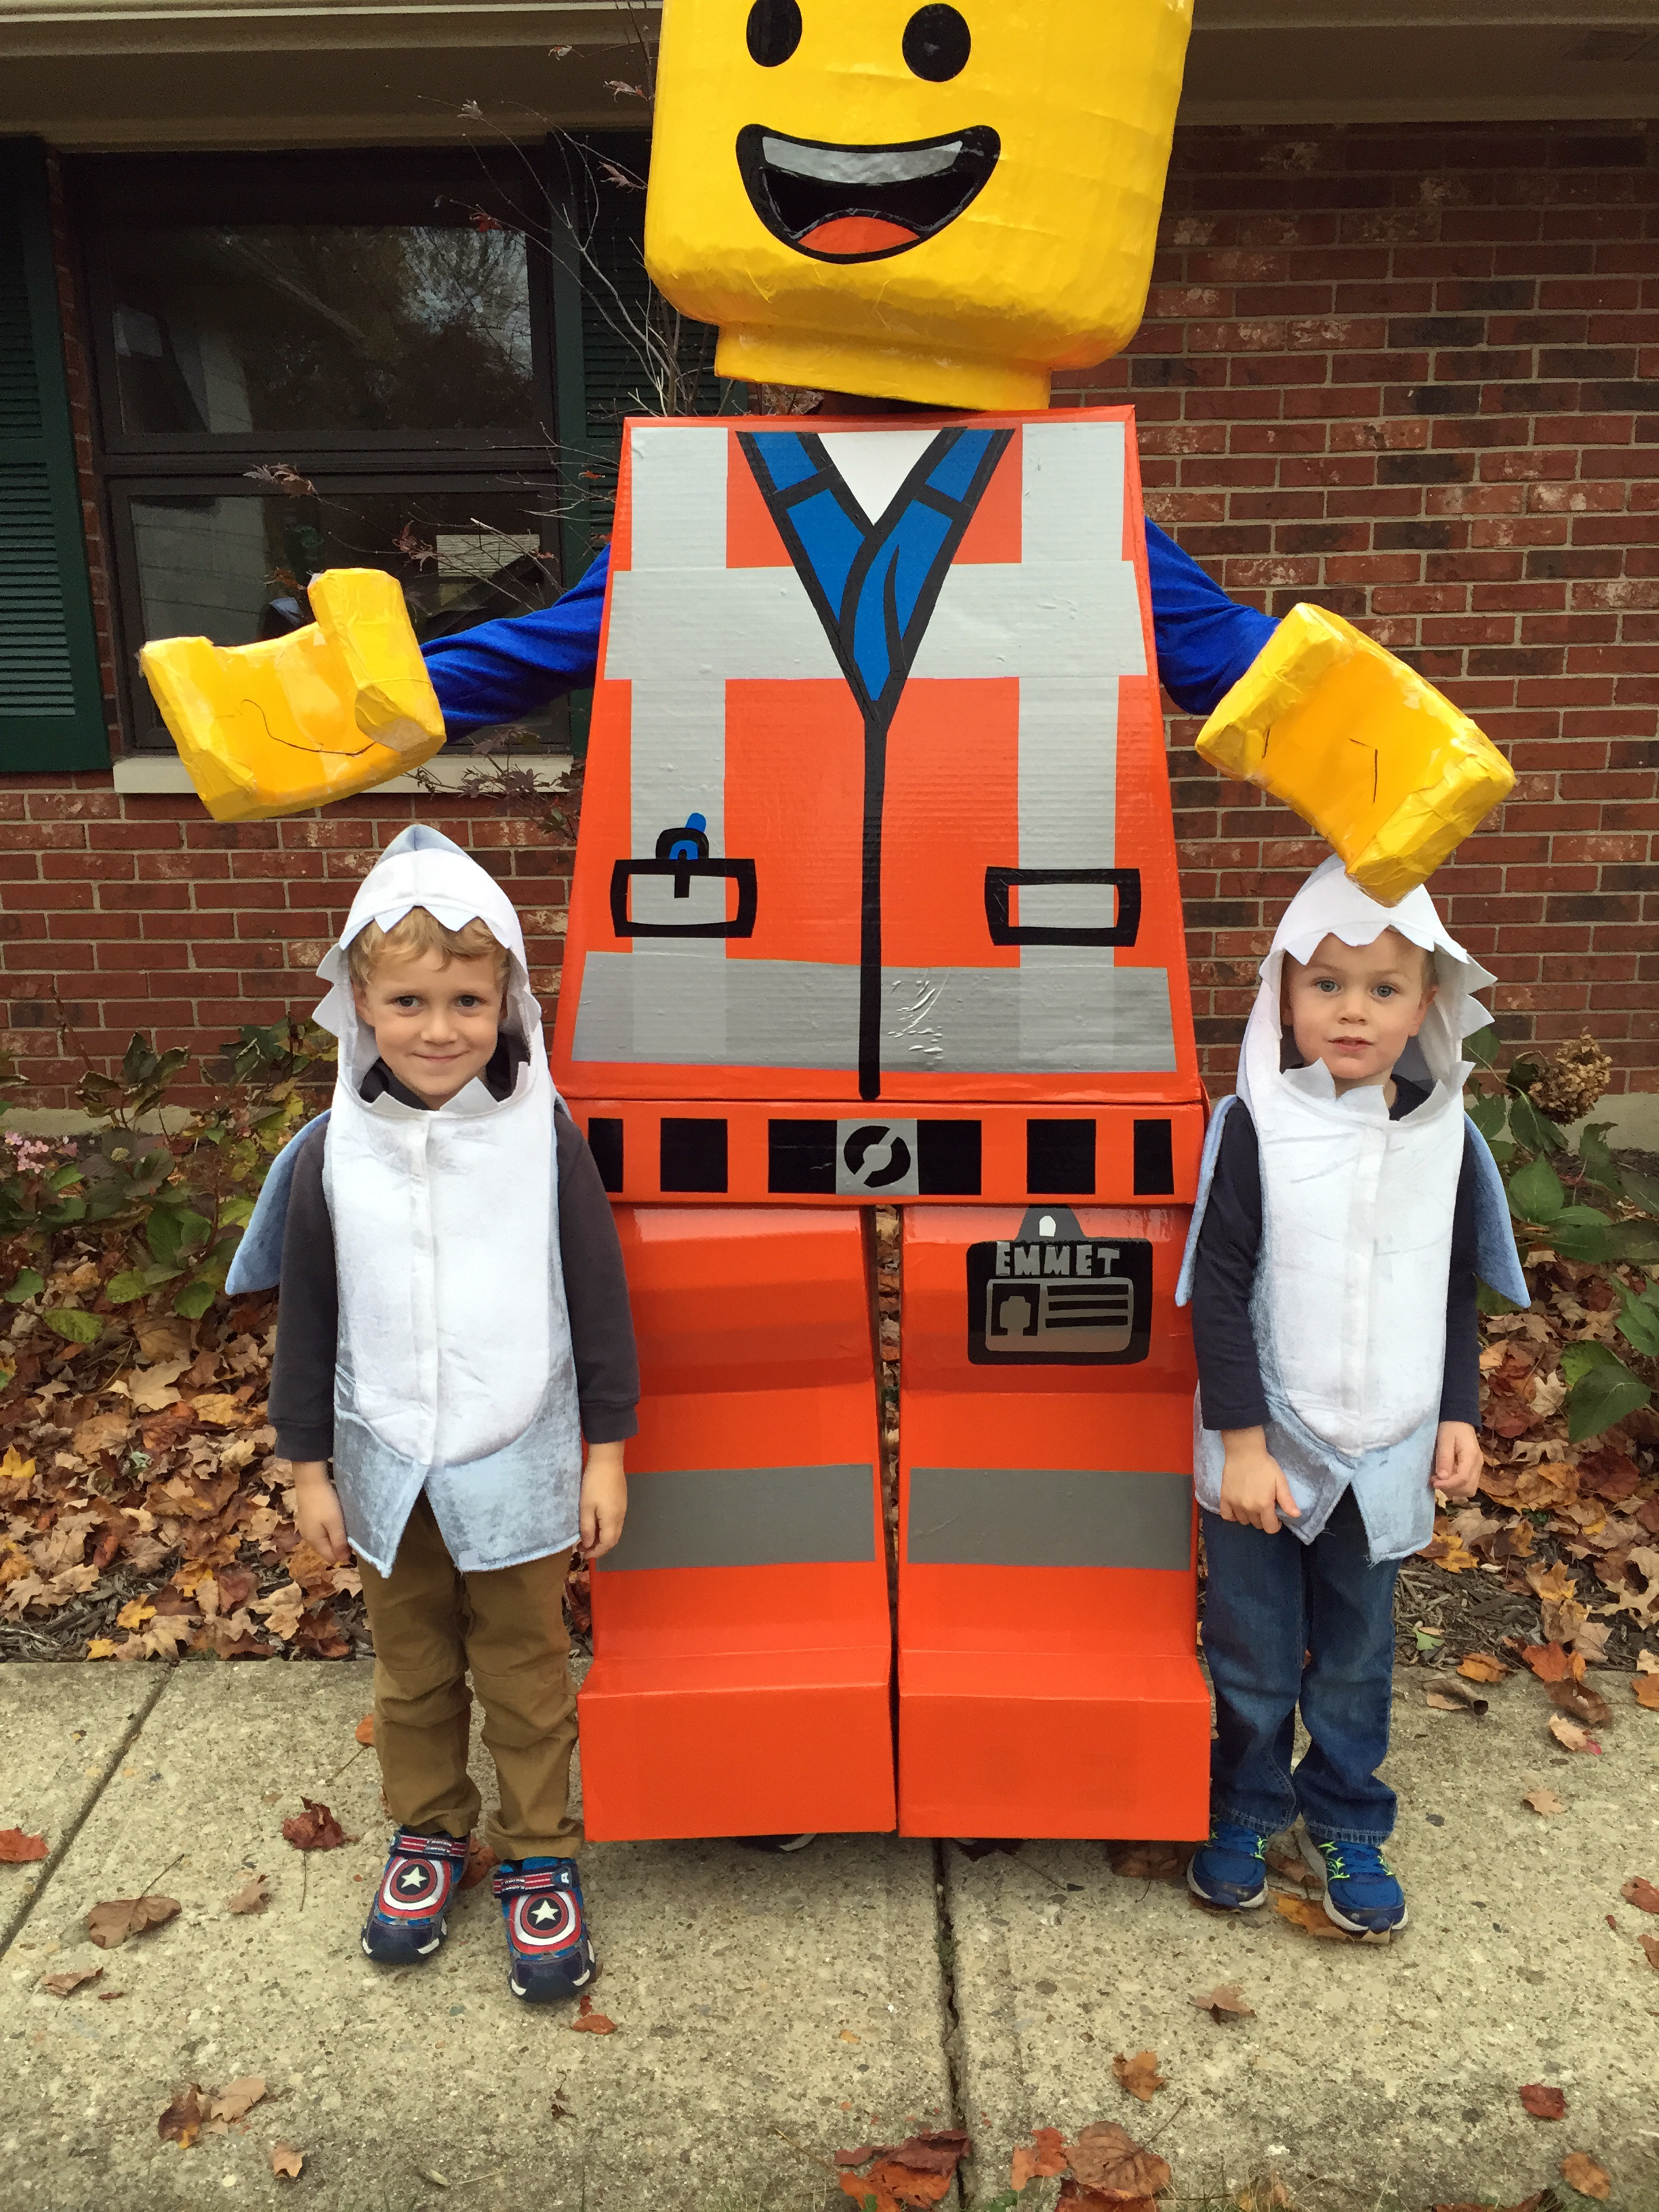
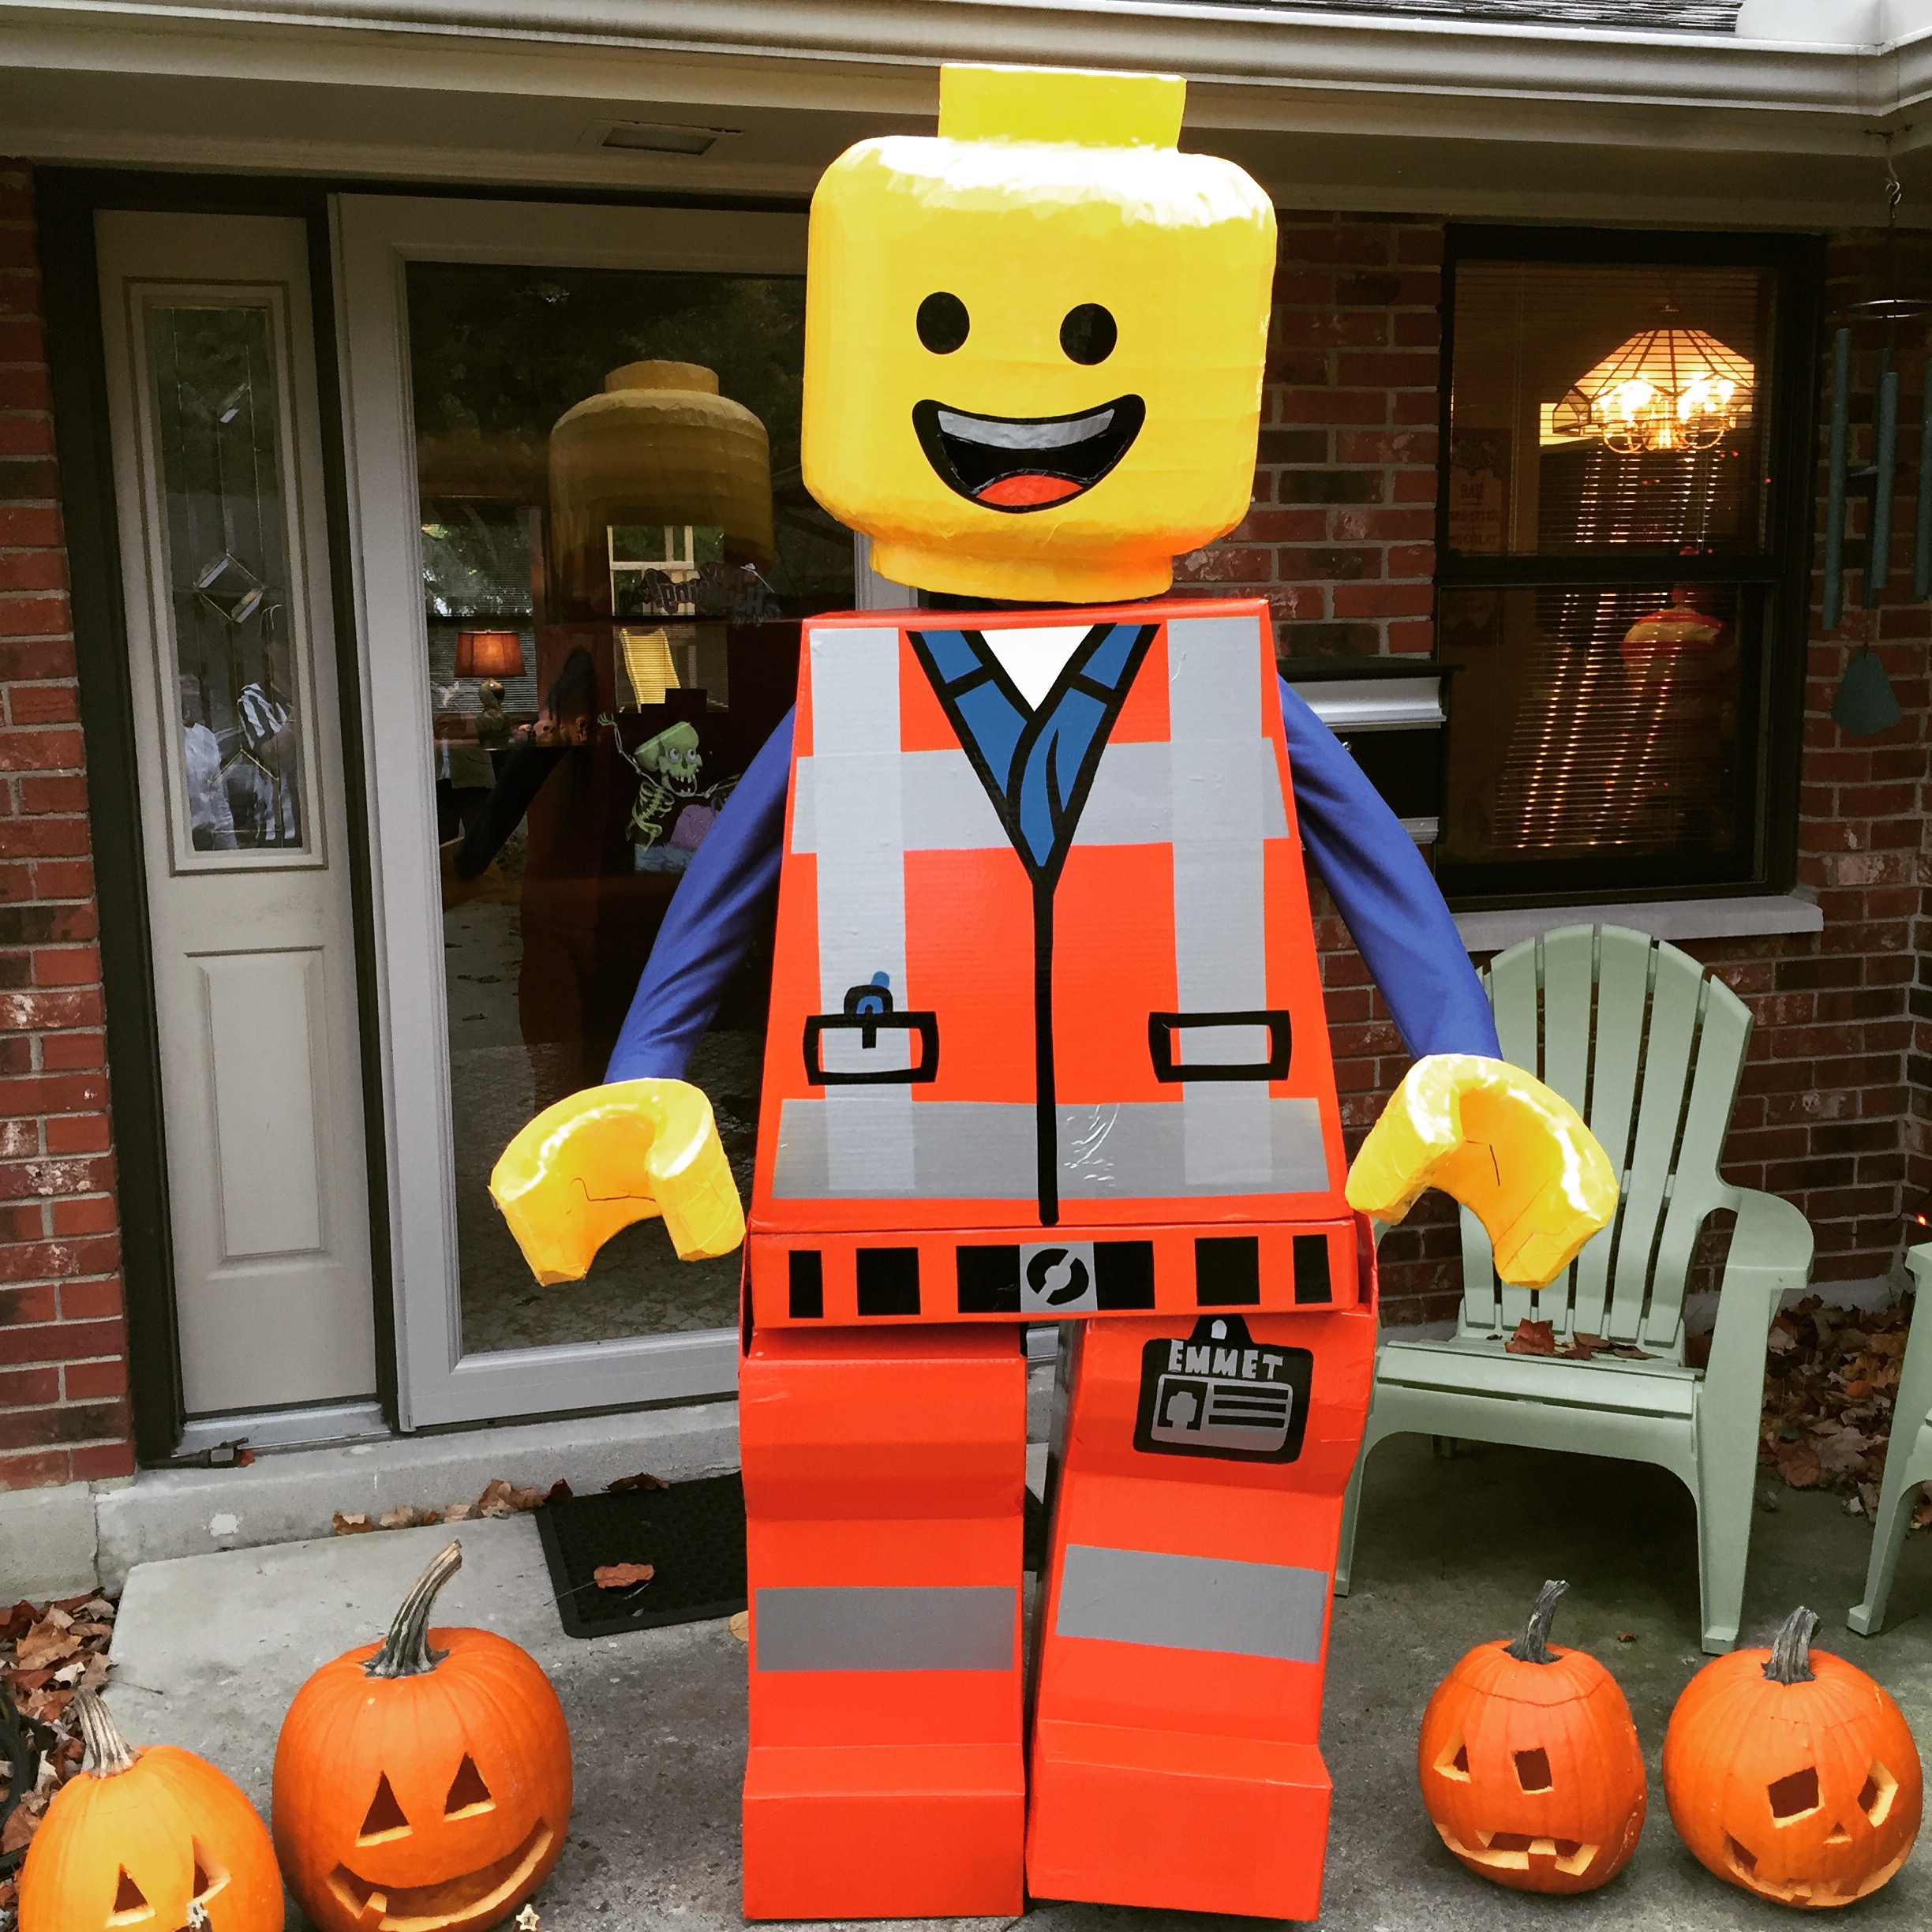
After a two nights of carefully applying vinyl – I couldn’t afford to run out – I had a costume that closely resembled Emmet!
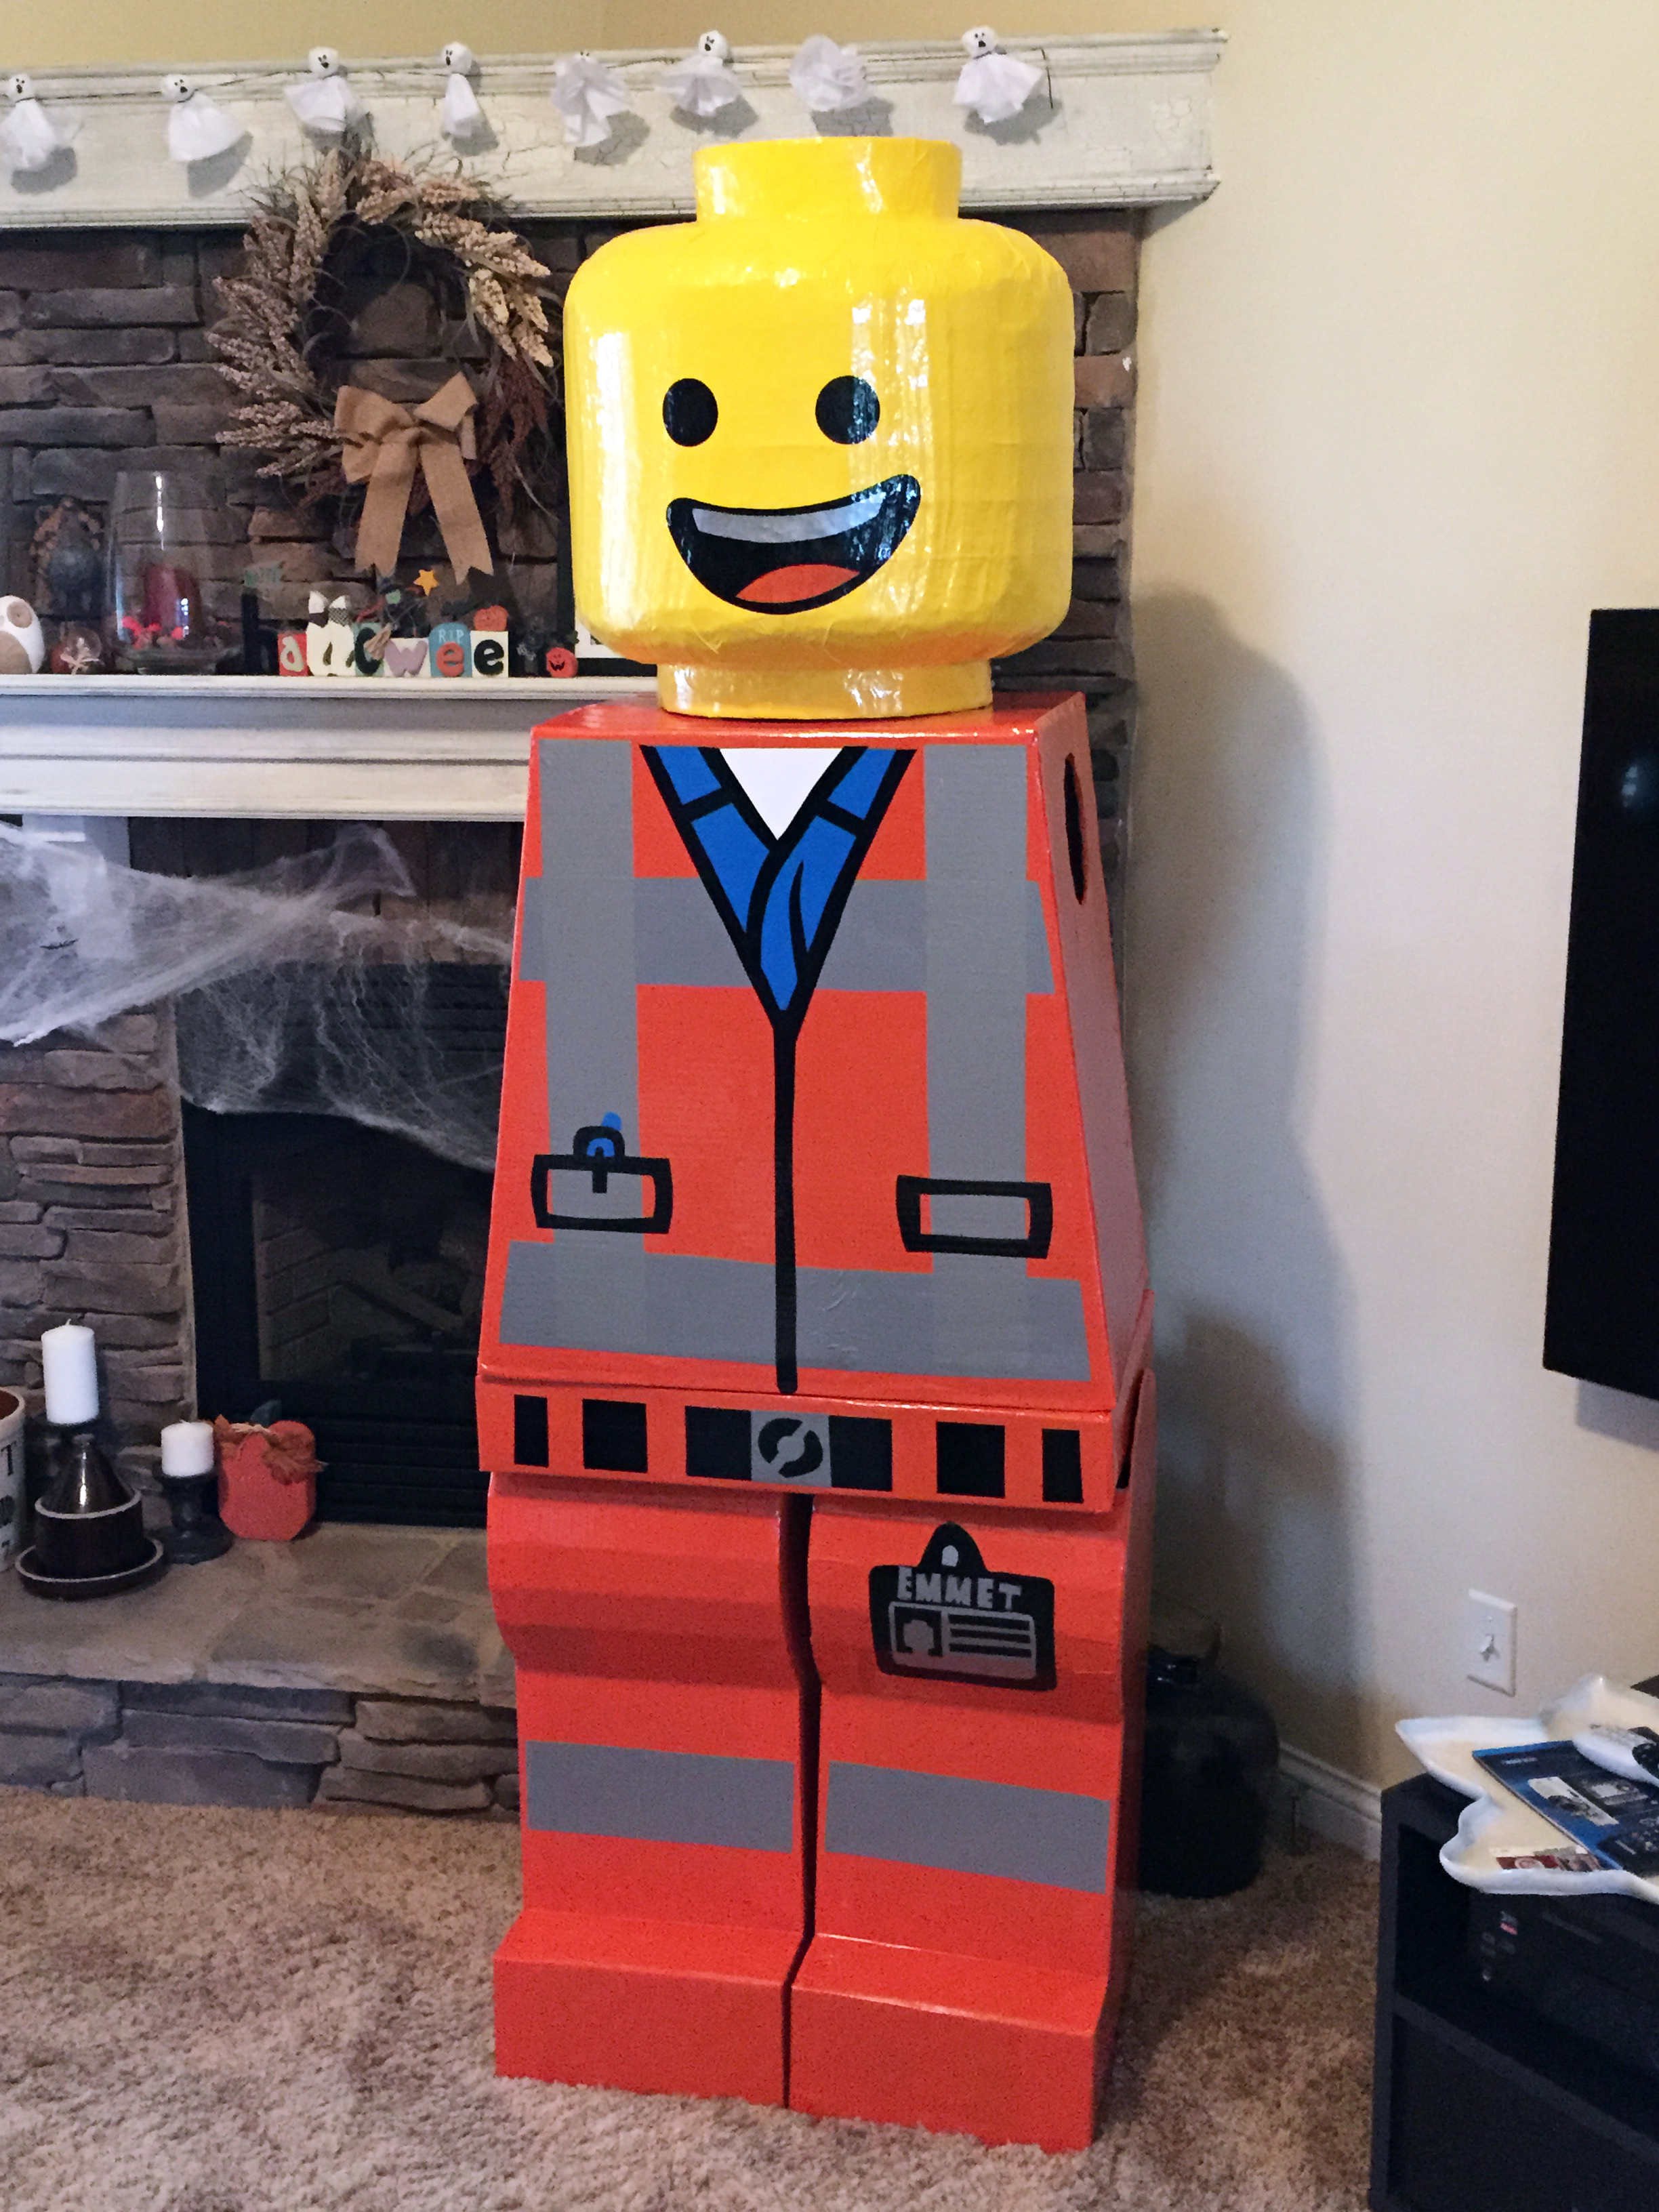
Looking good!
All that was left to do was to hollow the head out to fit my noggin, and create some hands. I measured the approximate shape of my head and started carving. I used a drywall saw and hacksaw blade to cut the hole for my head and cut out the mouth out through which to see. Finally, because the EPS foam gets everywhere, I used the leftover vinyl to coat the eye port. To keep it out of my hair, I wore a beanie hat under Emmet’s head.
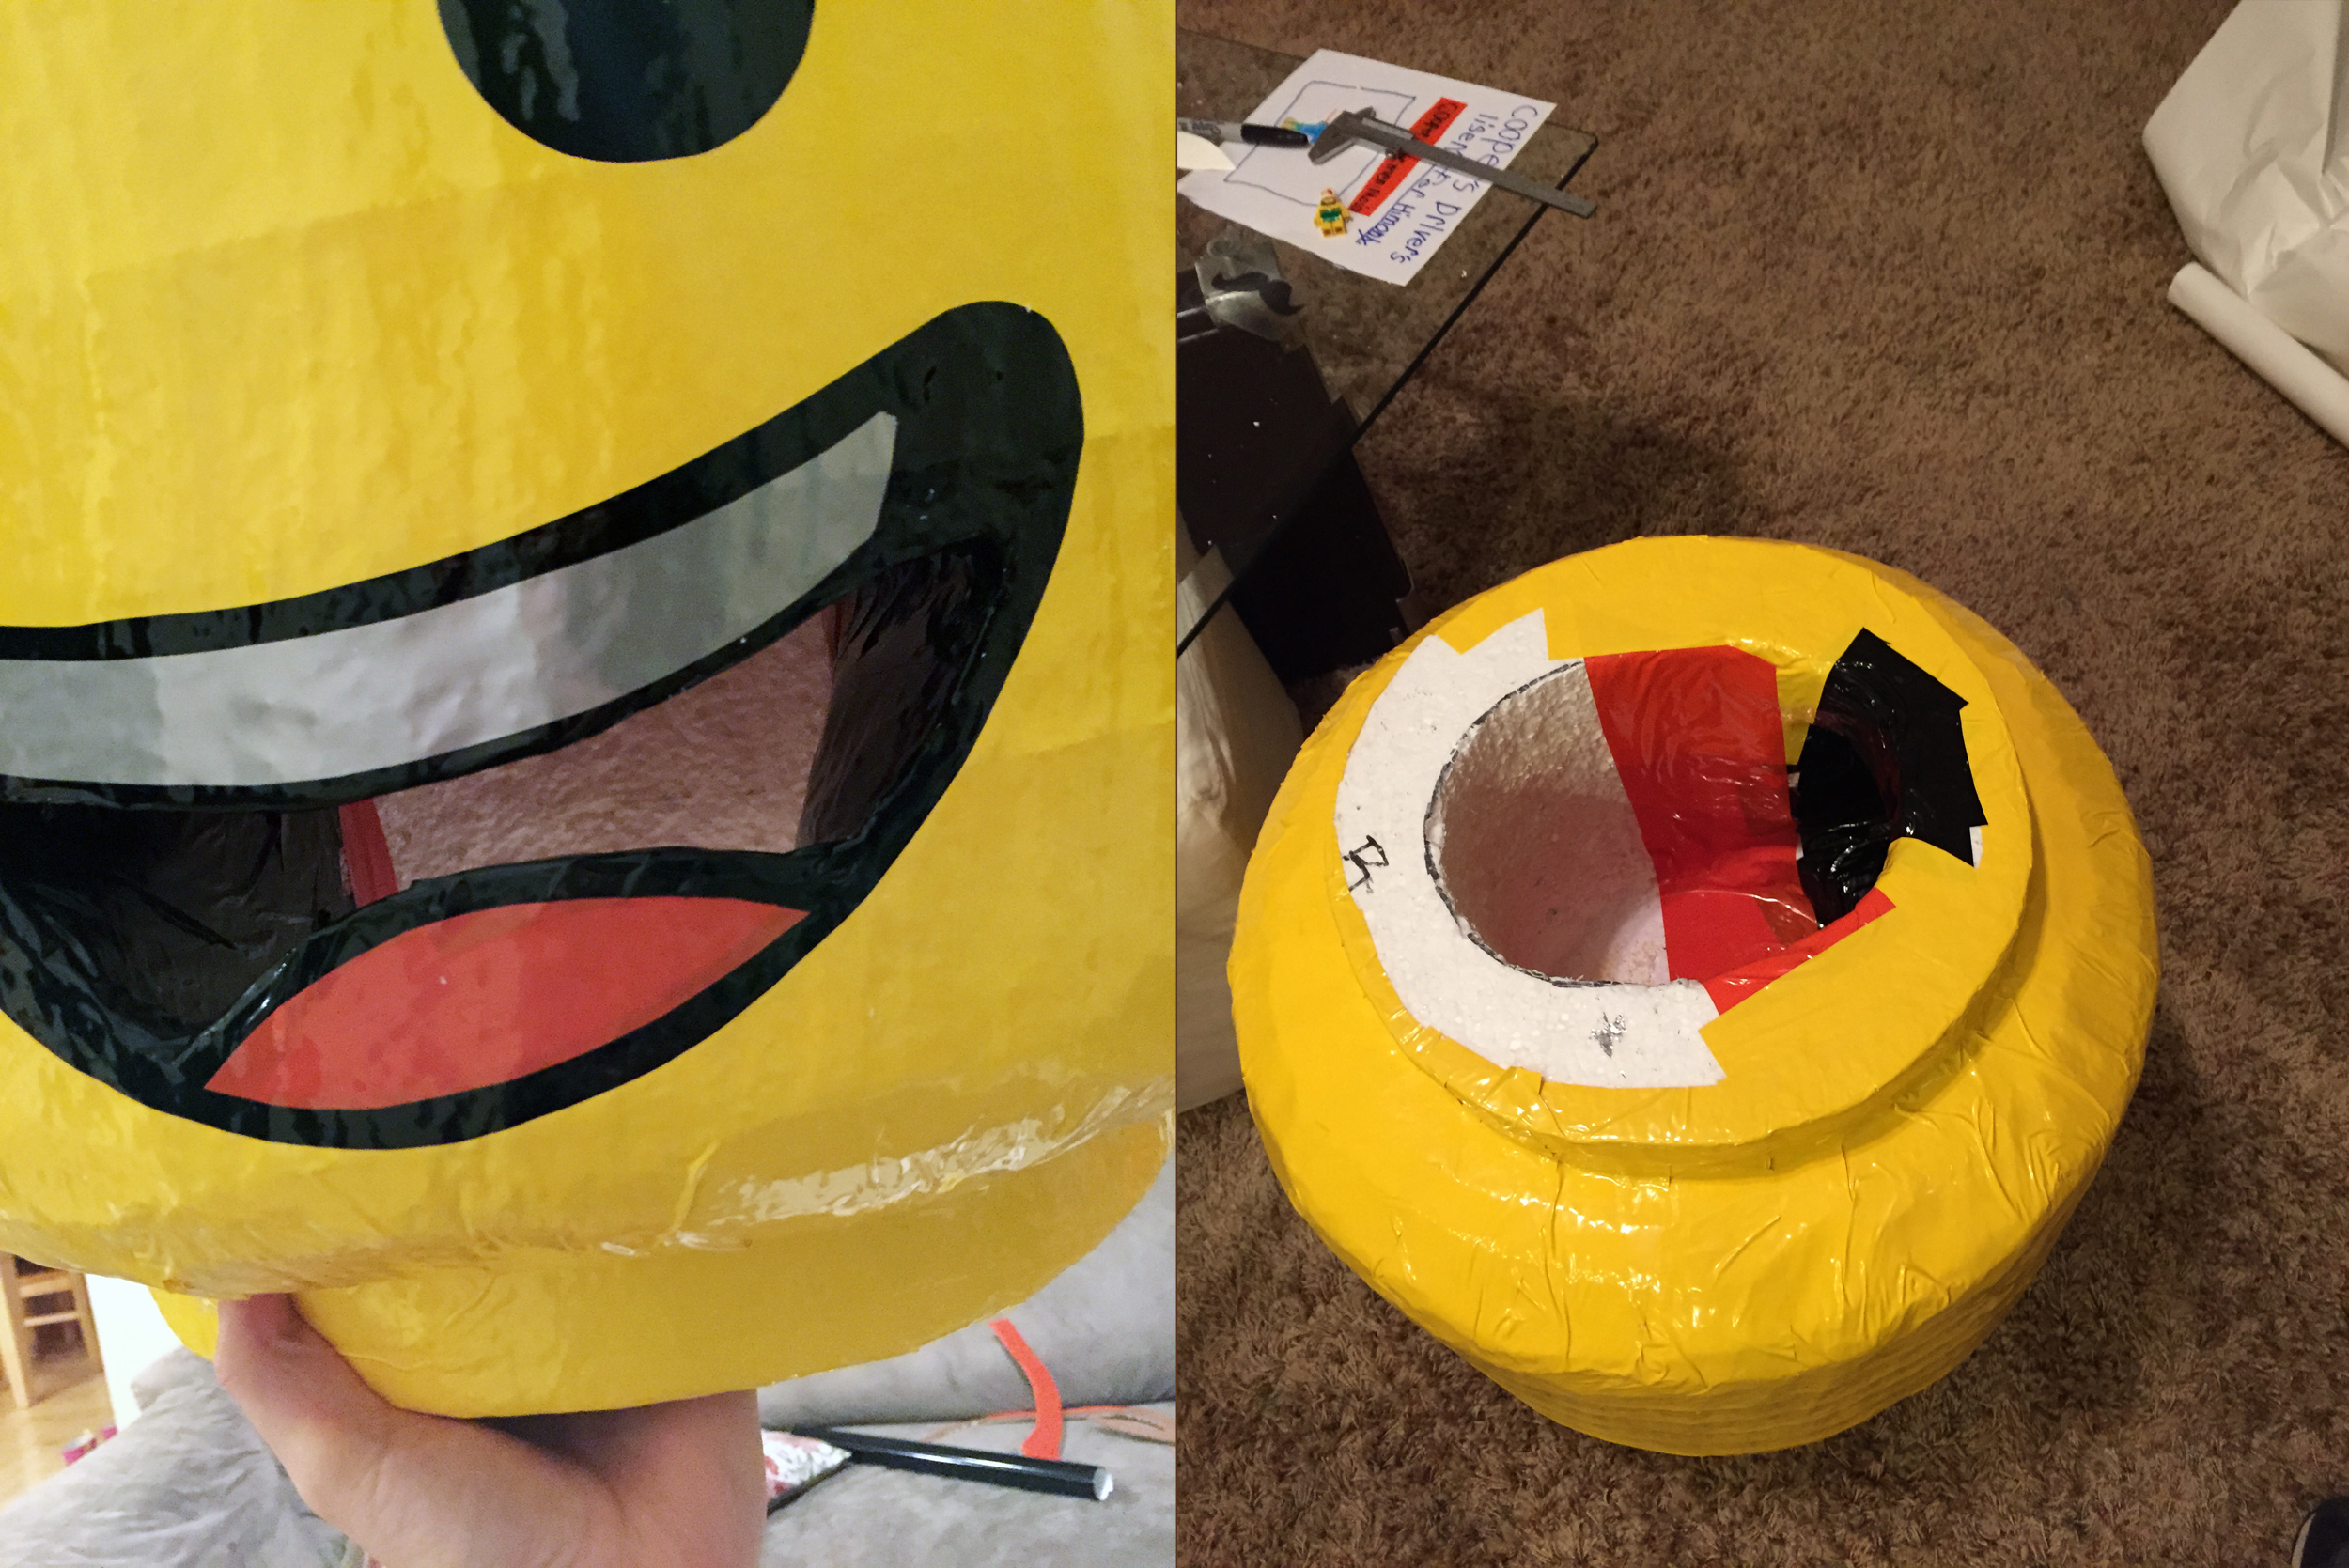
I can see!
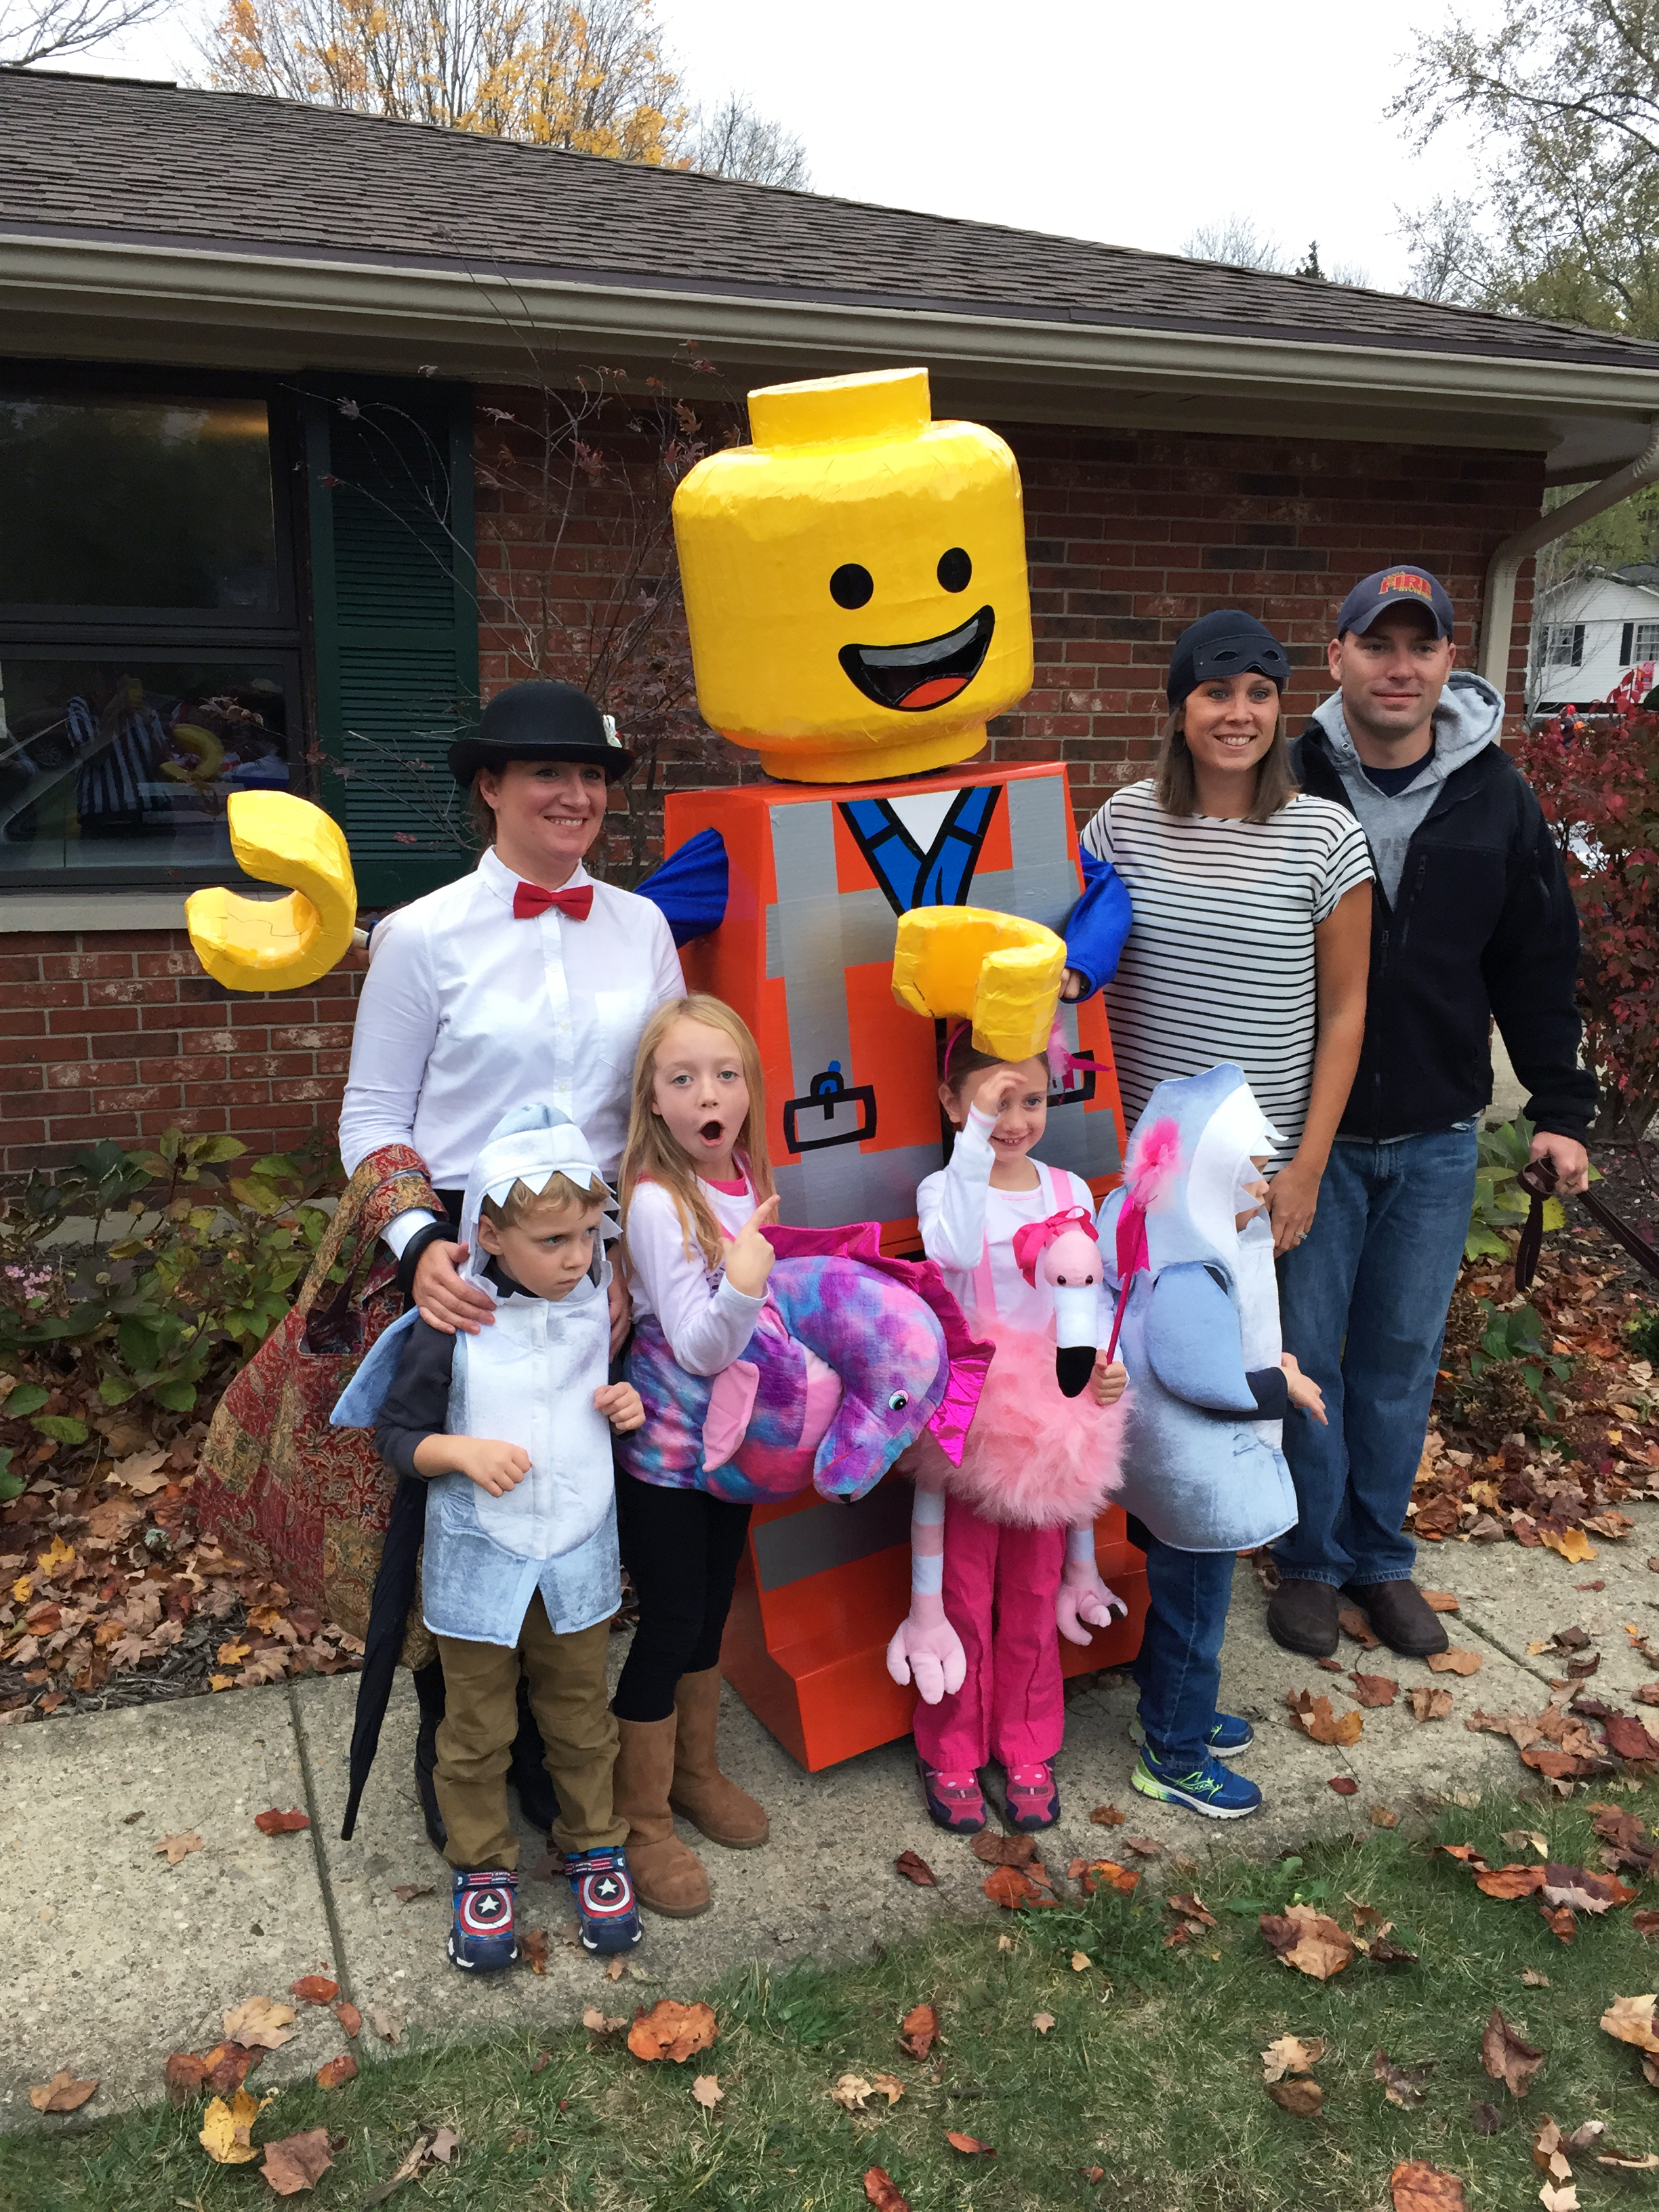
The hands were carved out of the leftover EPS foam to the correct scale. I used three layers for each, wrapped them in yellow vinyl, and stuck some 1 1/2″ PVC in the backs. In addition, the legs were held up with a standard set of suspenders. Altogether, everything came out very well. I think the kids loved it, and it was a blast to make. Final cost; $83.45.
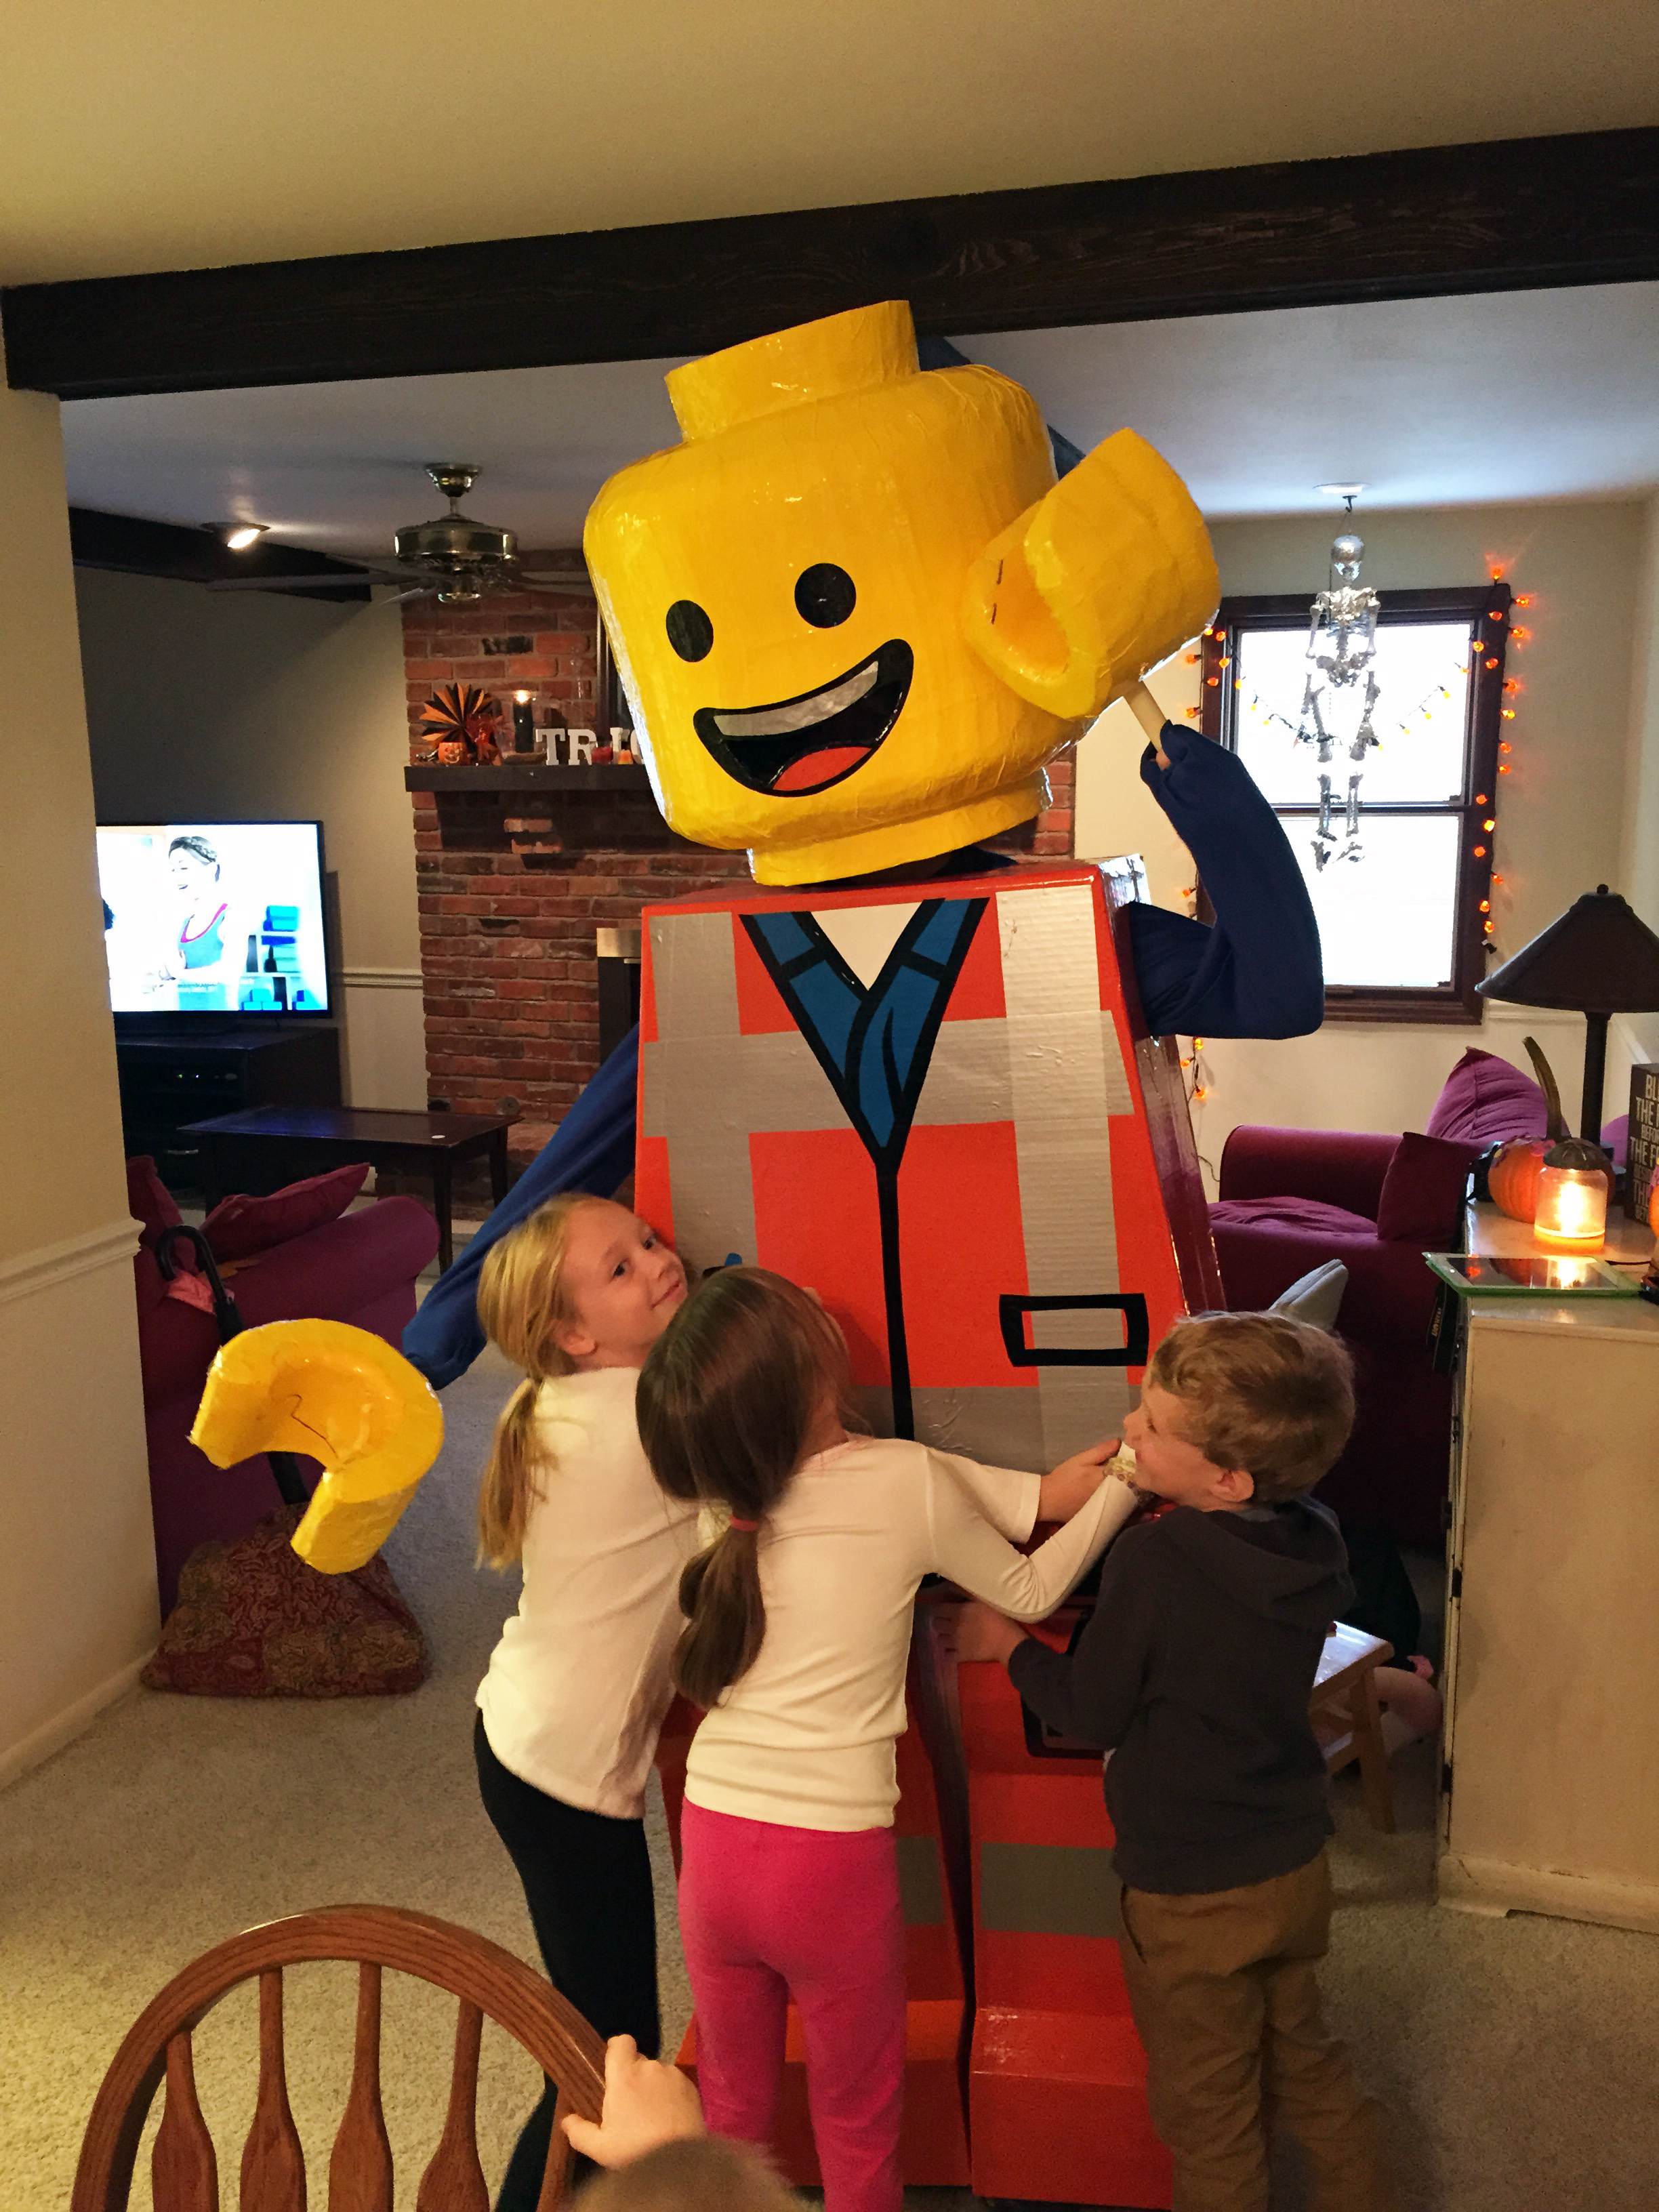
Of course, there is an elephant in the room – there’s no hair! I know, I know. I ran out of time and foam, unfortunately. Maybe next year! For now, the costume is assembled next to the kids Lego collection in the house!

Great build.
I was wondering how tall you are.
Looking to build my own and was wondering how much I had to mess with the scale of your pattern.
Thanks.
I’m about 5’11” and about 150lb. It could stand to be thinner, but then you start to get pretty far from the ideal proportions. Good luck!
Missing hair
It sure was! The last minute build didn’t provide enough time to sort out the hair.
How did you attach it to your feet?
How did you attach the legs to your legs? I made a similar suit for my son but I’m having a hard time figuring out how to secure the legs to his so they stay upright and allow him to walk.
The legs were just suspended off the ground by suspenders, which allowed them to move with my legs. My legs just floated inside the cardboard lego legs.
Hey just wanted to say thanks! Your schematic of the lego figure was easy to follow and made an amazing 1st Place prize winning costume!
It won’t let me add photos but the costume turned out amazing!
Thanks!
Also I added the hair!
Awesome! If you do upload the photos somewhere, I’d love to see them!
If you want to make an arms and hands pattern, I would love to make more of a LEGO statue for an elementary reading display. 🙂 This is so cool!
Hello! Making this for my 8yo 52inch, 54 pound little boy. Can you explain the rear leg template? How does it fit to the front and sides?
Sincerely,
Sonja
Sonja, the rear and front of the legs were attached to the sides of the legs via tape or hot glue gun using the tabs.
Haré este diseño hoy espero me salga a la perfección
Domingo 18 de septiembre 2022
I have a 7 and 8 year old that I would love to make these for! Do you happen to have the measurements you used ? Like what did you scale down to? Did it fit and work well? Thanks!
Could I use this pattern to make this costume out of foam? I wouldn’t need the tabs but I assume the dimensions would be the same. Also do you have any advice for scaling this down to a child about 4 feet tall?
I wouldn’t see why not! As far as scaling – I’m 5’11”, scaling down to 4 foot would require scaling everything down by roughly 67.6%.
Hi,
Thank you very much for the measurments and plans you uploaded !!! My kid has a Mardi gras disguised day at school and we used it to make a Lego Darth Vader costume. If anyone is interested I used it and converted it for a 4 years old kid (104cm tall). It’s in cm but i’ll gladly send the updated pattern to whomever wants it for their kid.
Thanks again and enjoy the teenadult life, it’s the best !!!
Hi! I see this is a couple of years old, but do you still have the pattern for a 4 year old? I would really love it!
Also, how is it for a 4 year old to walk in? Arent the legs kinda stiff?
Did you still happen to have the plans for a younger kid?
How did you figure out the conversion measurements?
My kids are 7 and 8, Just trying to figure out how I could get the proper measurements for them.
Thanks in advance!
I’m about 5’5 140 lbs. How much would you recommend scaling this down by?
How would you print the template so it’s the proper size for me to cut it out and trace to cardboard
I think you would need to use the dimensions from the drawing and redraw them on the cardboard. Unless you have a very large format printer, I don’t think it can be printed and traced onto the cardboard.
Hi!! This seems super super useful! I want to make a Lego Joker costume, and this seems like the best way to do that!! Would you happen to know of a good way to resize it? I’m a bit shorter than you (5’2) and don’t know any of the tips and tricks to resize patterns like this, yet
Amazing!!!! Great job!