
Zinc Plating on the Cheap
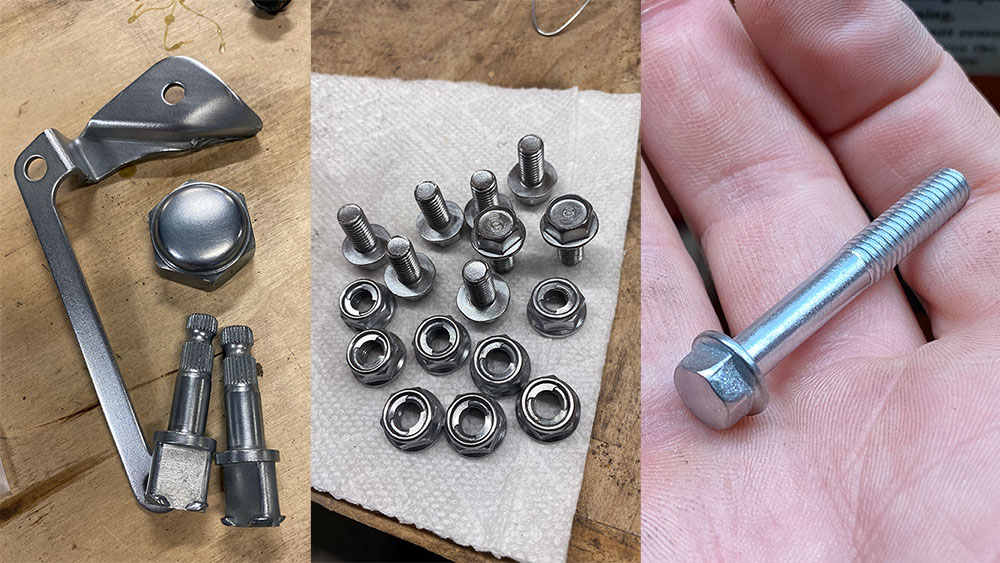
Recently, I took on a project to restore a little Honda Z50R motorcycle for my son for Christmas. Ive always worked on motorcycles, and my father restores vintage dirt bikes so I was comfortable taking on the project. However, I try to learn something with each project, and this one was no different. Instead of painting, I got myself into powder coating, which was really rewarding. Additionally, I chose to refinish all of the hardware by recoating it with zinc – just like it’s done form the factory. Zinc plating not only gives a shiny finish to hardware, but functions as a rust inhibitor.
There are a number of resources online about how to do this, but they all seemed to vary just enough to add some confusion. I figured I’d write a thorough post on how I did it.
As an overview, we’re going to make an electrolyte plating solution from a number of household items. We’ll mix the solution, then “prime” or “plate out” by adding zinc ions to the solution. Once ready, we’ll go through the process of plating some parts.
Supplies
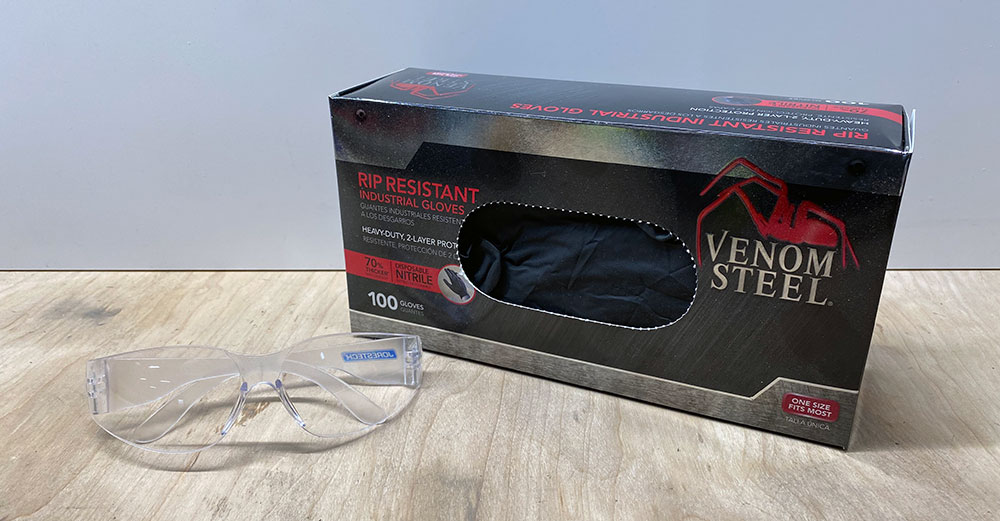
Safety
- Nitrile Gloves
- Safety Glasses
- Open space with some ventilation
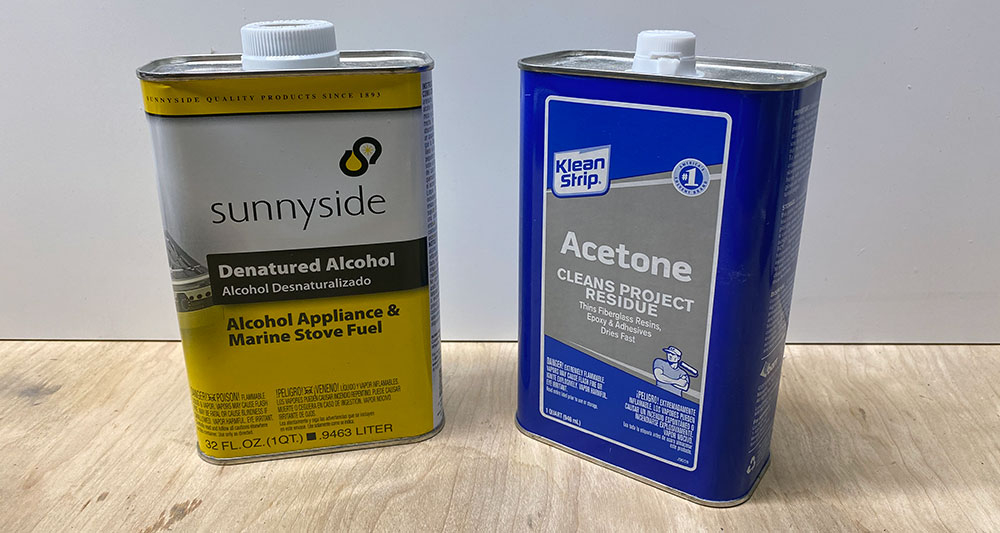
Part Preparation
- A source to sand blast the parts
- Acetone (a quart or so)
- Denatured Alcohol (a quart or so)
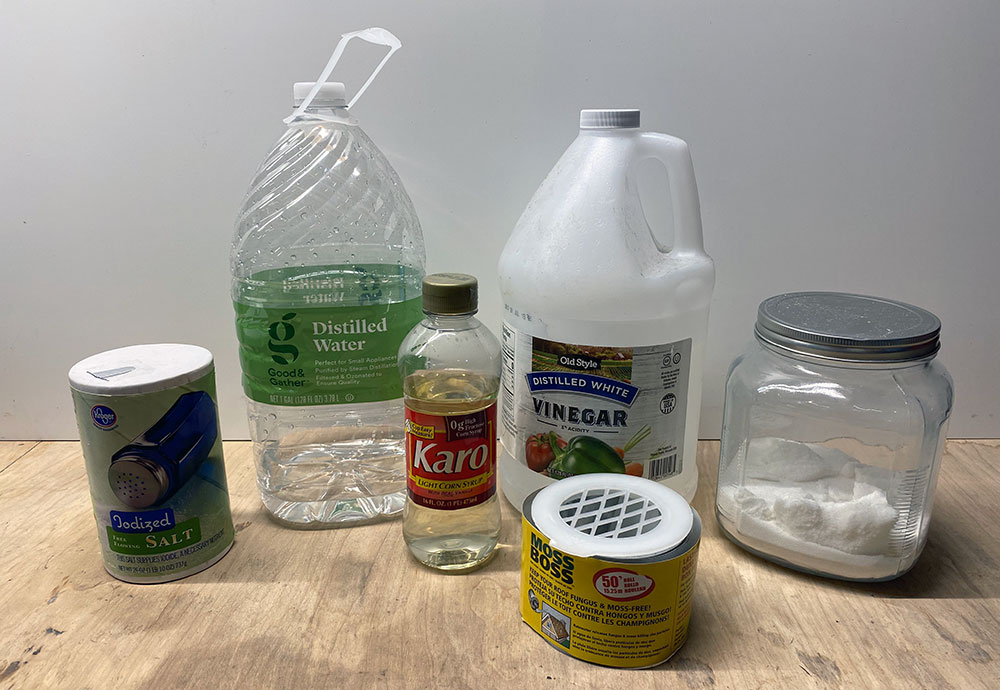
Plating Solution
- Distilled Water (gallon)
- White Vinegar (gallon)
- Epsom Salt
- Sugar (acts as a brightener)
- Karo brand Corn Syrup (no high fructose) (also acts as a brightener and may be redundant, but I found no negative effects form using both)
- Zinc strip from the roofing section
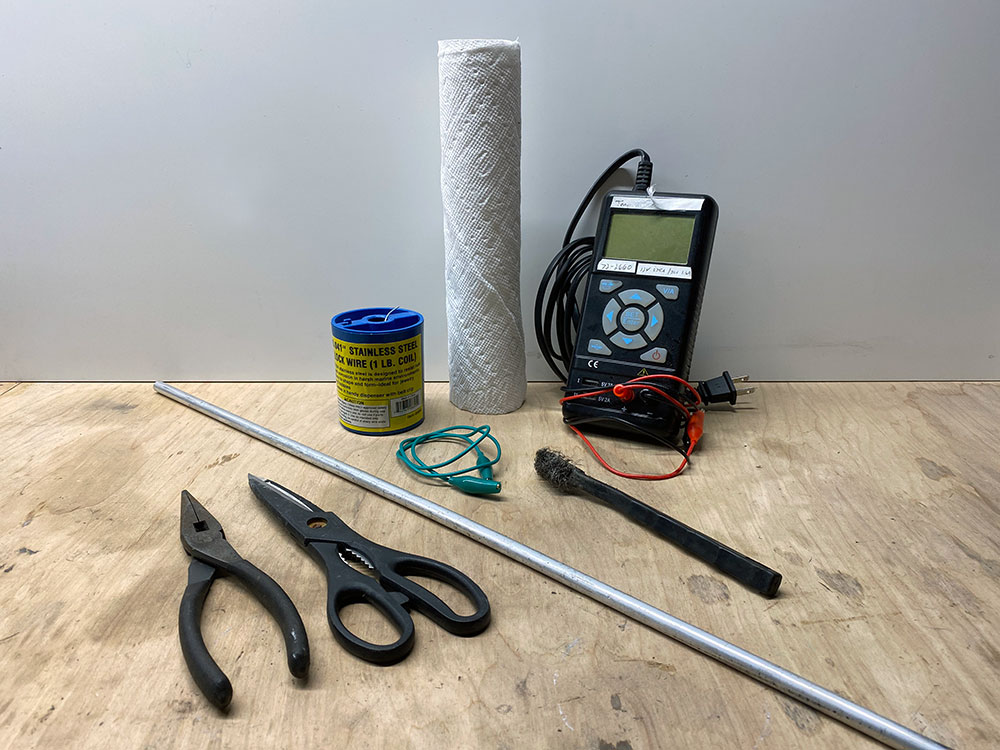
Tools
- A small power supply (I had this one, but an old phone charger can work. Something around 5V and 0.5 mA to 2 amps should be ok)
- Wire with optional alligator clips
- Three tubs slightly larger than the size of your part (I used 5L Tupperware containers with lids, not shown)
- Wire wheel (brass) or brass brush
- Shop towels/paper towels
- Safety wire (from which to hang the parts)
- Rod from which to hang the parts that will rest on the op of the container (copper rod, etc)
- Scissors
- Wire cutters/Needle Nose
- Method by which to measure weight and volume of the ingredients (not shown)
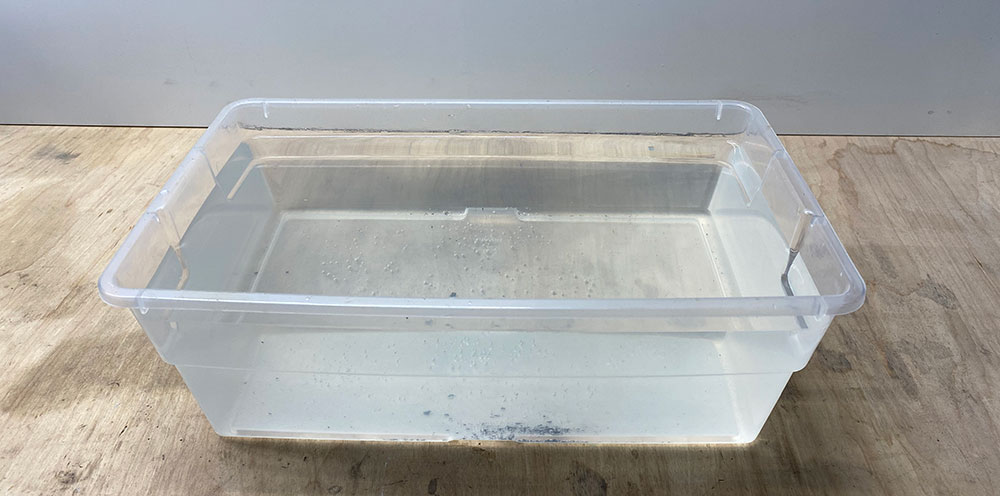
Making the Solution
Add the below to one Tupperware container in this order:
- 3L distilled water
- 1.5L vinegar
- 100g salt
- 100g sugar
- 4oz of corn syrup
Mix together. The corn syrup will eventually dissolve and is difficult to force to mix initially.
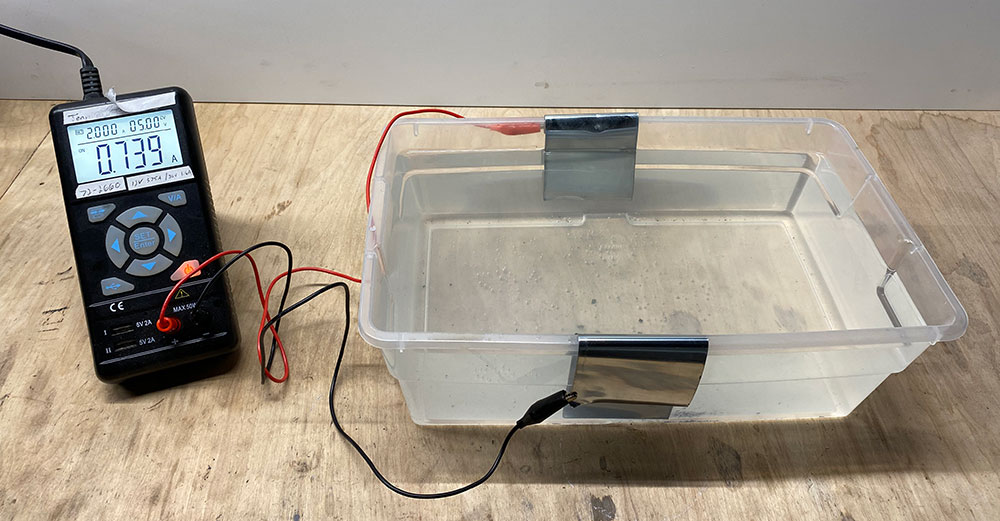
Adding Zinc Ions to the Solution
Now we are going to “prime” or plate out” the solution by adding zinc ions. The thought is that by adding zinc ions which will already be suspended in the solution, it will be more effective.
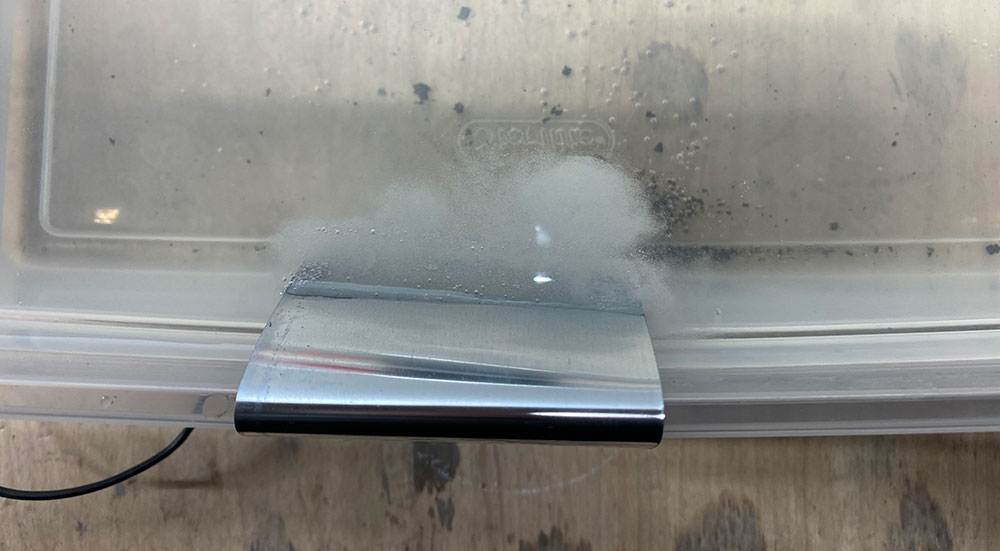
Cut two 6″ strips off the zinc roll and bend the top edge so they hang over opposite sides of the container. Connect the positive lead from the power supply to one strip, and the negative to the other strip. Don’t submerge the leads in the water – just the zinc strips. Power the power supply and set to 5V and 2A. Immediately, you’ll see the strips start to bubble. Lightly cover the container (don’t seal it) and leave to work for 2-3 hours. After, the solution is complete. The power supply can be turned off. You’ll notice the zinc strips will have lost some mass. Because you have an entire roll, you can throw those strips away.
Preparing the Parts
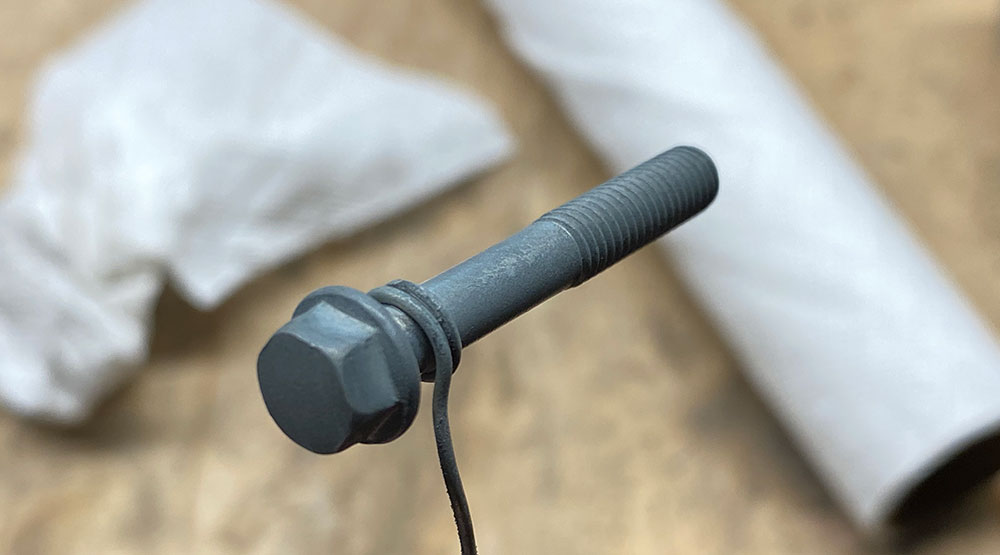
It’s paramount that the parts are void of any contaminants or old plating. I sandblasted all my hardware, then rinsed them all in acetone or alcohol. After, they were only touched when wearing gloves to avoid any oils contaminating the surface.
Once clean, find a way to suspend the parts in the solution. I rested an aluminum rod over the solution. Any conductive rod would work. Many use a scrap piece of copper tubing. From this, I hung the parts by safety wire so they were submerged completely in the solution.
At this point, cut two fresh strips of zinc sheet and drape them over opposing edges of the container and into the solution. Connect them together with a wire or alligator clips. The idea is that were going to have a zinc sheet on both side of the part, which should be more effective.
Plating the Parts
The parts are prepared and hung into the solution. The zinc is also draped into the solution. Hook the positive wire from the power supply to one of the zinc strips. Hook the negative wire to the rod or safety wire from which the part is suspended.
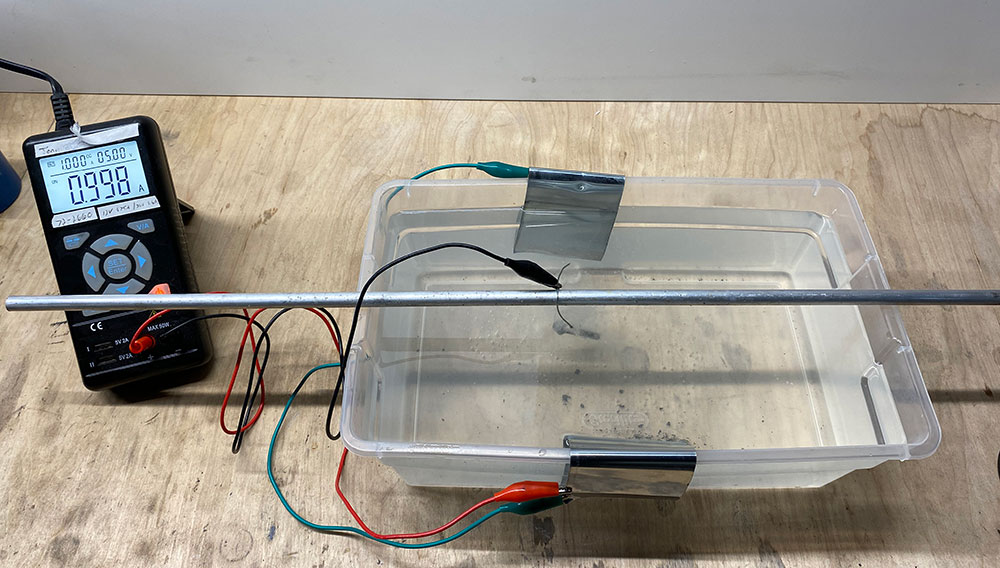
Both zinc sheets are connected together with the green alligator clips. The positive goes to one sheet and the negative goes to the part.
There is varying info on how much amperage should be supplied per square inch of part surface area. I tried to stick around .060A per square inch. The slower you plate (the lower the amperage used), the finer the zinc crystals are which are deposited to the part. If you only have a power supply that offers 2 amps, you can combat this by adding a few more parts to the solution at once, thereby increasing the surface area of the parts being plated.
Once the power supply is set at the desired amperage, turn it on. You’ll see the part starting to bubble a bit. Zinc is beginning to adhere to the part chemically.

I let batches go for about 15 minutes at a time. You’ll start to see the part turn a gray color. First it will turn light gray, then dark gray. If too much amperage is used, this process will happen more quickly and a dark gray will be achieved faster. Worst case scenario is that the reaction will eat into the part (for fun, I’ve tried this and the process actually ate into the bolt, forming bubbly zinc crystals and eroding some of the part itself) . I’ve found it’s ideal to run the process until an even medium gray coating is present on the entire part.
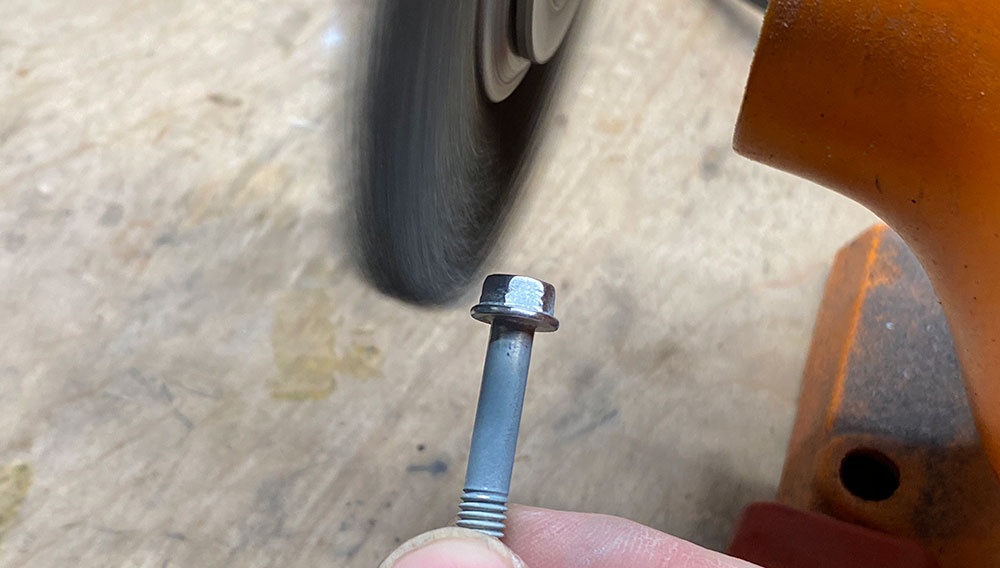
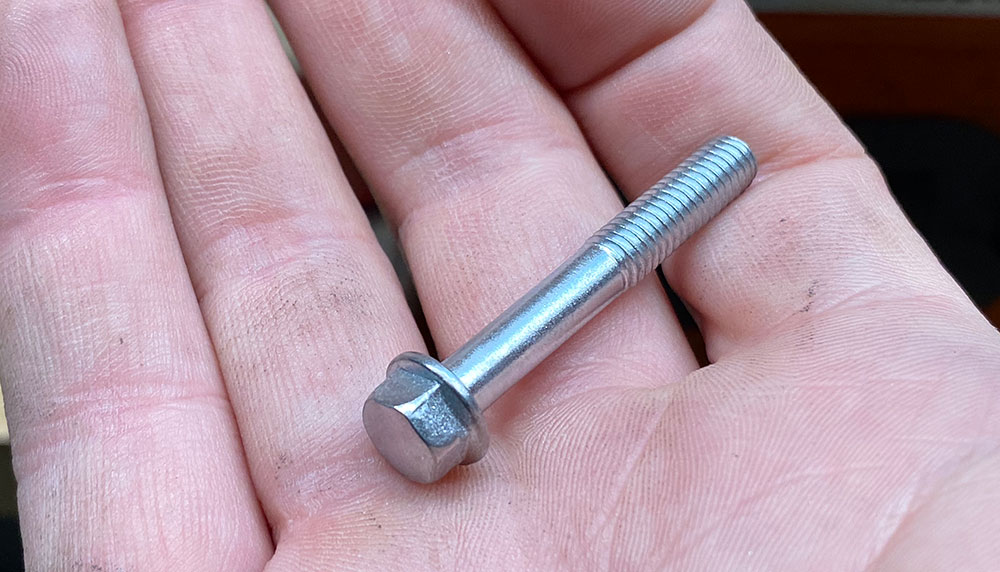
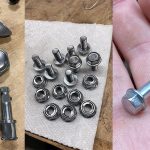
Once the desired result is achieved, stop the power supply and pull the part out. Give it a quick wash in distilled water, then polish it off with a wire wheel. You’ll notice it doesn’t take much to remove the dull gray coating and reveal a shiny silver zinc finish. The process can be repeated a couple more times to build more of a coating on the part. Don’t worry about the threads getting too thickly coated. The coating is very thin, and I’ve never had a problem threading in recoated bolts.
Results
At this point, the part is finished and can be used. Some like to polish the part with metal polish or toothpaste. I’ve found this to be a lot of extra work for little reward.
Once done for the day, the solution can be saved for use in the future. Pull the zinc strips from the container and seal it.
Troubleshooting
There are a number of things to look out for:
- Uneven coating
- Could be that the part is not clean or contaminated with oil, etc
- Could be that that part is too close to the zinc anode/sheet – I notice this on large parts like sprockets, where they are probably too big for the container being used
- Rough finished surface
- This could be due to too much amperage causing courser zinc crystals to form. Reduce amperage.
- Part/Cathode being damaged/eaten away
- This is also due to too much amperage.
- Light plating around safety wire on part
- There will be some ghosting around the safety wire. Try doing multiple sessions, moving the wire to different locations on the part each time.
I hope you got a good result and found learning this new skill educational.
Very interesting and informative Christian. I had done this before using a kit from Eastwood. It is rather pricy and with your list of materials it will be a lot easier to do when I need it. Also used the Blackening kit to rust proof parts and keep them black.
Hello.
This is what I was looking for, great input, thank you very much, Christian.
I have a big brainstorm about treatment of rusted part of old scooter body and frame, everybody around push me to just keep the corrosion, just to inhibit with proper fluid (we know well how to do it), clean all, polish the colour, and present it all together with original paint (85%-90% surface) as “original state”. I do agree that it shows perfectly time factor, original colour and “how it was looking like” in ’74, but … I wish to do something with this rust which will be just … dirty black. I wish to change it somehow to.. .liquid gold, you know. But just plain painting with some car lacquer will be “renovation”, which is “terrible mistake”… you see, we are sophisticated like youngsters :-). Your solution contains like 5% of mild acid, which : and this is my question, if You know it : will destroy any colour painted 60 years ago, or not ? I want to keep all original colour, thinking if I can zinc the bare metal with your genial method. Cheers ! Michal
I’ve called Caswell and they’ve described Acetone as the worst thing you can use. Just a tip maybe avoid that – maybe denatured alcohol will work + muriatic acid
I’ve been trying to find out why acetone is bad but can’t find anything. Why did Caswell say it was bad? I use it, along with cellulose thinners for de greasing and have not noticed anything wrong.
Acetone leaves a film behind. you can remove it with Isopropyl alcohol. Thats what caswell told me regarding nickel plating.
I spoke to Caswell about this when I was doing black nickel plating. Acetone leaves a residue behind. Isopropyl Alcohol removes it.
I used vinegar and drain cleaner powder to soak my bolts it took off all the corrosion. I also down sized the solution that you made so I can do small amounts at a time if I’m not always doin big batches.
Thank you, the best guide I’ve found. Very detailed but not ridiculously so.
I did forget to do a step I use for Nickel plating which is very useful. I dip the bolt (or whatever it is) in hydrochloric acid to remove old zink or cad plating and also etch the surface ready for the new zinc plate. It doesn’t seem to have caused a problem this time though. I also dip zinc or cad plated items in HCl before welding.
Thank you so much for this guide.
any idea if you want to use a black chromate that you need to remove the film on the freshly plated zinc?
Your plating solution calls for Epson salt, but the photo and list of the required amounts lists plain table salt? Which is correct?
Use pickling salt, it has no iodine or other plating pollutants. Epsom is fine too.
In your “Plating the Parts” section you instruct to adjust your power supply to 0.060 amps/sq.in. of part surface area. I’m not that familiar with the different types of power supplies that might be available. In my limited experience though, it seems to me the adjustment would be to the voltage so that your ammeter would read the correct amperage for the surface area of the part. Is that correct?
You are correct about adjusting voltage to get the current density you want.
It depends on the power supply. Some will let you control the voltage, some will let you control the current and some won’t let you control anything. Your goal here is to control the current.